Ghana Health Service Financial Monitoring Dashboard User Guide
Introduction
The Ghana Health Service Financial Monitoring Dashboard is a Programs Funds Transfer Monitoring Software to track receipts into, and transfer of funds within, the Ghana Health Service. It also provides a resource for collating IGF aggregate reports of revenue and expenditure to be captured on a quarterly totals basis to generate cumulative, Year-To-Date (YTD) reports. Debtors, creditors and cash assets information is also deduced from these, for management information purposes. Finally, a resource is also available to capture outstanding audit issues at all levels for management attention and action..
This user guide will walk you through the various features and functionalities of the Financial Dashboard, helping you make the most out of this tool.
Getting Started
To access the Financial Dashboard, navigate to the application URL and enter your login credentials. If you don't have an account, you can get one by getting in touch with your regional health directorate or the HQ.
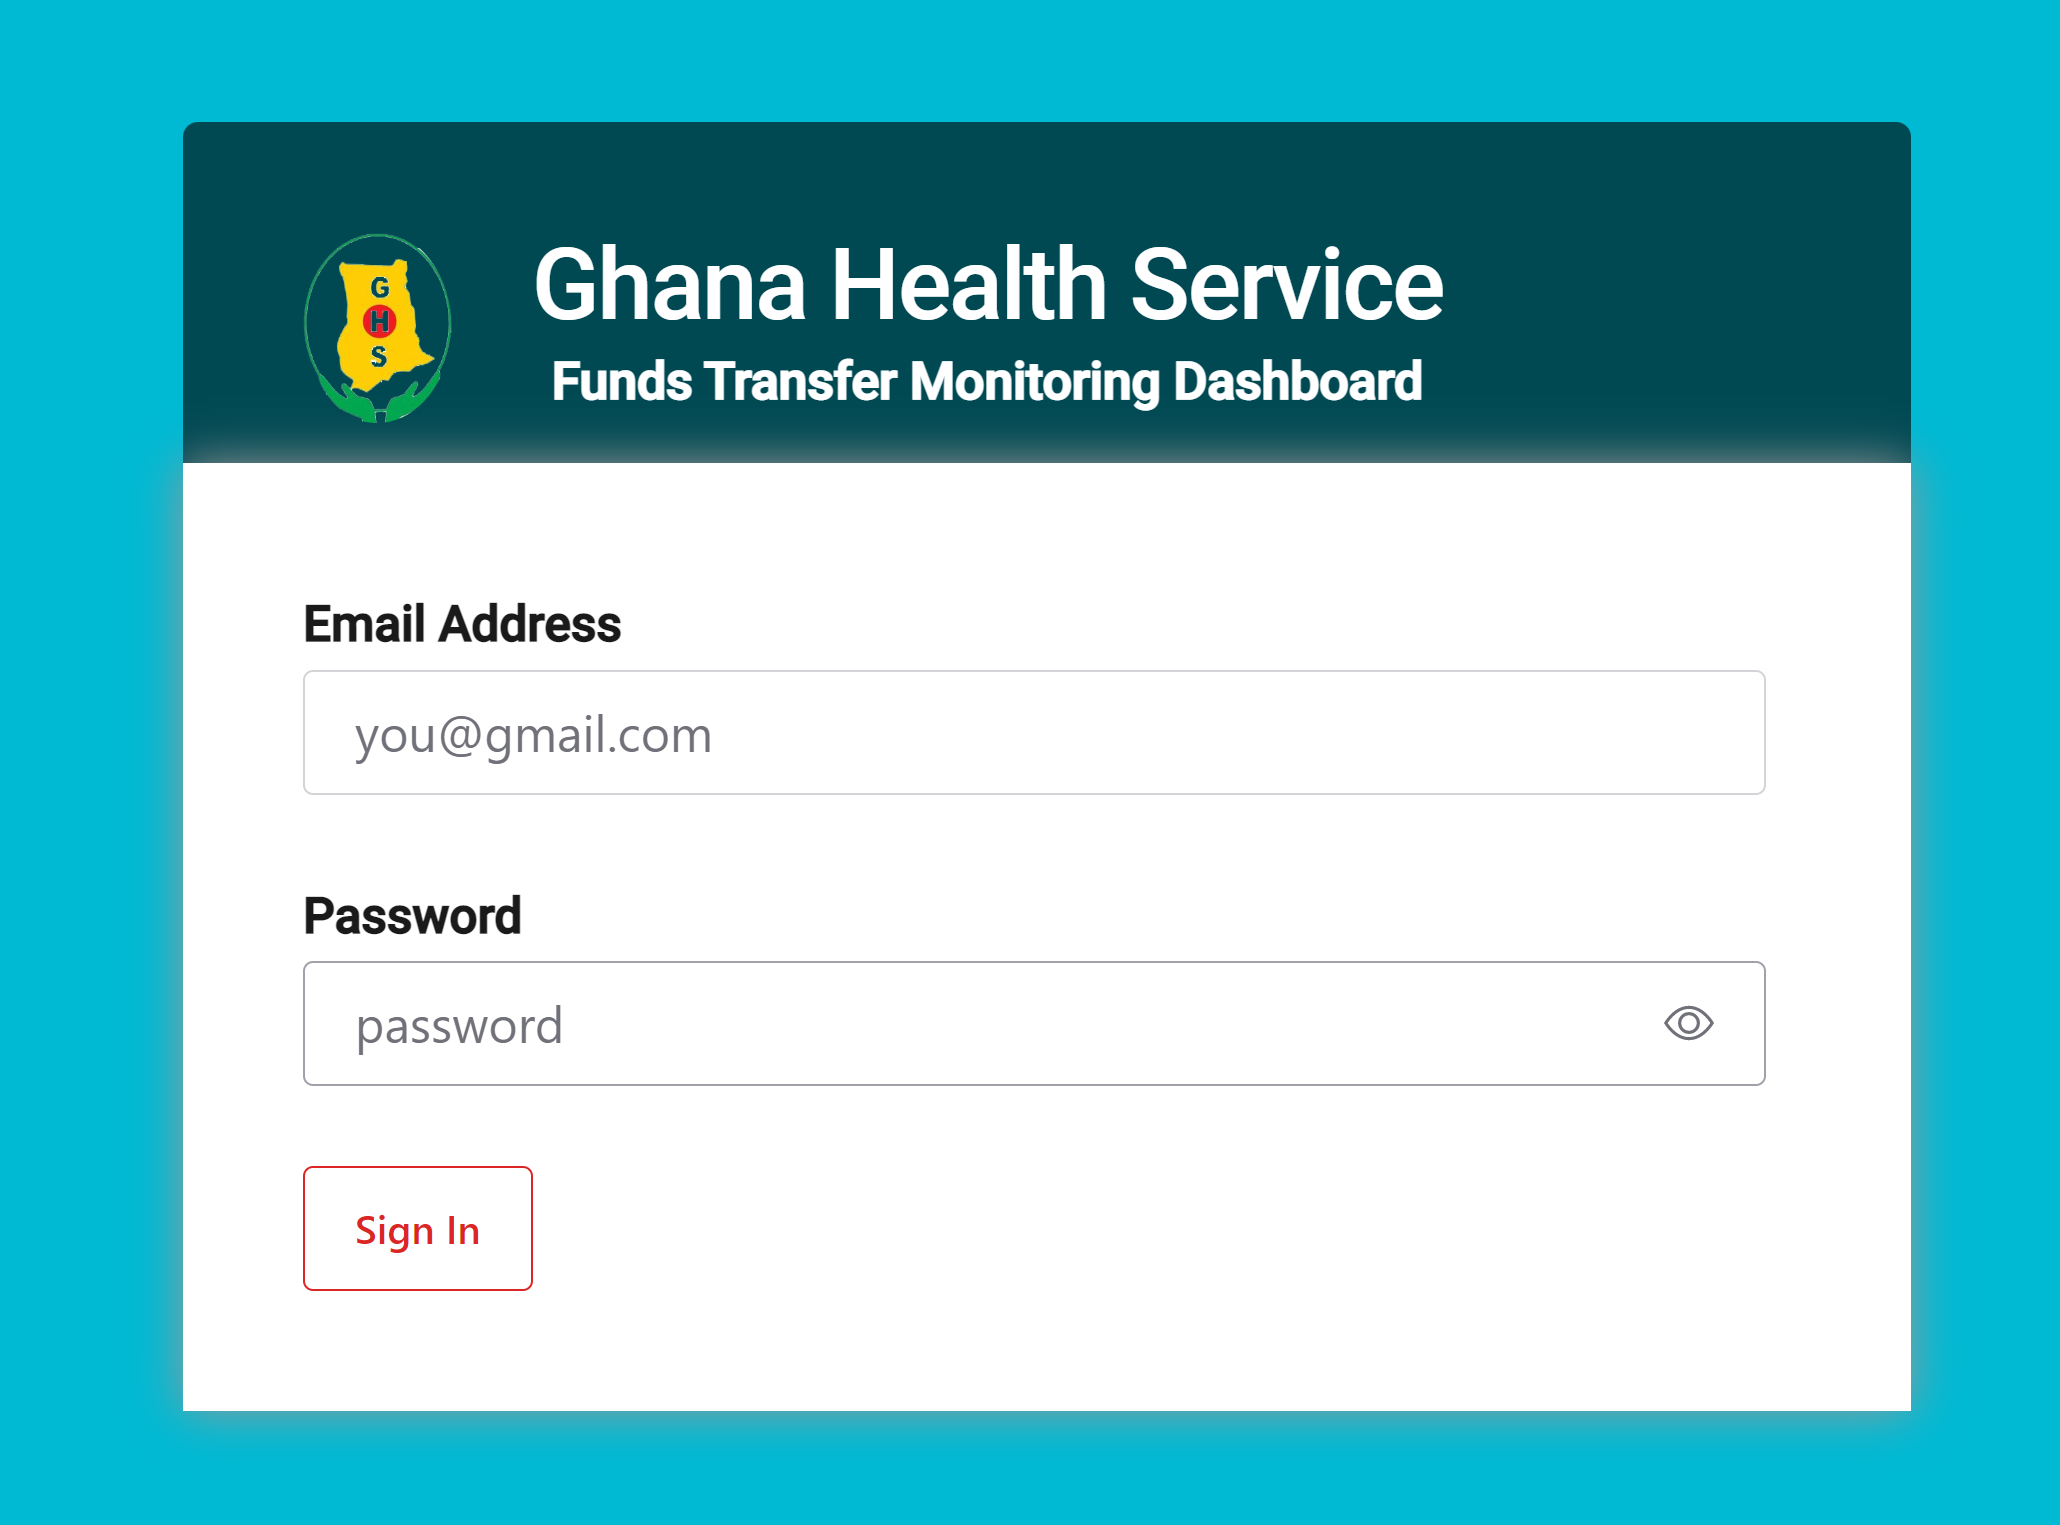
Once logged in, you will be presented with the dashboard interface tailored to your user role and permissions.
Dashboard Overview
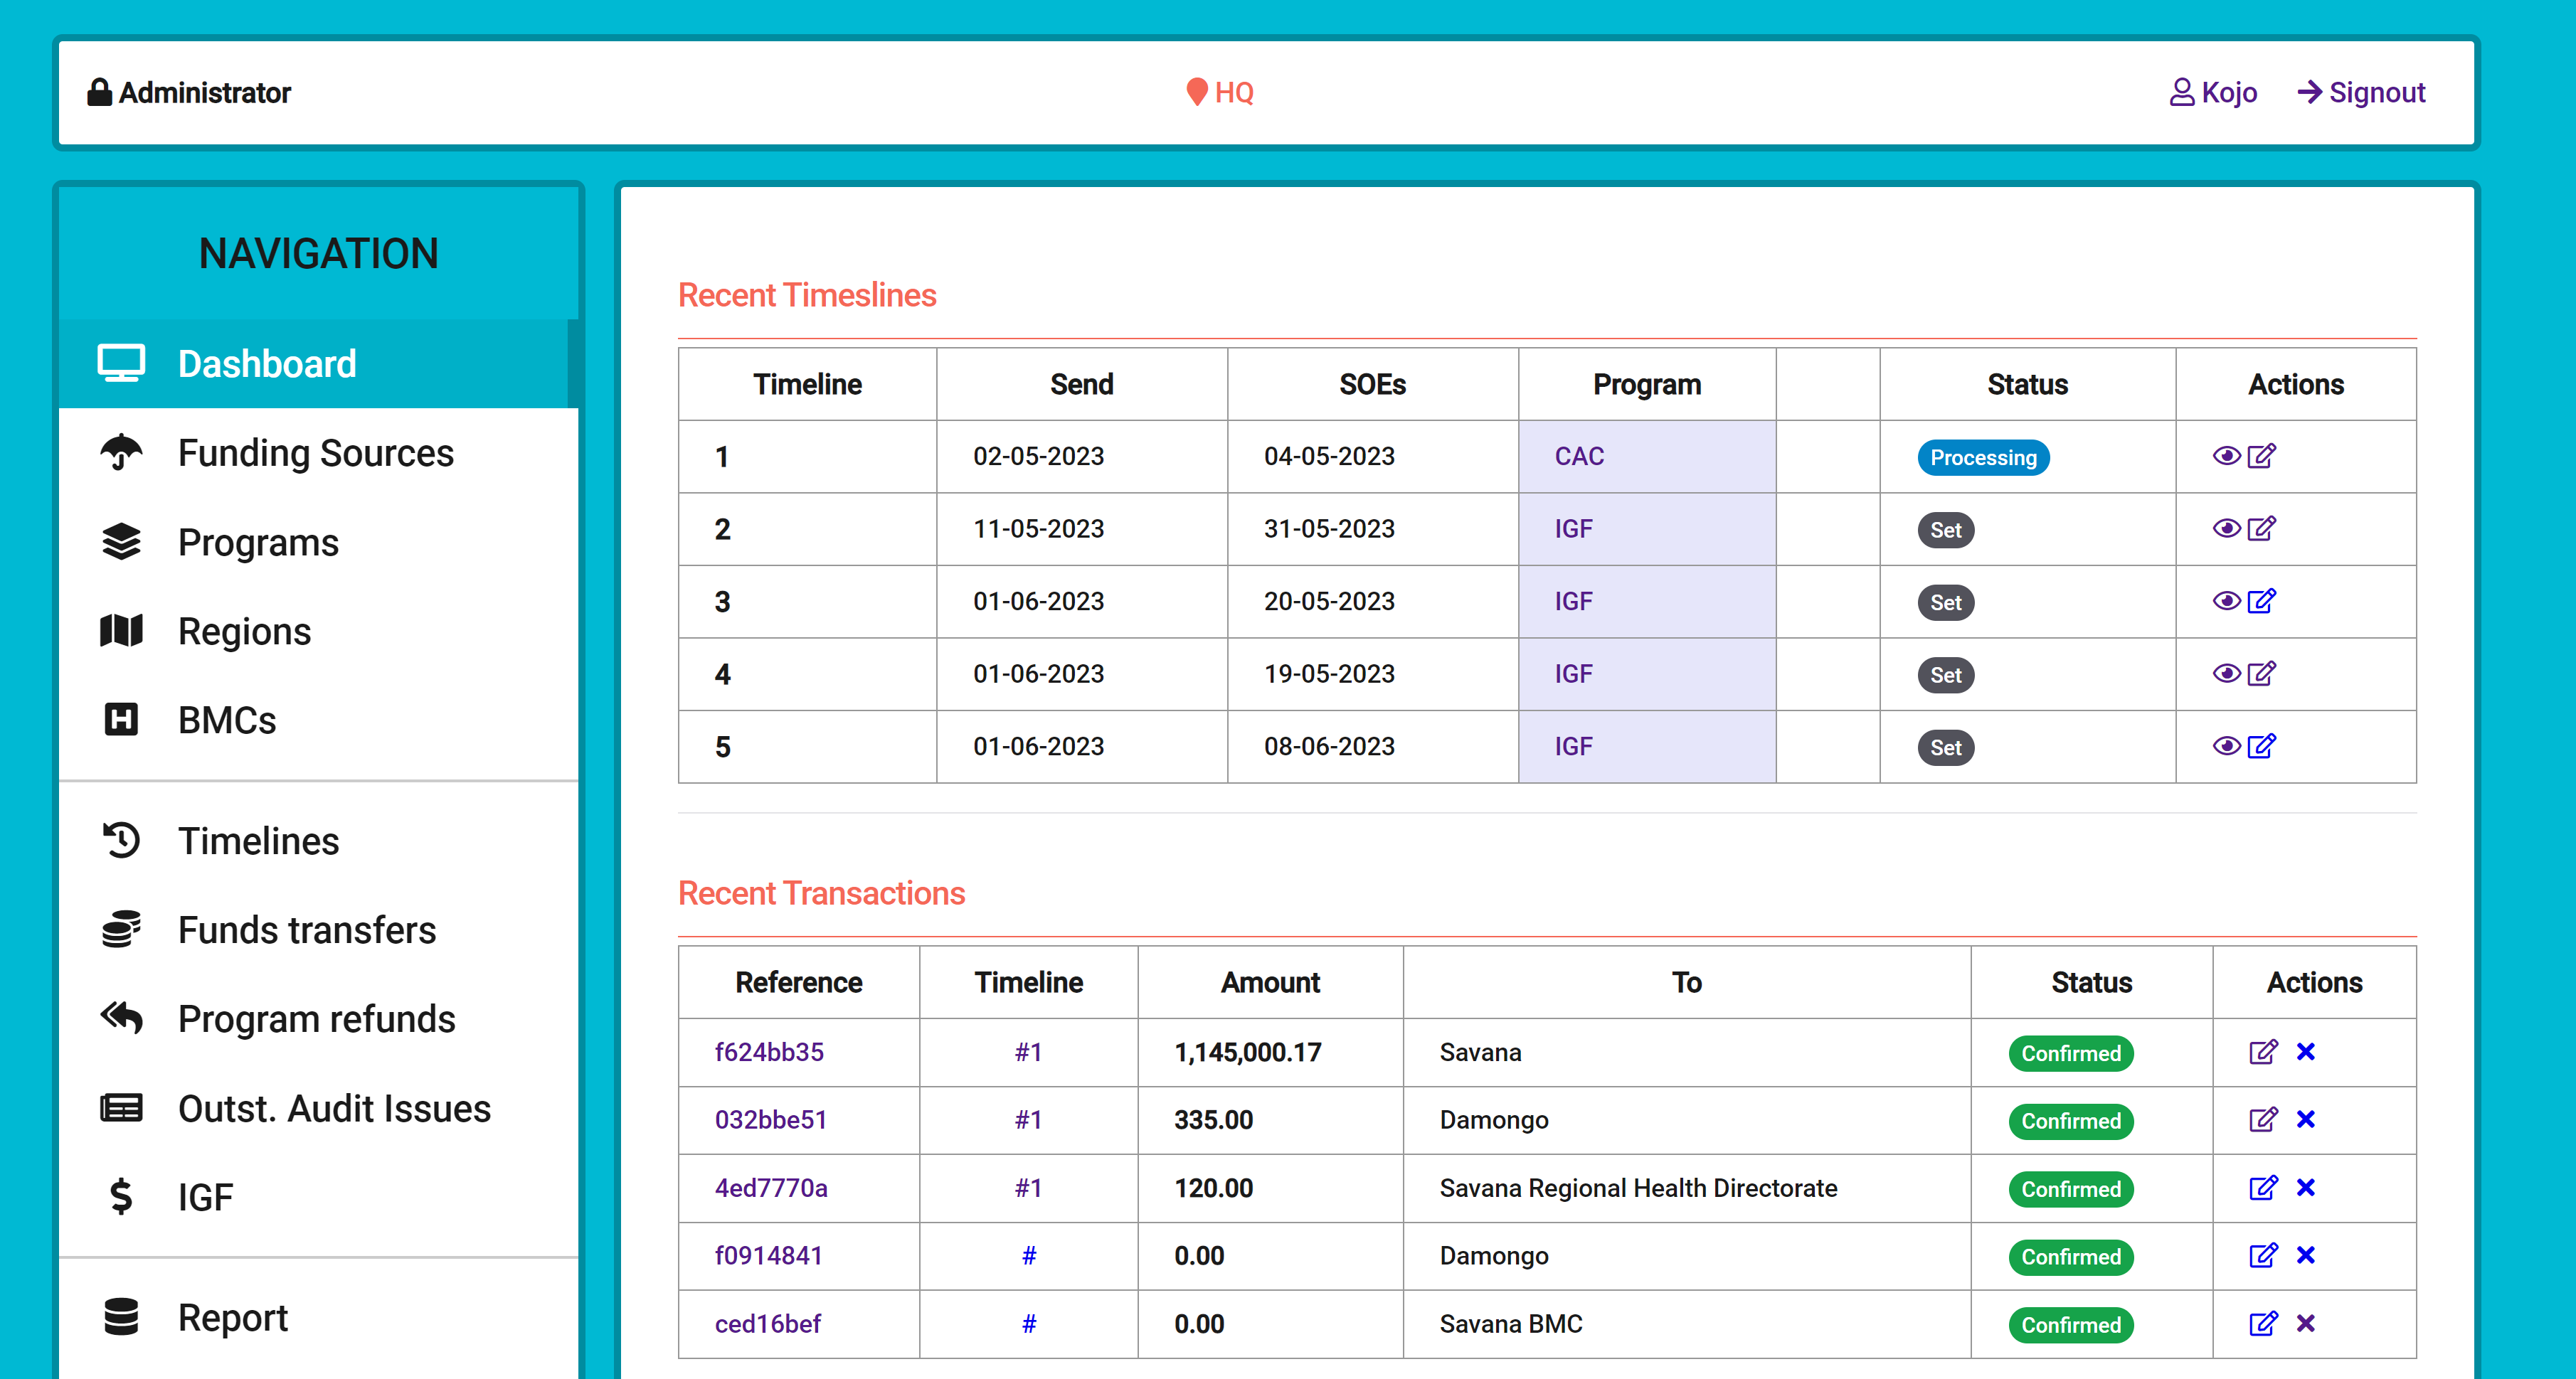
The Financial Dashboard interface consists of several key components:
- The main navigation to the core features of the application, at the left
- A summary of recent activities at the right
- The active user bar at the top
User Settings and Preferences
This application is user-driven. It's key to setup the right users and their proper permissions before anything else. The users settings menu is under the "Settings" menu in the navigation bar. Clicking the menu should take you to the user's list as seen below:
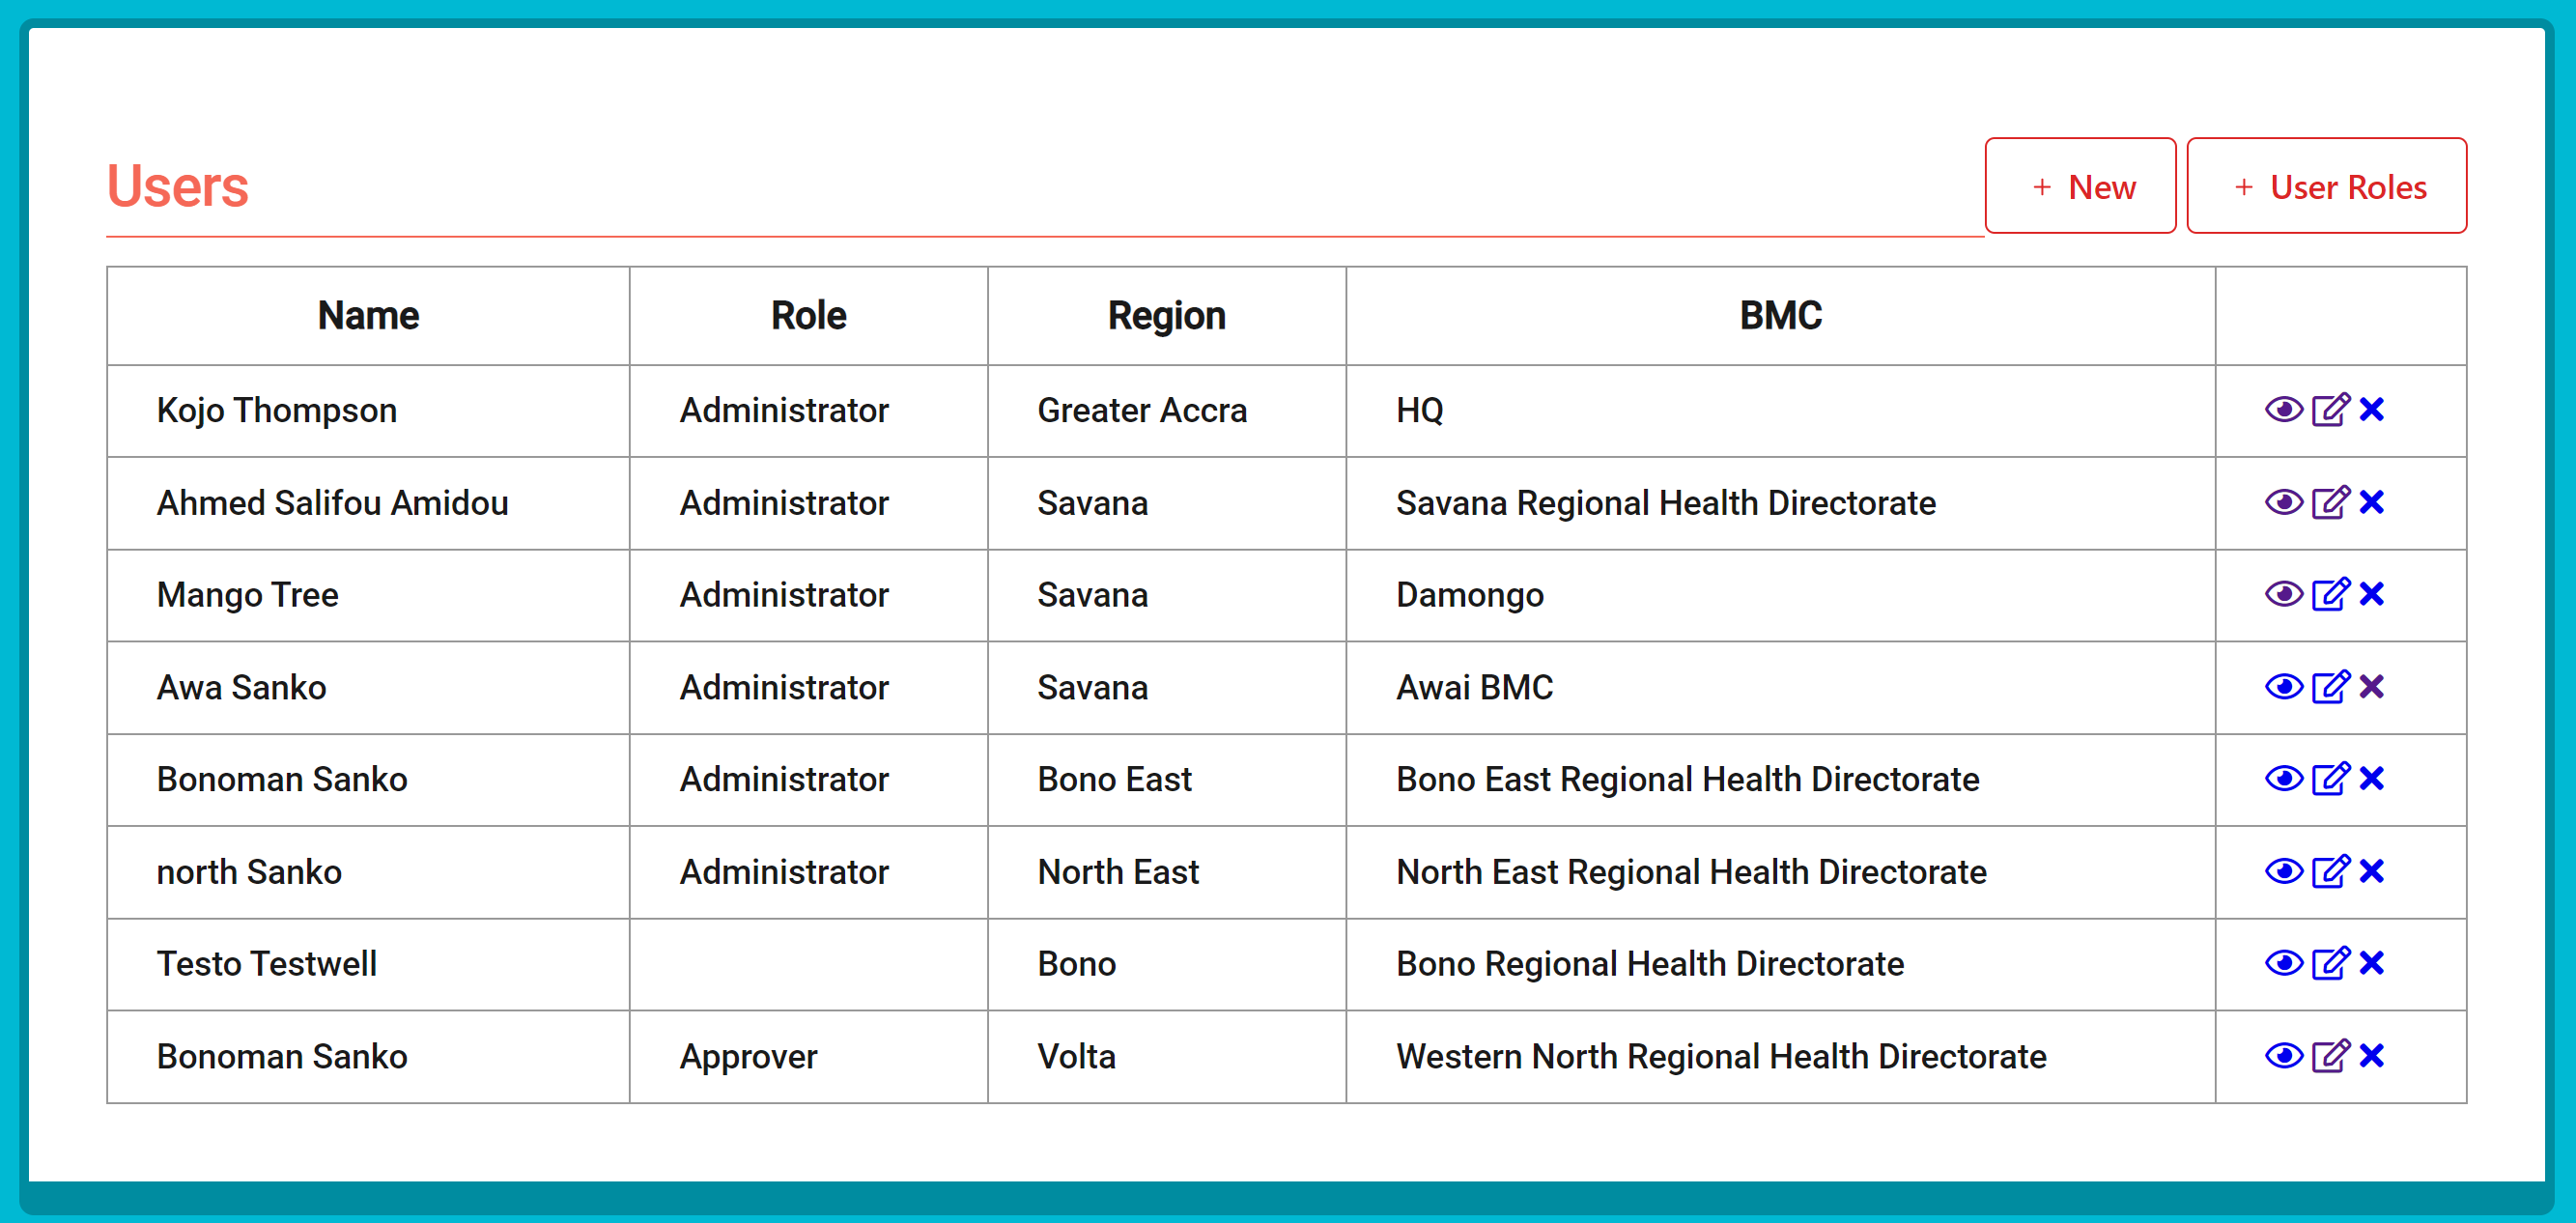
Depending on the type(Role, Permissions, BMC) of account you are signing in from you might see a different list of users. If you sign in from the HQ and you are admin you could see users from other BMCs. If you sign in from any BMC, you will only see the users from that BMC. The right to add, edit, delete, or update users depend on the permissions given to your user account when you where added.
The "+ new" button allows you to add users in your BMC or the BMCs under your BMC.
The "+ User Roles" button allows you to manage user roles and permissions
The "eye" icon allows you to see a user profile details
The "pencil in asquare" icon allows you to edit the user profile
The "X" icon allows you to delete a user
Adding Users
After clicking on the "+ new" button from the users page you will be presented with the form to add a new user

To add the new user fill in the form, select the role to assign to them, then pickup the various permission that will be granted to that user. Once the user created, communicate to them their username(email) and the password you've set for them. Note that they can change their username and password once they login.
Users Roles Management
After clicking on the "+ User Roles" button from the users page, you will be presented with a form to add new user roles and their respective permissions
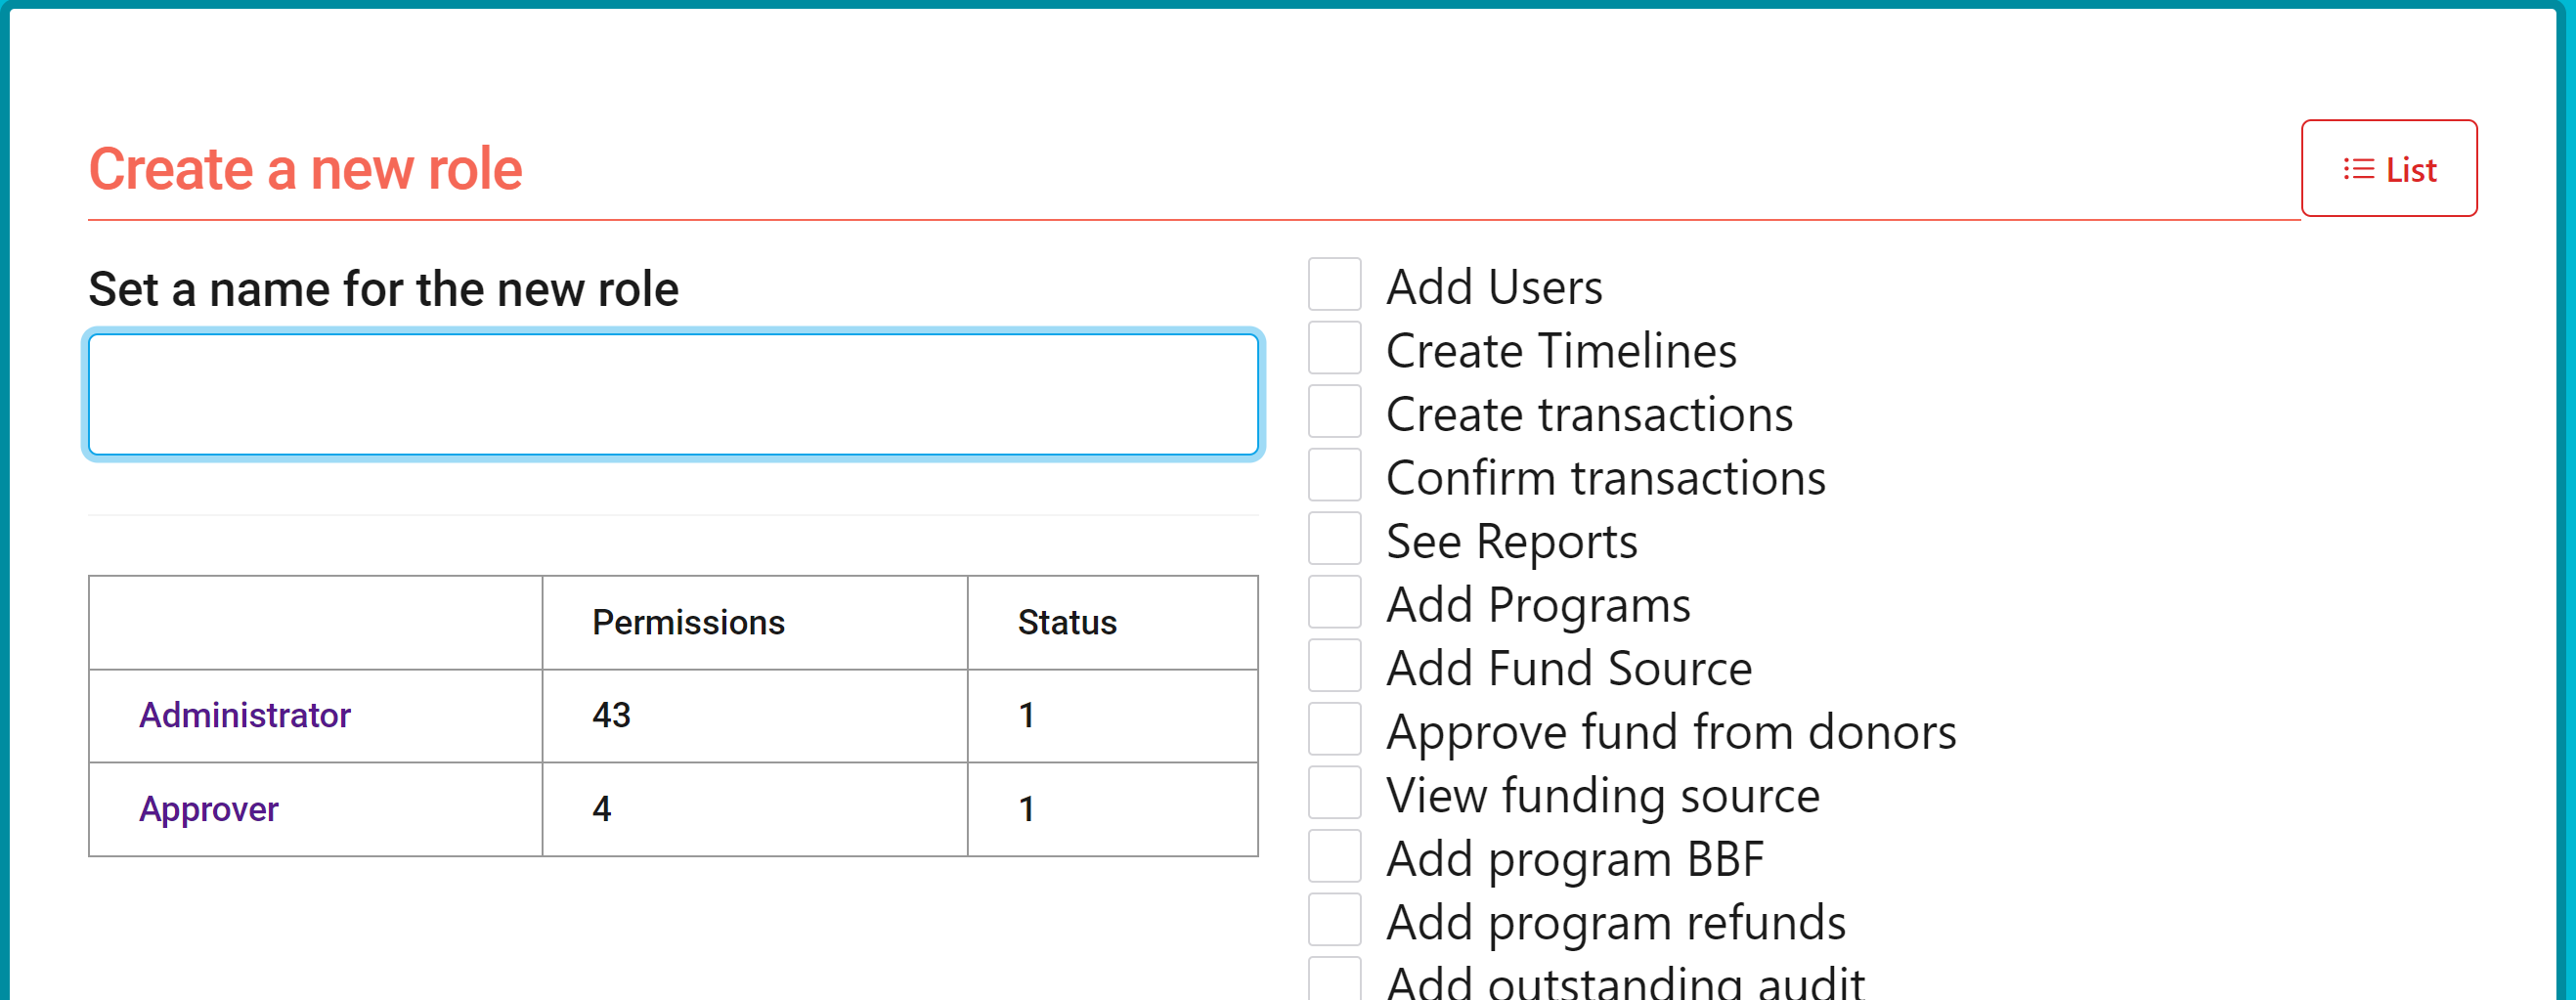
When you create a role and assign a set of permissions to it, those permissions can be fully or partially assign to any user created later on to whom you assign that role.
For example, we can see here that the "Administrator" role has 43 permissions. We can create users and assign them the "Administrator" role and set less permissions for them.
As far as the permission are concerned they are self-explanatory; they mean what they are used for.
Budget Management Centers
The Budget Management Centers are the core part the system. They are organized in a pyramidal form and data flows from top to bottom and vice-versa. The following image describs the system's high level design:
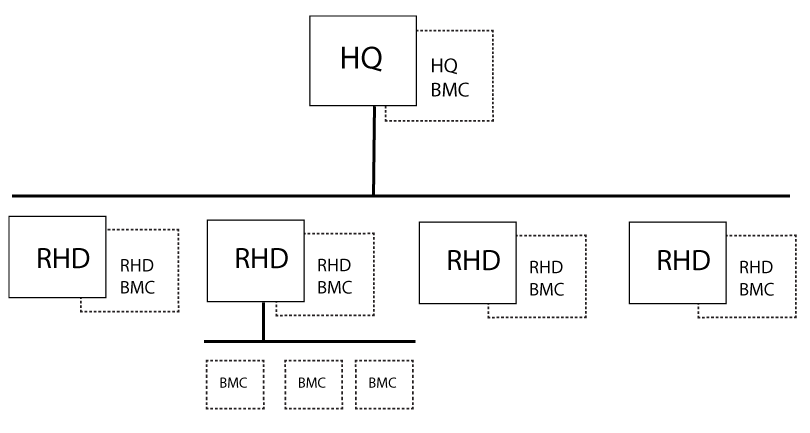
- The Headquarters (HQ) module handles the receipt of funds from donors and funding sources.
- HQ sets timelines and allocates budgets to various Regional Health Directorates (RHDs).
- The RHDs are now in charge of forwarding funds to the BMCs under them.
- BMCs receive allocated budgets and manage their expenditures within the allocated limits.
- The Financial Dashboard tracks budget utilization and variances at both the HQ and BMC levels.
The key aspect to note with the BMCs is that they have a parent-child relationship. For example, when a user from BMC-A adds BMC-B, only BMC-A can see and transact with BMC-B.
Modus operandi
The HQ has a dashboard and can add the RHDs. Then the HQ would go ahead and add the first administrators with the adequate permissions to manage their respective RHDs. Now each one of these RHDs would have their dashboards as well. The first administrators will now be in charge of adding the other their BMCs and other users.
Since the HQ and the RHDs can also play the role of a BMC, they also have to add themselves as a BMC and set the users to manage that BMC.
The BMCs page in general looks like this in the following image: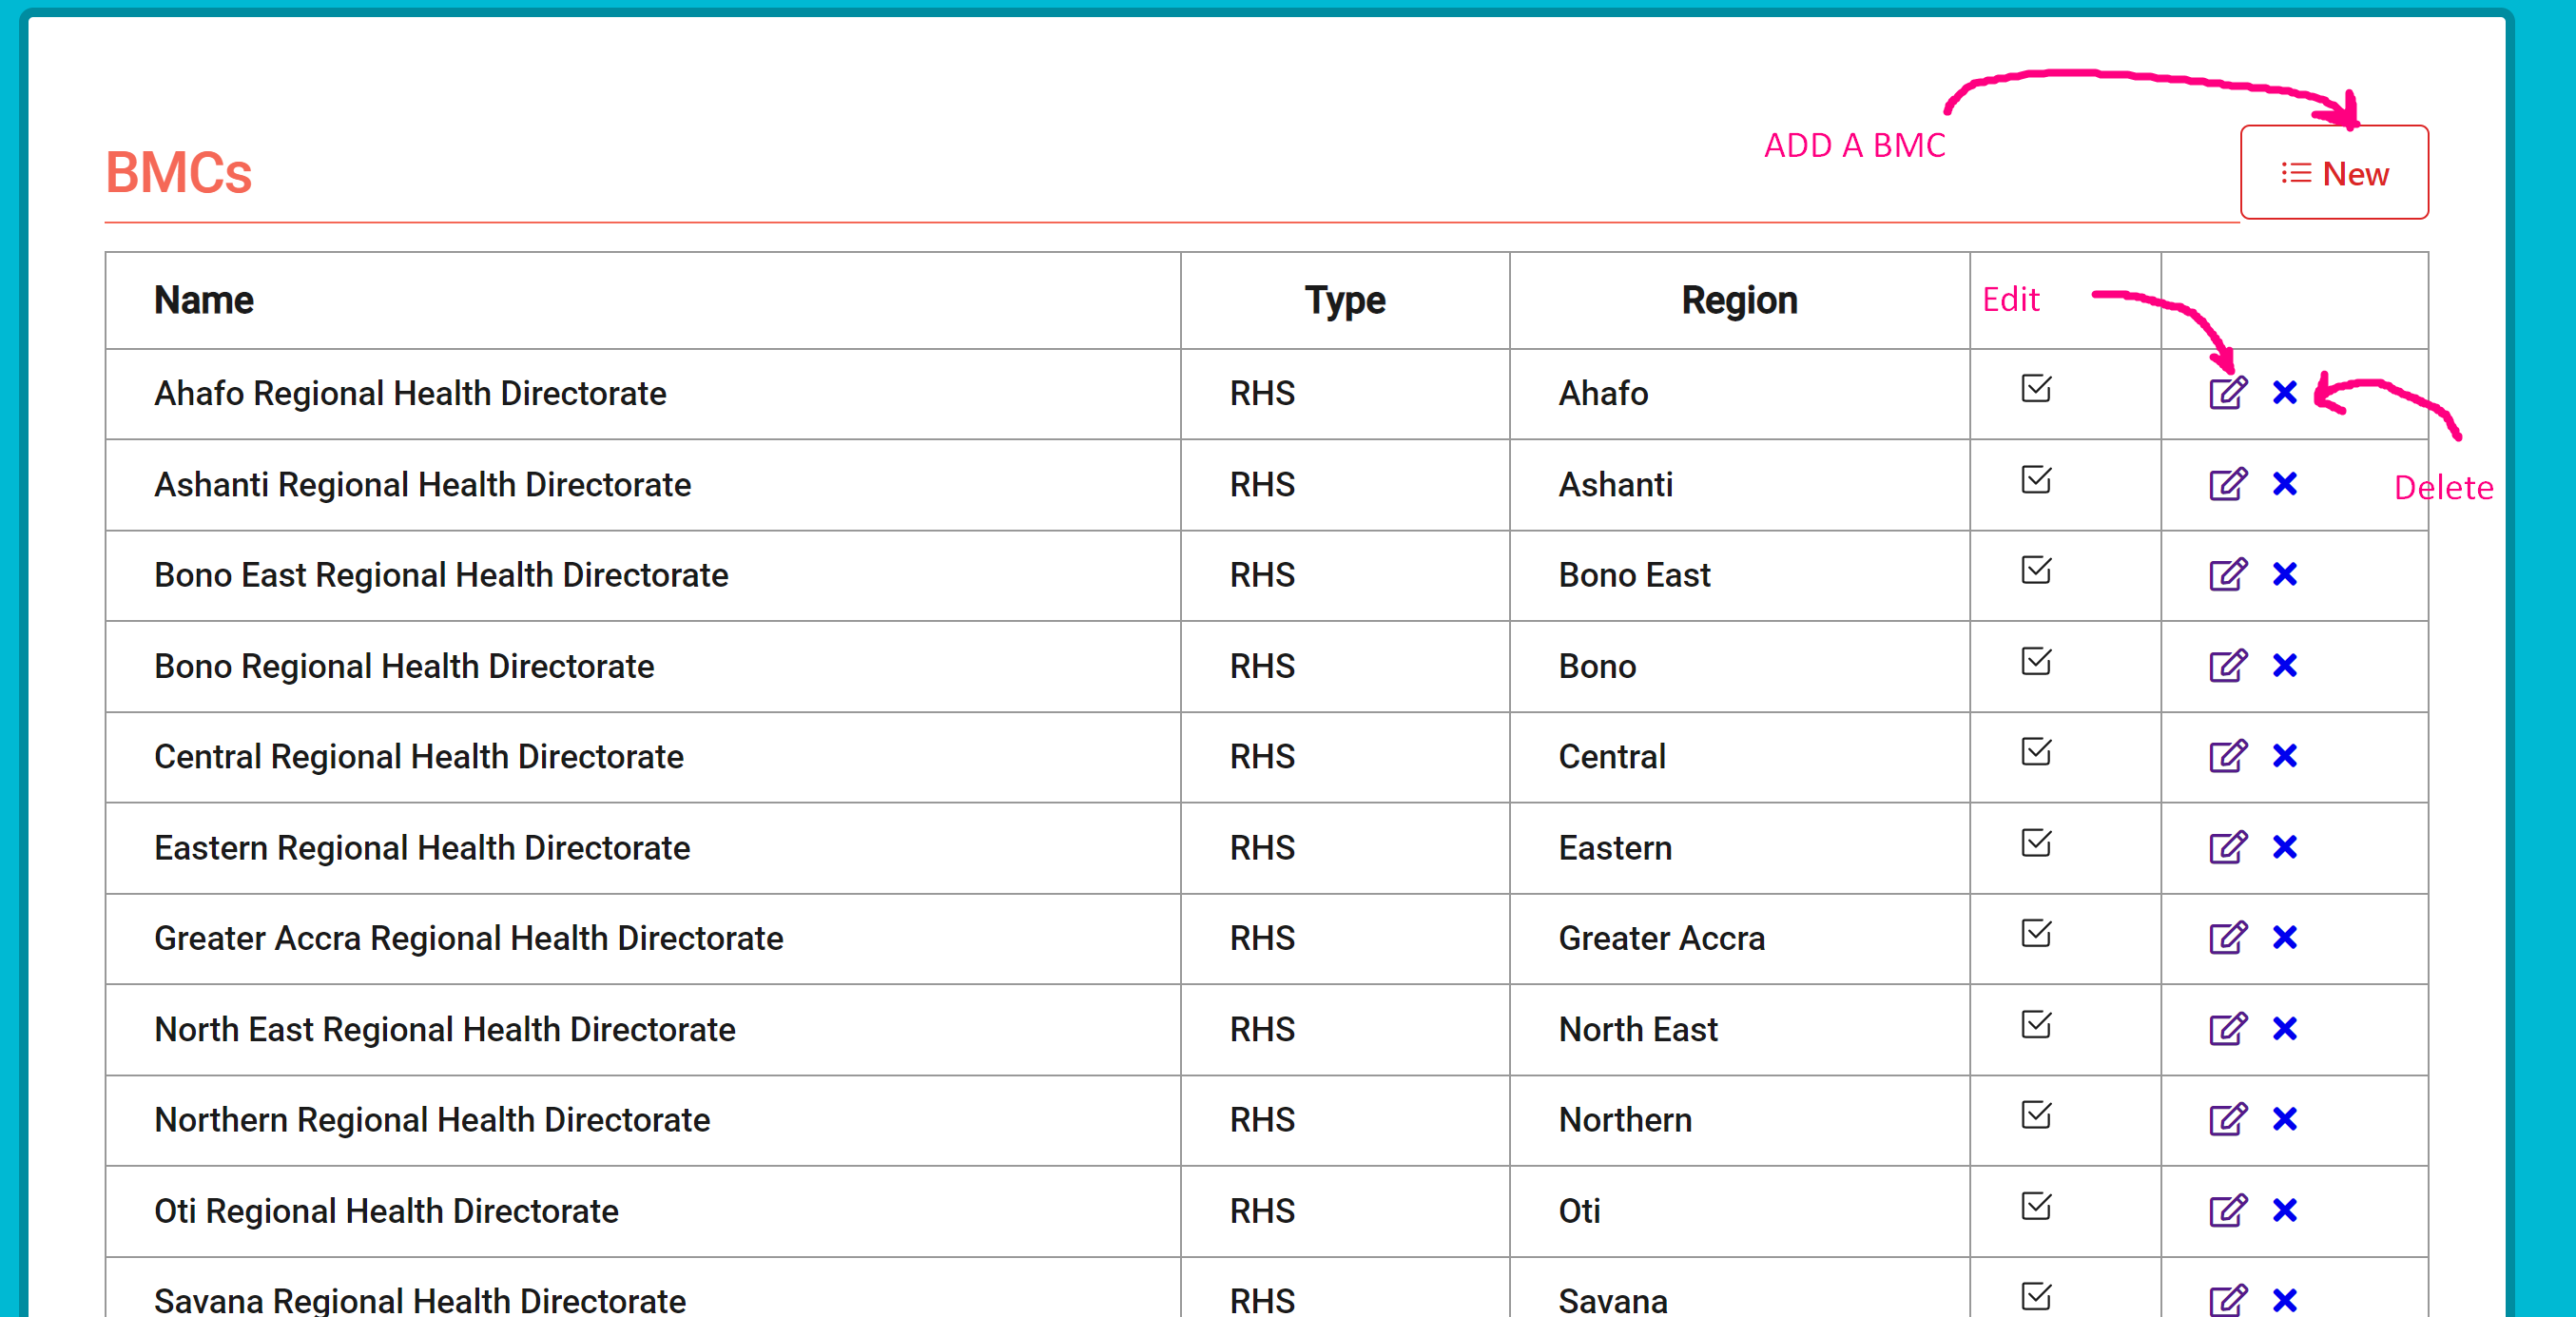
To add a new BMC, click on the " = New" button. You will be presented with a form like this:
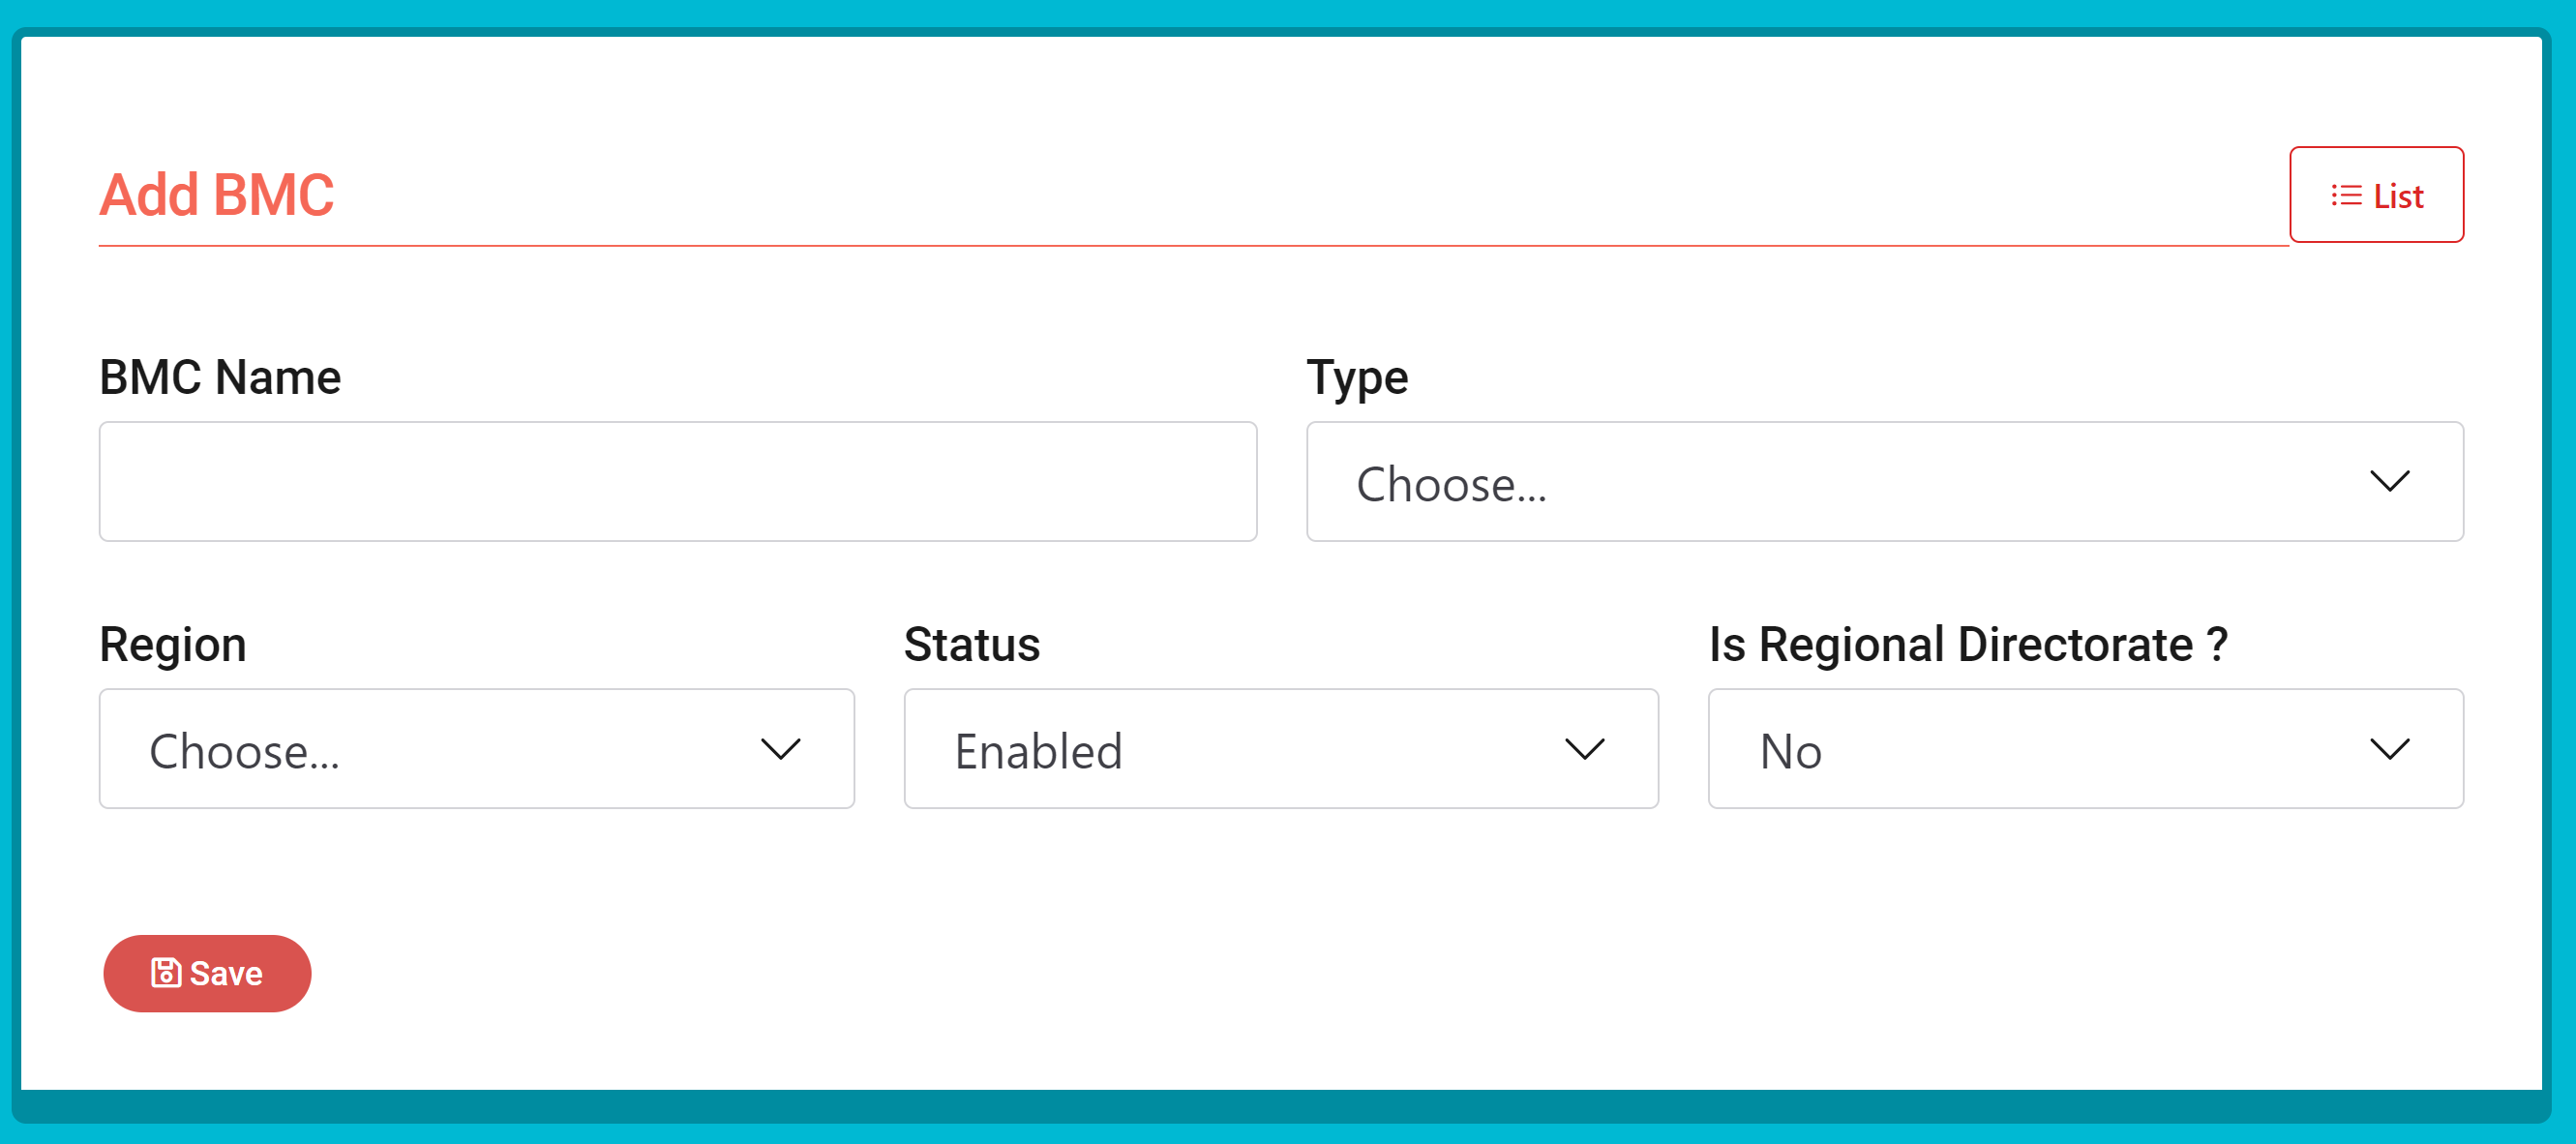
Provide the name, the type, the region, and you can save it. Once you create a BMC, head over the "Settings" menu to create a users for that BMC
Timelines
The concept of timeline allows us to streamline the funds transfers from HQ to various BMCs, and sometimes the other way round. A timeline embeds a given fund from a donor, a program the funds are set for, the date to disburse the fund to regions, the date SOEs are expected, and the various regions that will benefit from that fund.
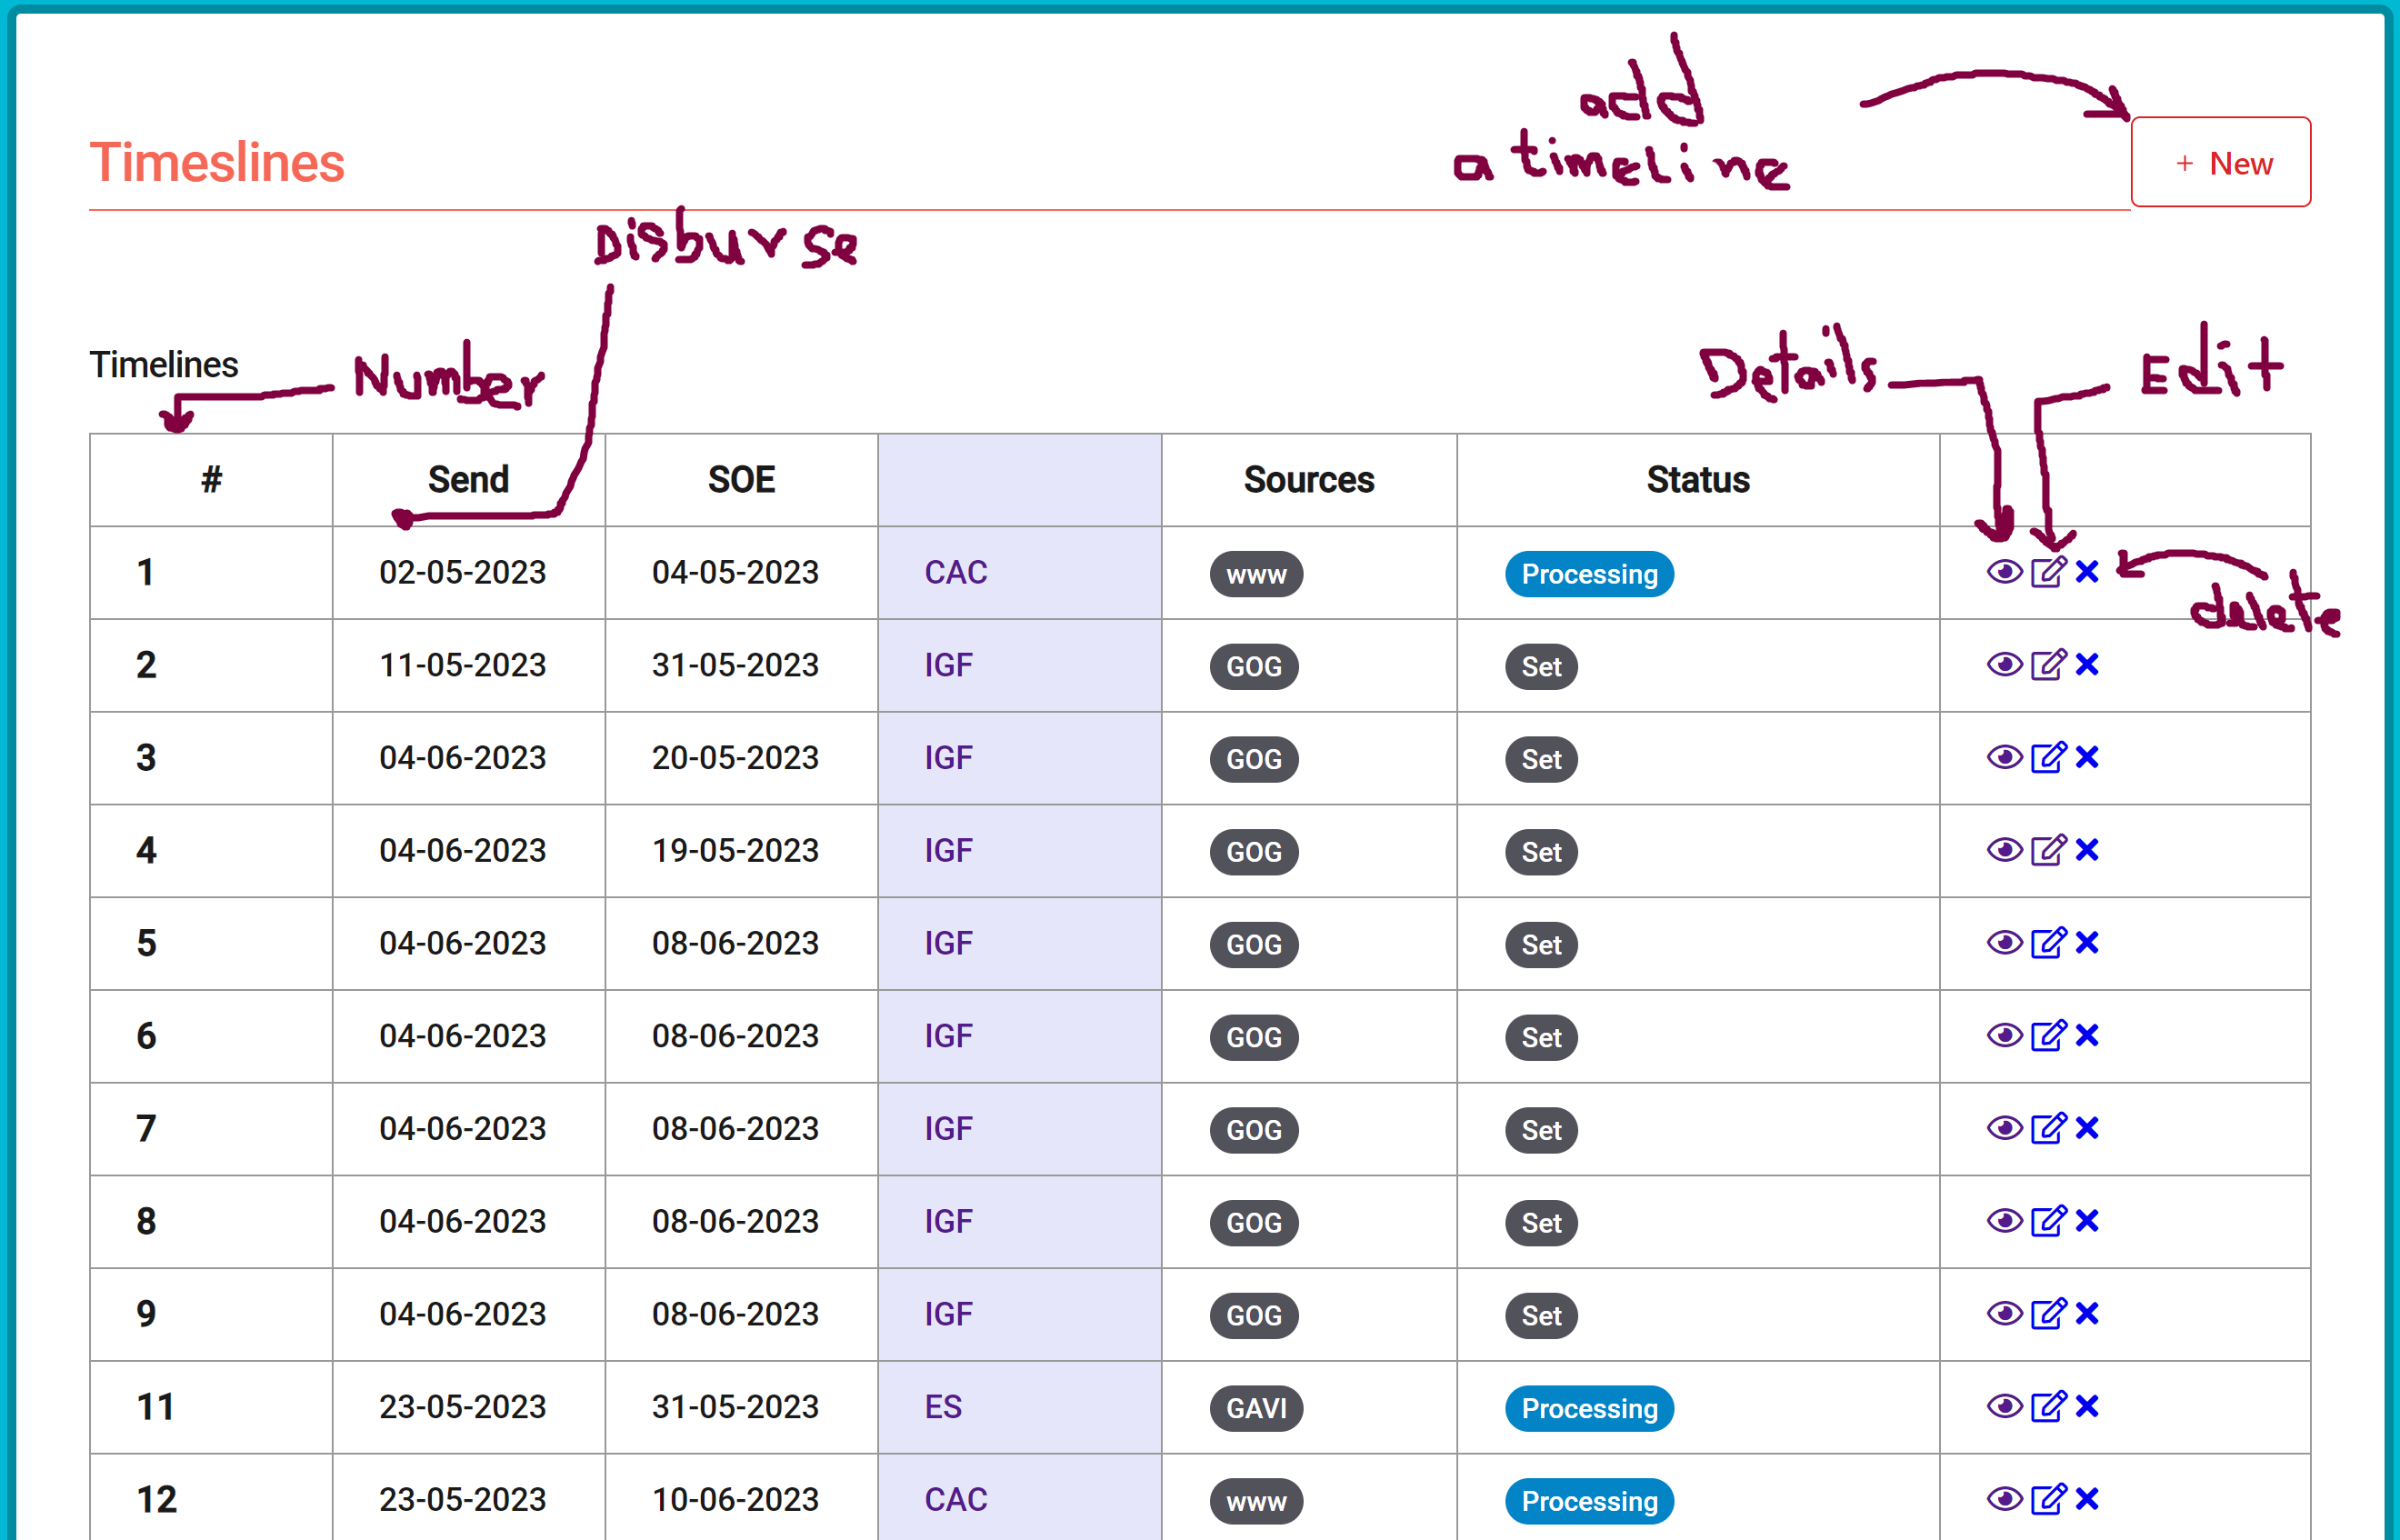
When you click on the "eye" icon to view a timeline you can see its details and all disbursements and transfers planned and executed under that timeline.
The status has three states or statuses: set, processing, executed. When it's created, it takes the initial state of "Set". When you start scheduling fund disbursements to regions it moves to "Processing", and when you schedule for all the beneficiary regions, it moves to "Executed".
Viewing a timeline
When you click on the "eye" icon to view the details of a timeline you will be presented with the following screen: 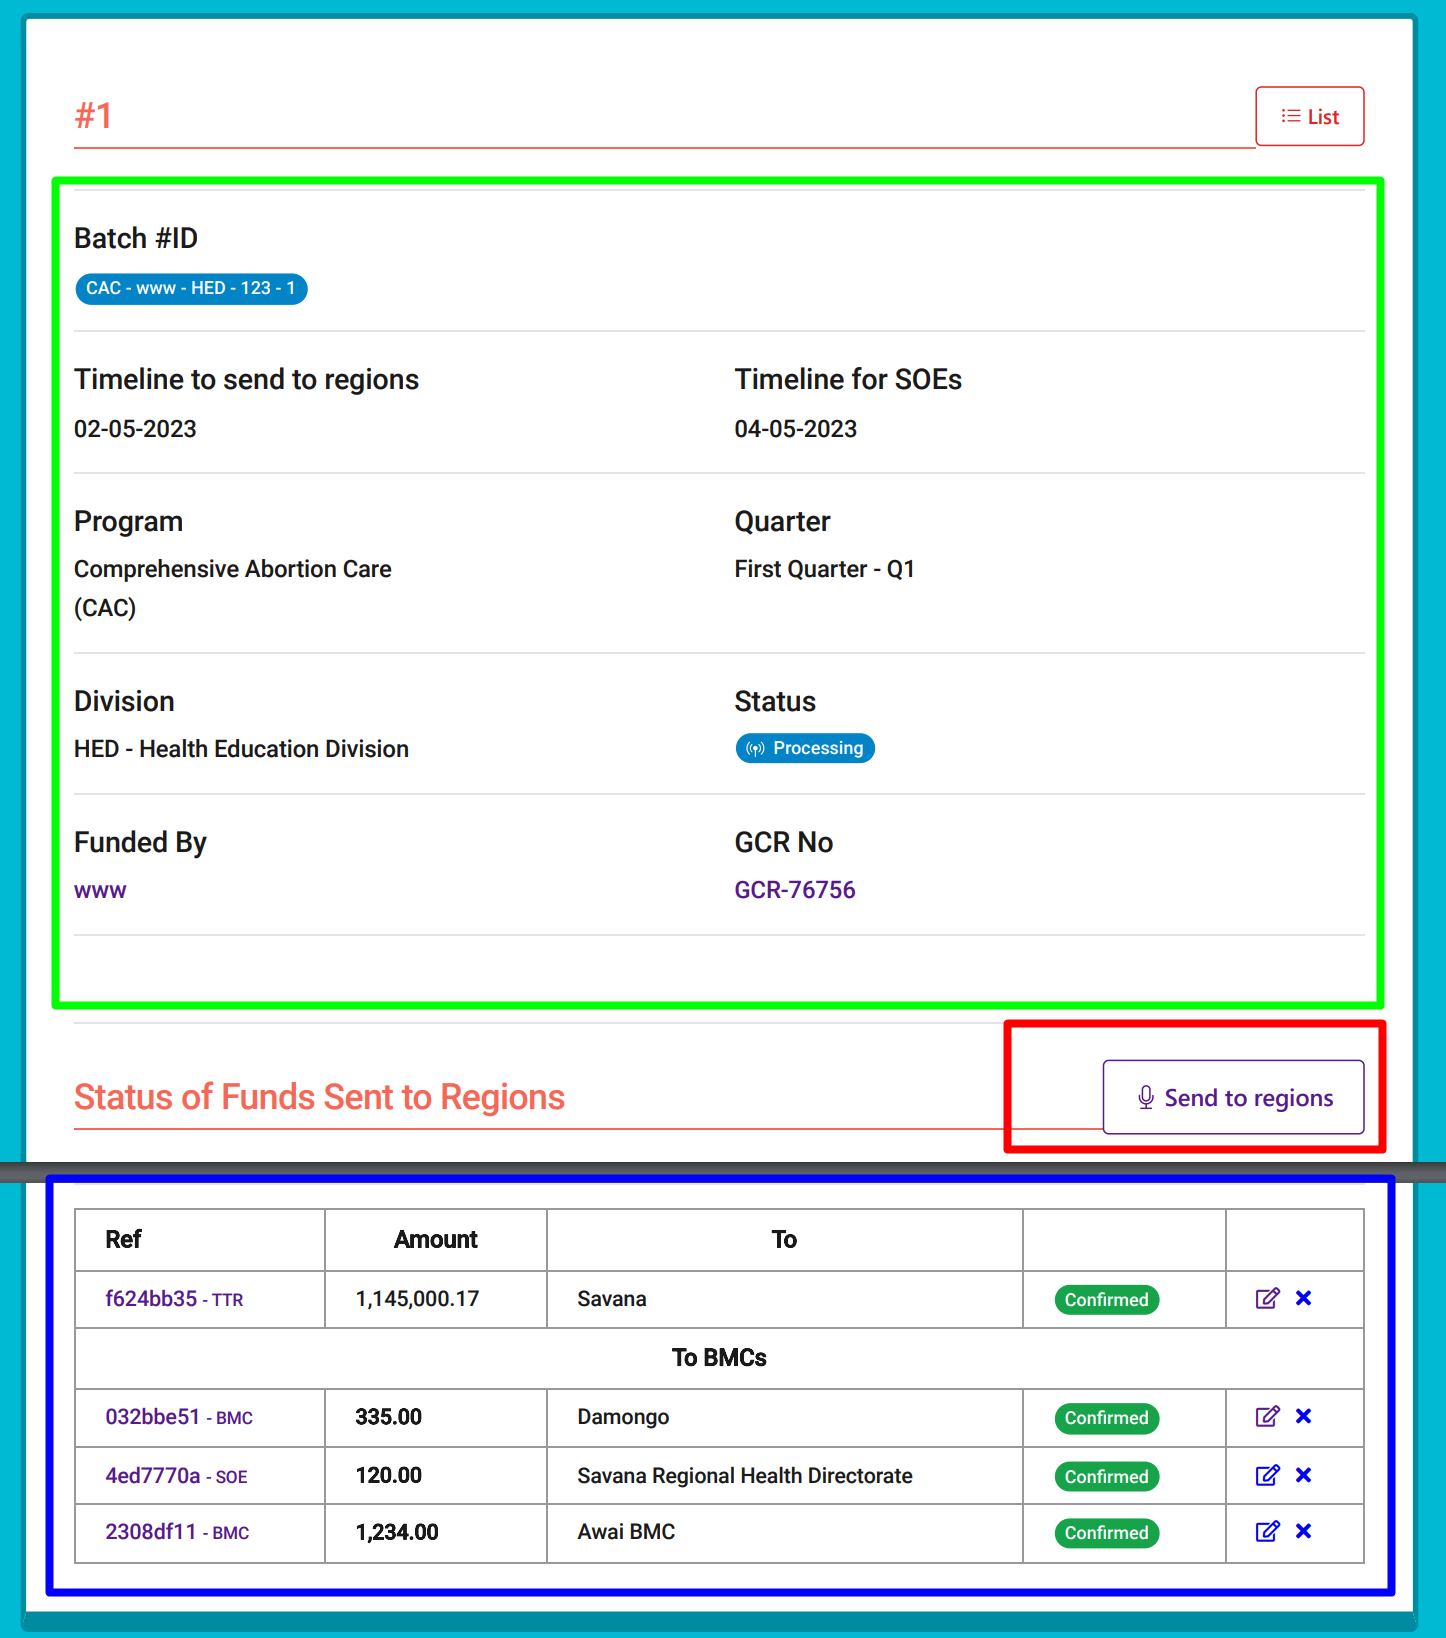
- The green zone shows the timeline details
- The blue area show the regions and BMCs that have been scheduled or that have already received the funds
- The red area contains a button. This Button is used to schedule/initiate transfers to regions if you are from the HQ or to BMCs in you are from RHD.
Sending funds
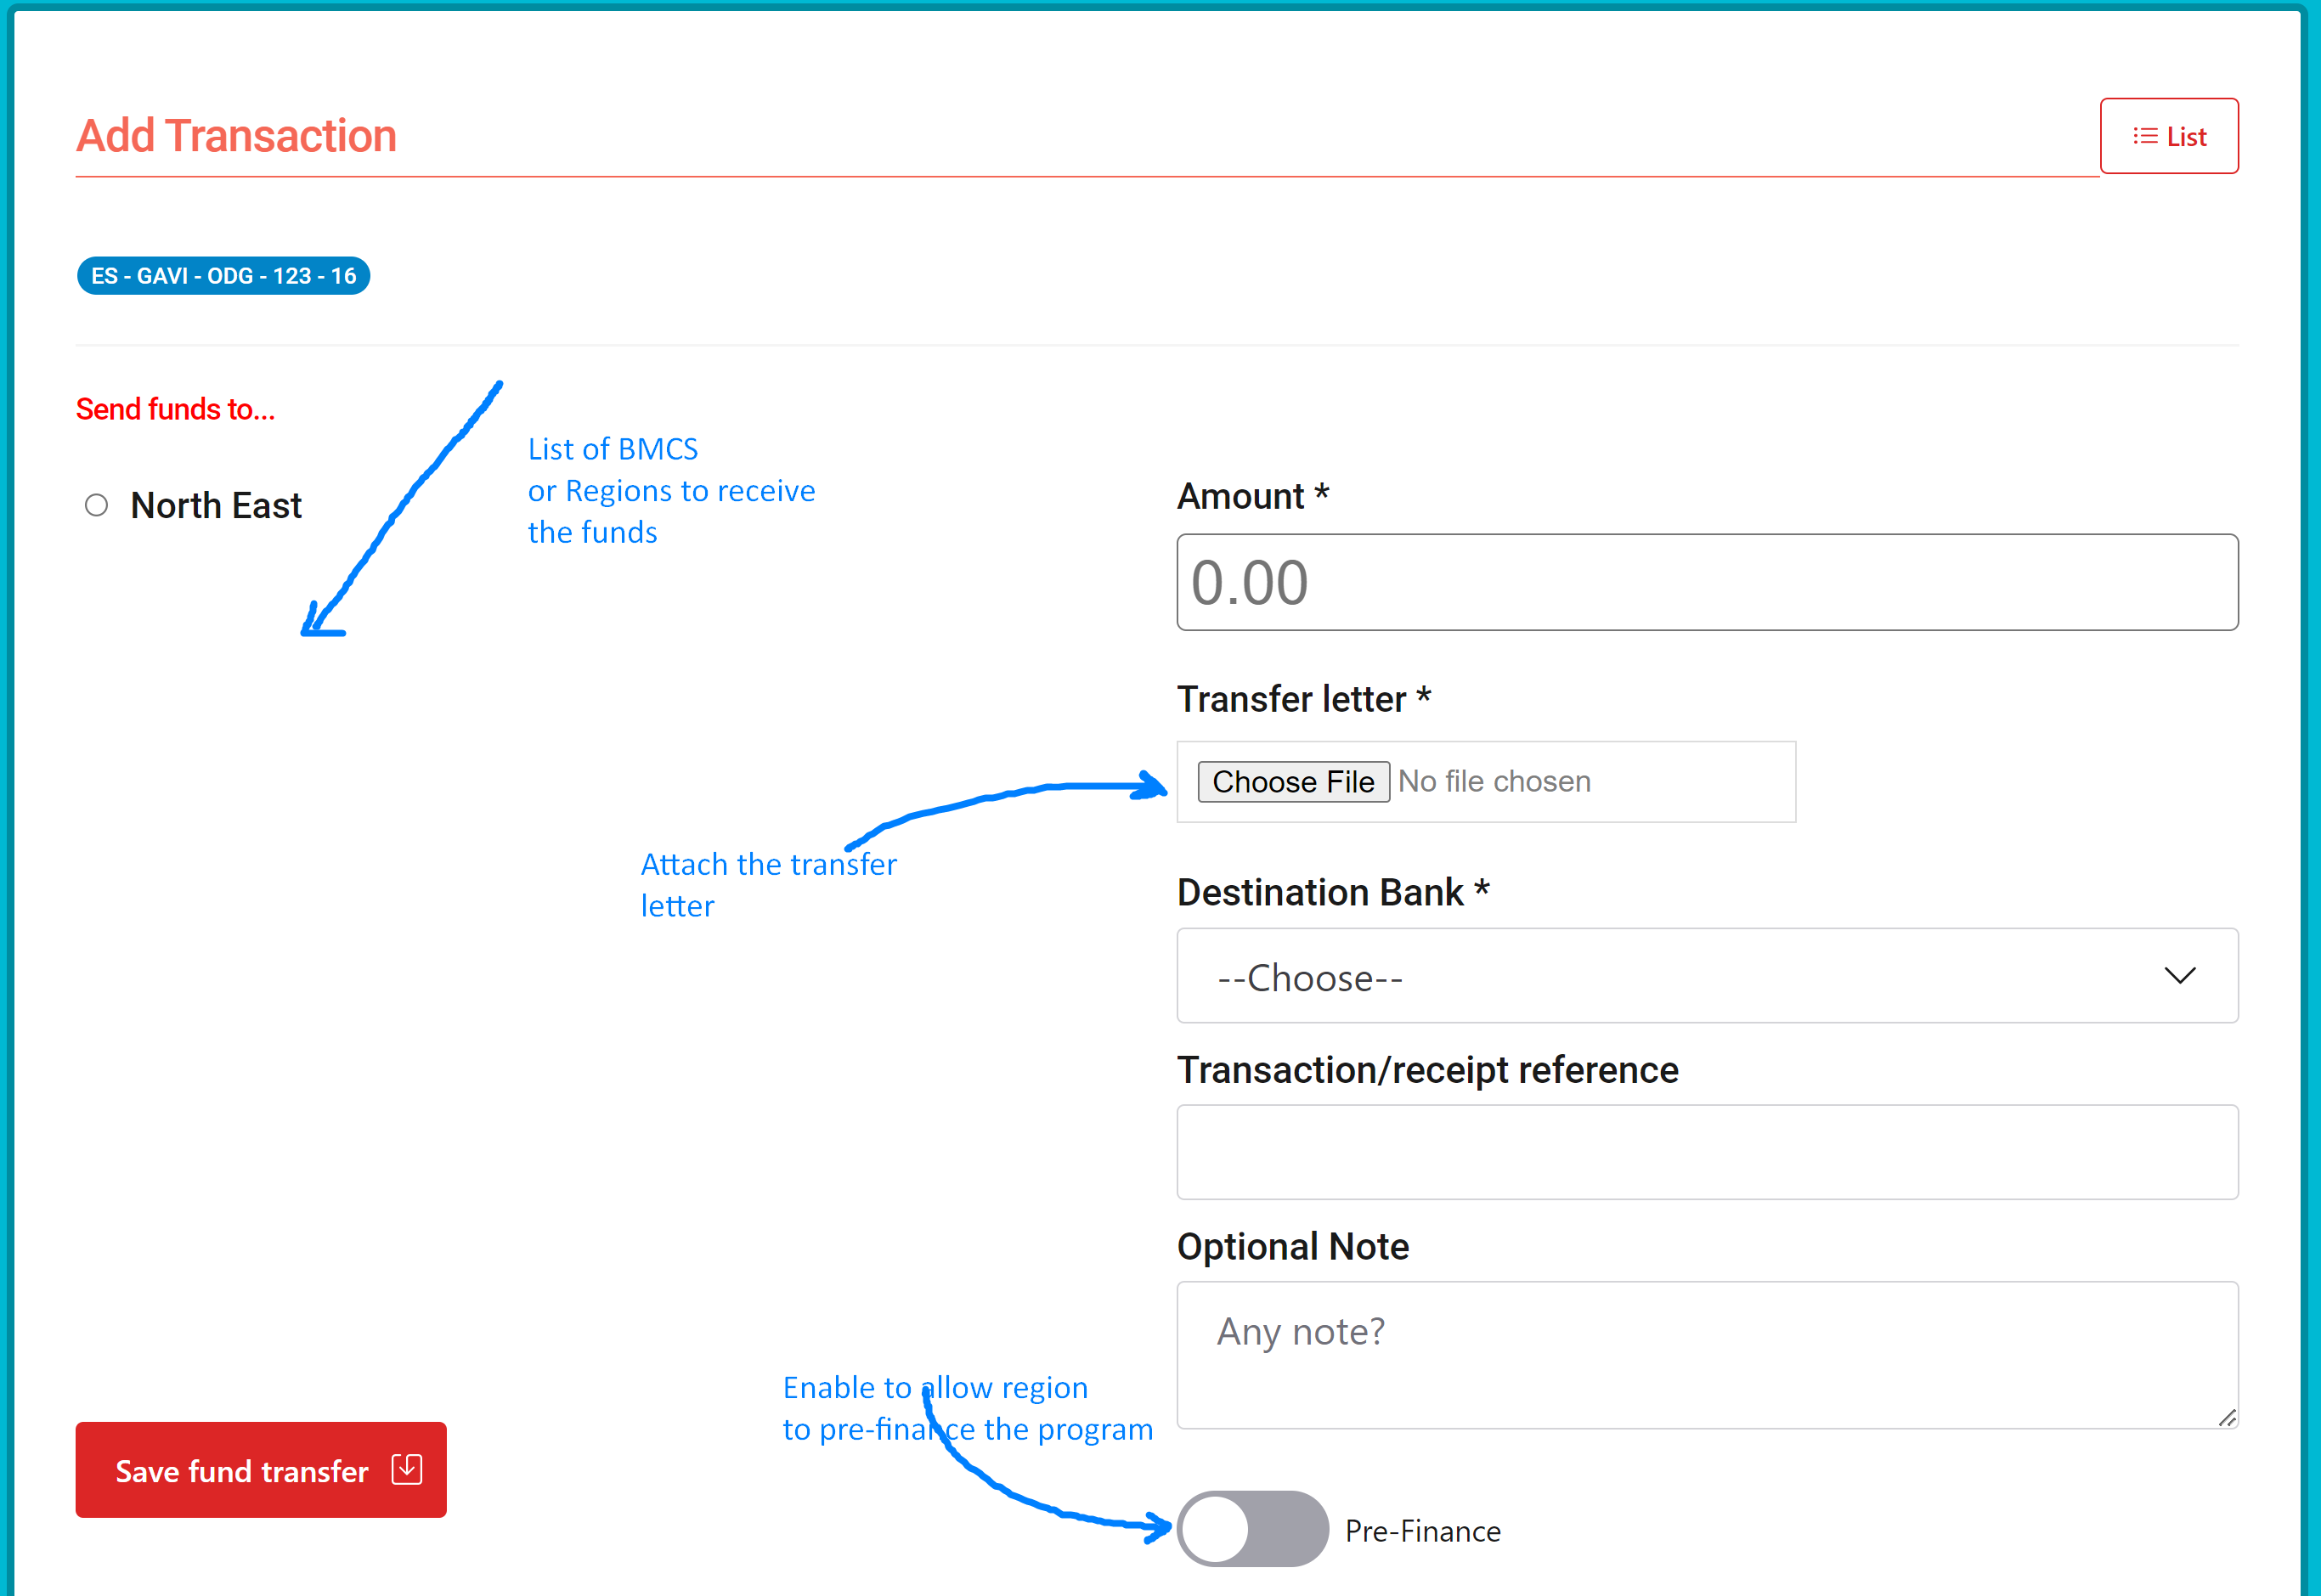
To initiate a fund transfer to a region or a BMC, click the "Send to regions" or "Send to BMCs" button. You will see the following screen:
An example of a filled form would look like this: ![]()
After filling and submitting the form you should receive a confirmation message as the following: ![]()
Note: All caught up! shows up when you have sent to all the regions the timeline was defined for.
As explained earlier, if you have sent to all pre-defined beneficiary regions, the timeline status will go to executed as seen on the following images: 
And if you go back to view the timeline transactions section, you would see that it's marked as "pending". It assumes that the disbursement was set and the funds are not sent yet. ![]()
In the other hand the region could see the transfer as following:
![]() Because the transaction is in the pending state the recipent does not have the option to confirm it.
Because the transaction is in the pending state the recipent does not have the option to confirm it.
When the funds are finally sent to the recipient's bank account the HQ can mark it as sent: 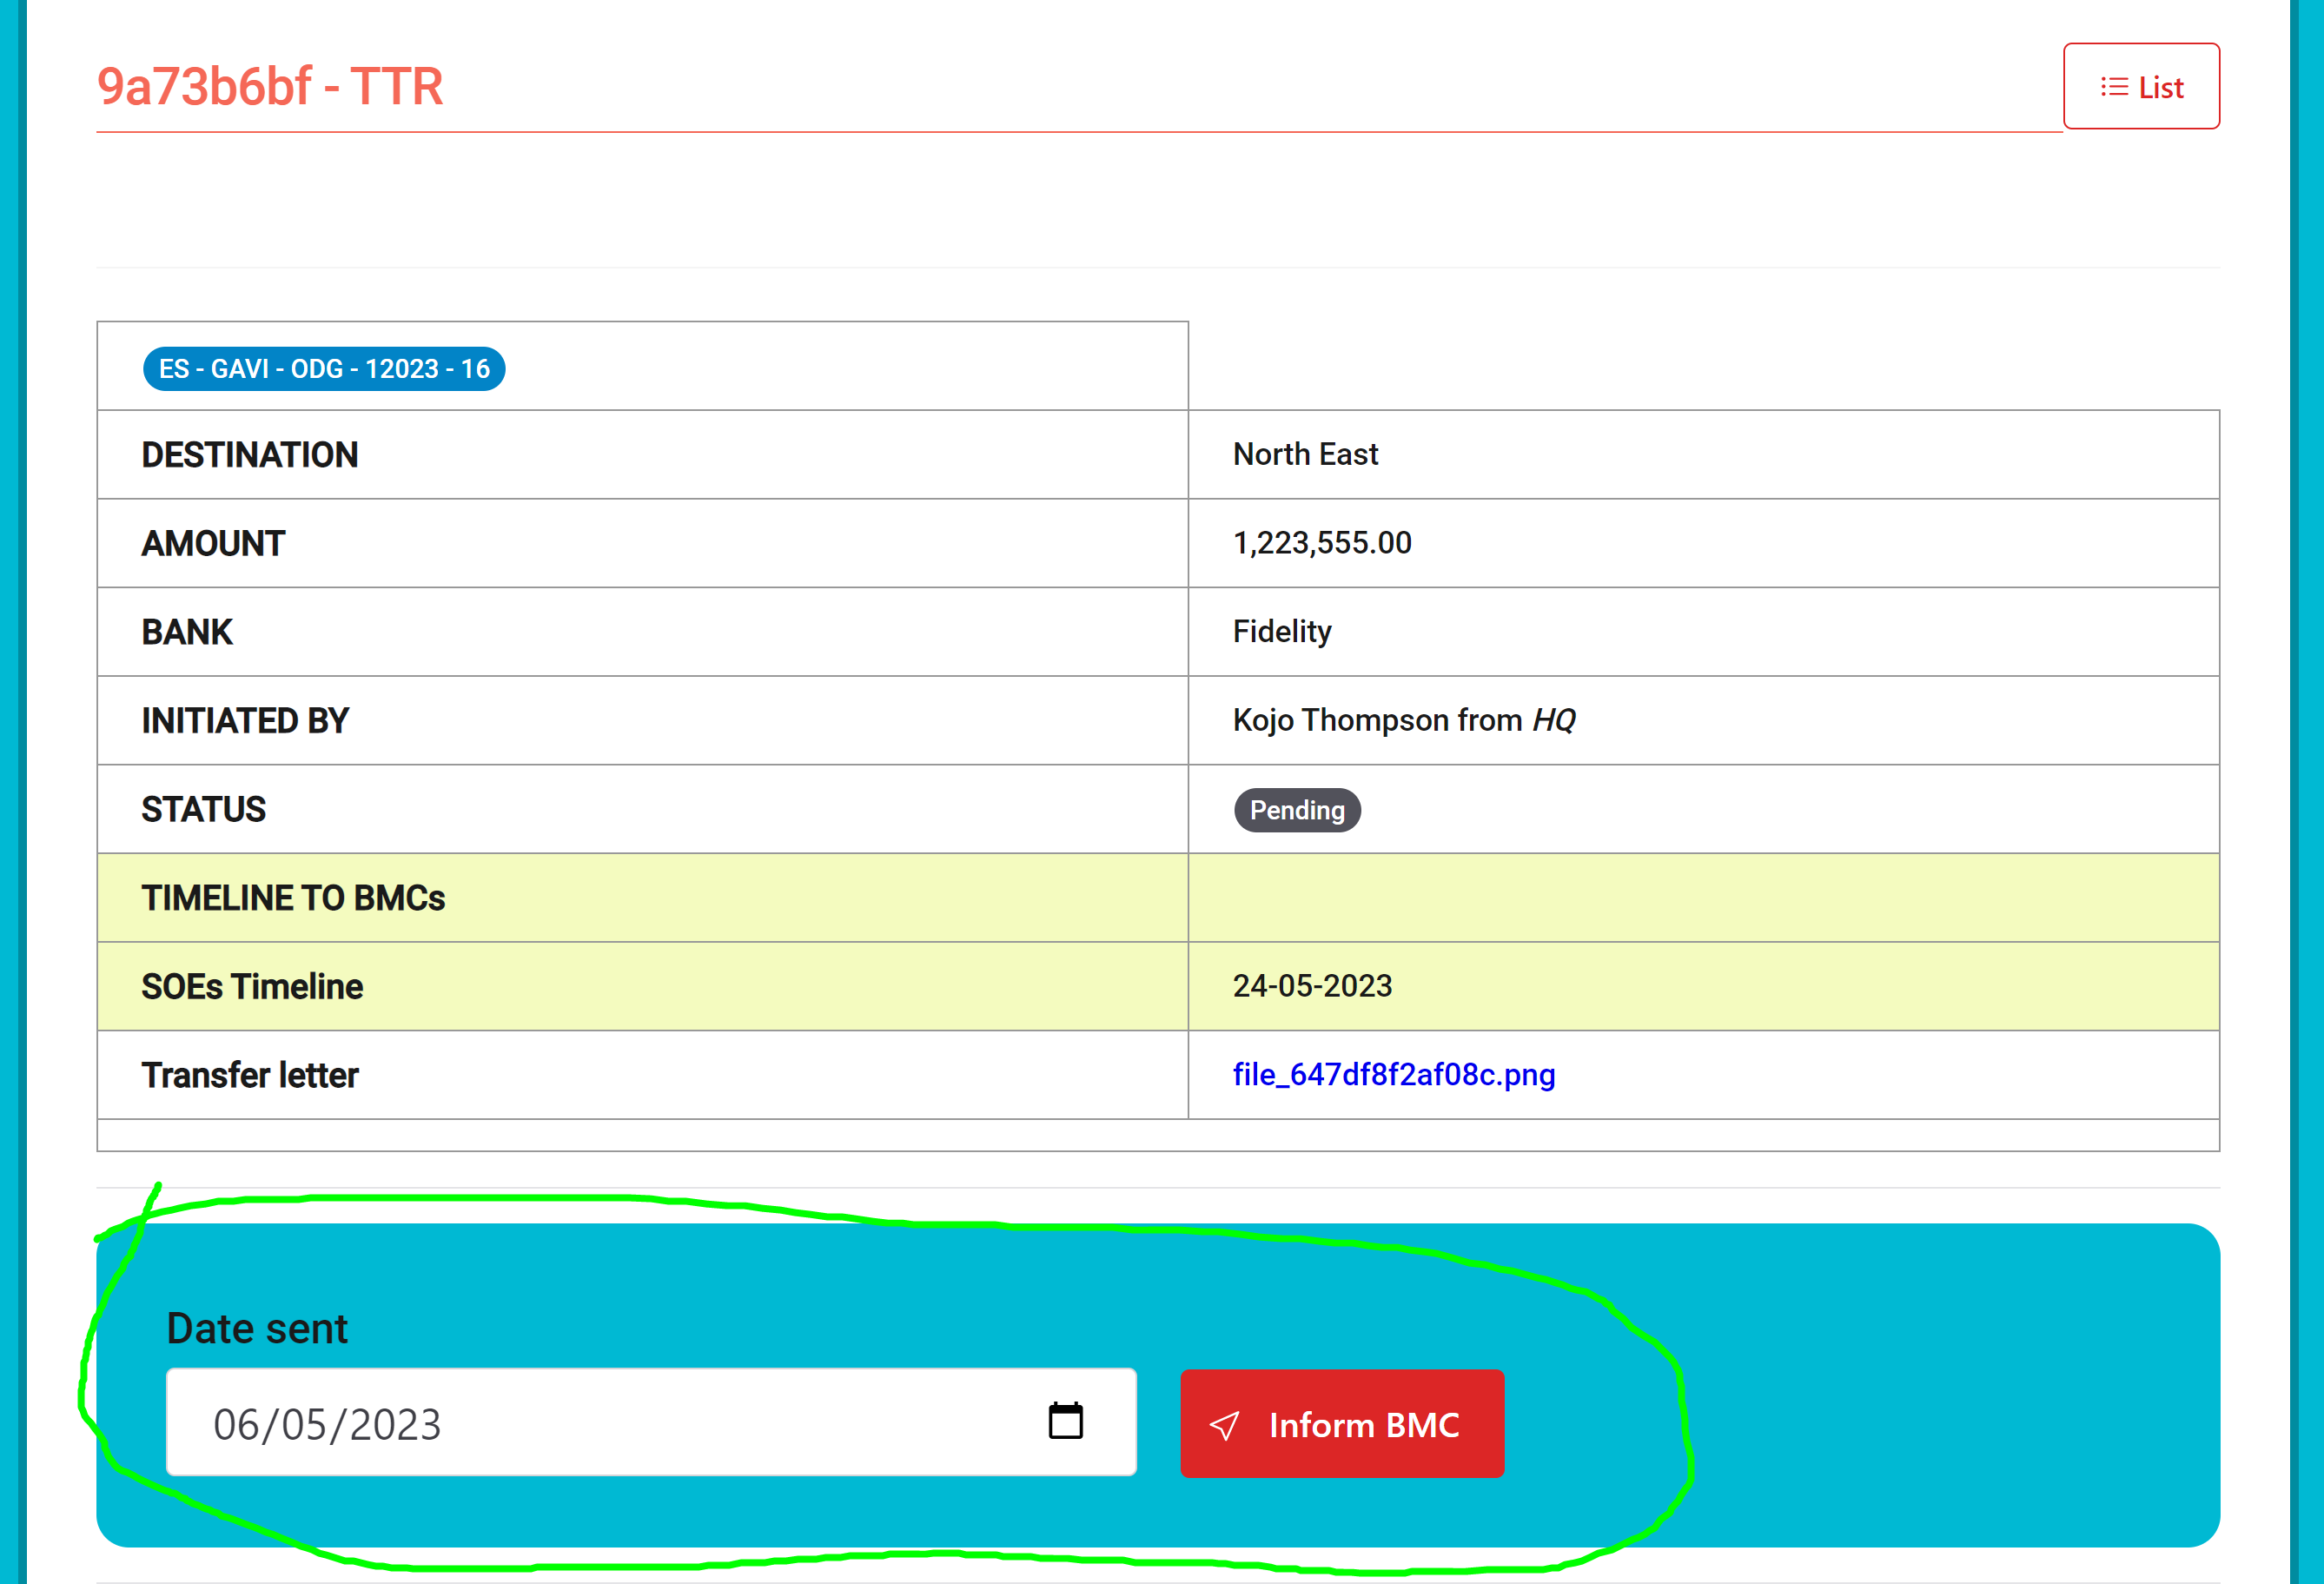
After that the recipient, the region, will have the chance now to confirm if they have received the money: ![]()
Once the transfer confirmed, the region or BMC will see a screen like this: ![]()
In the case of a BMC, they will also see the SOE return form under the transaction details: 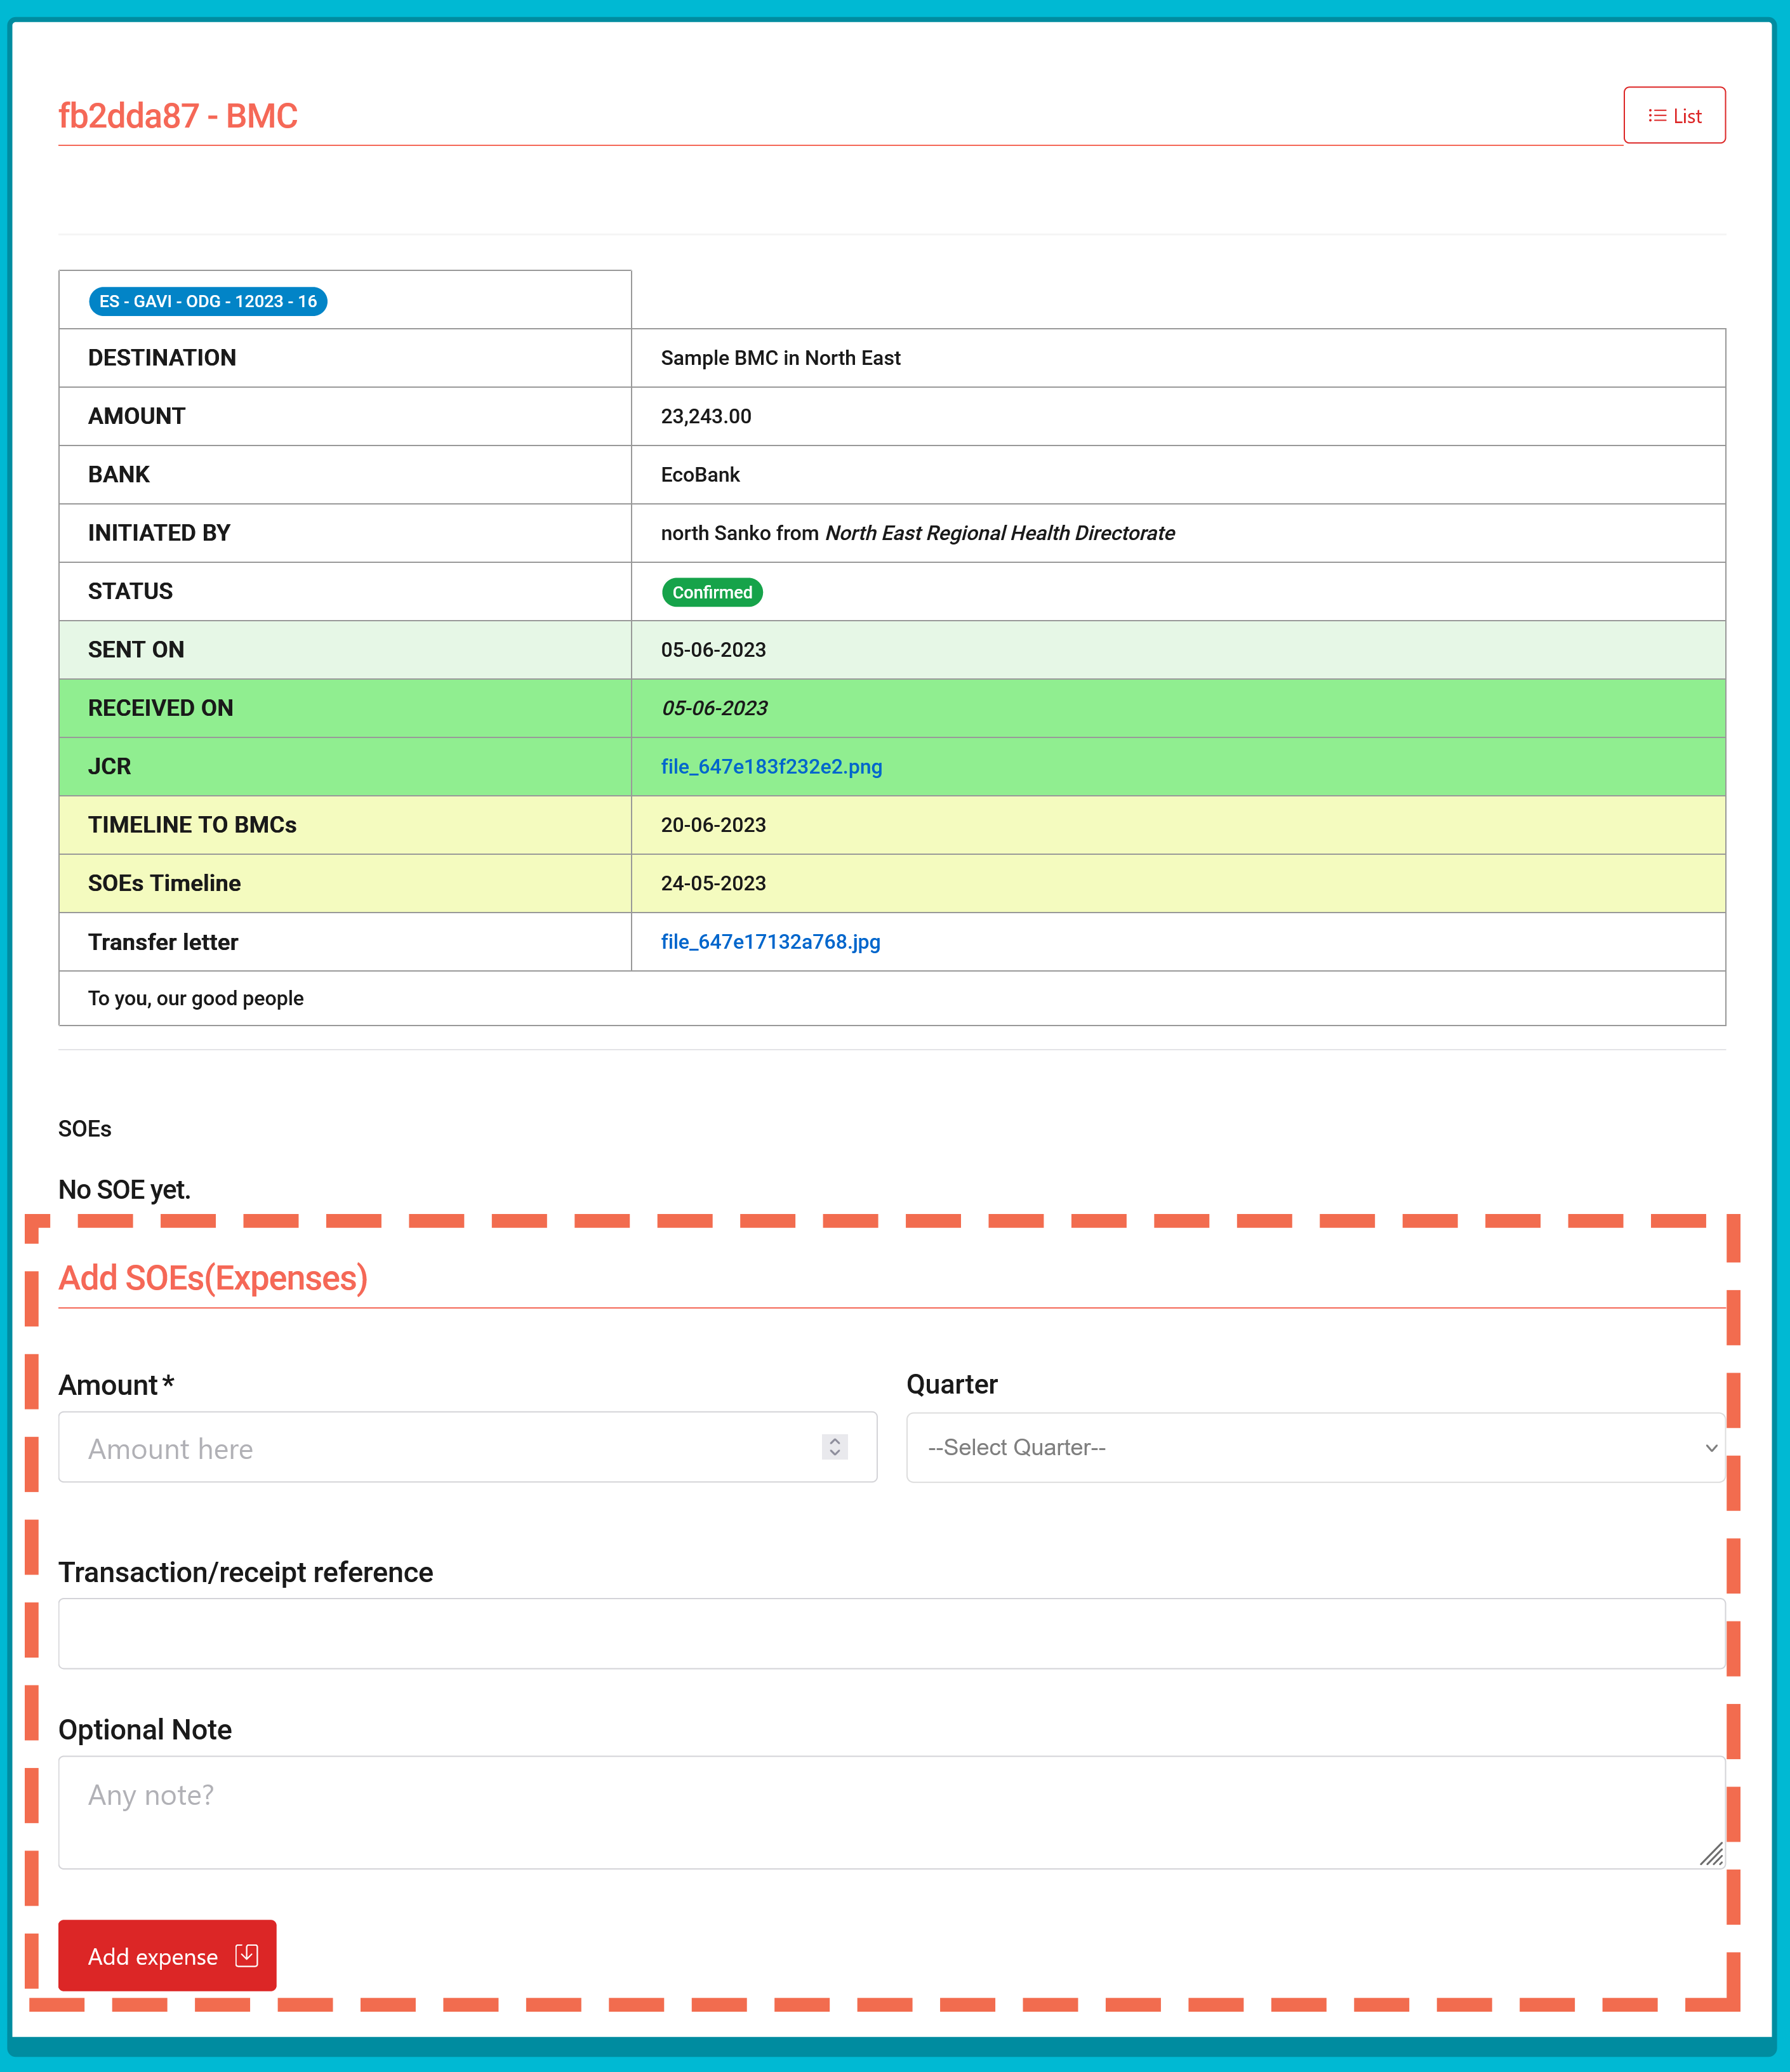
In the other hand, the region that just received the fund can now start disbursing the fund to their BMCs: 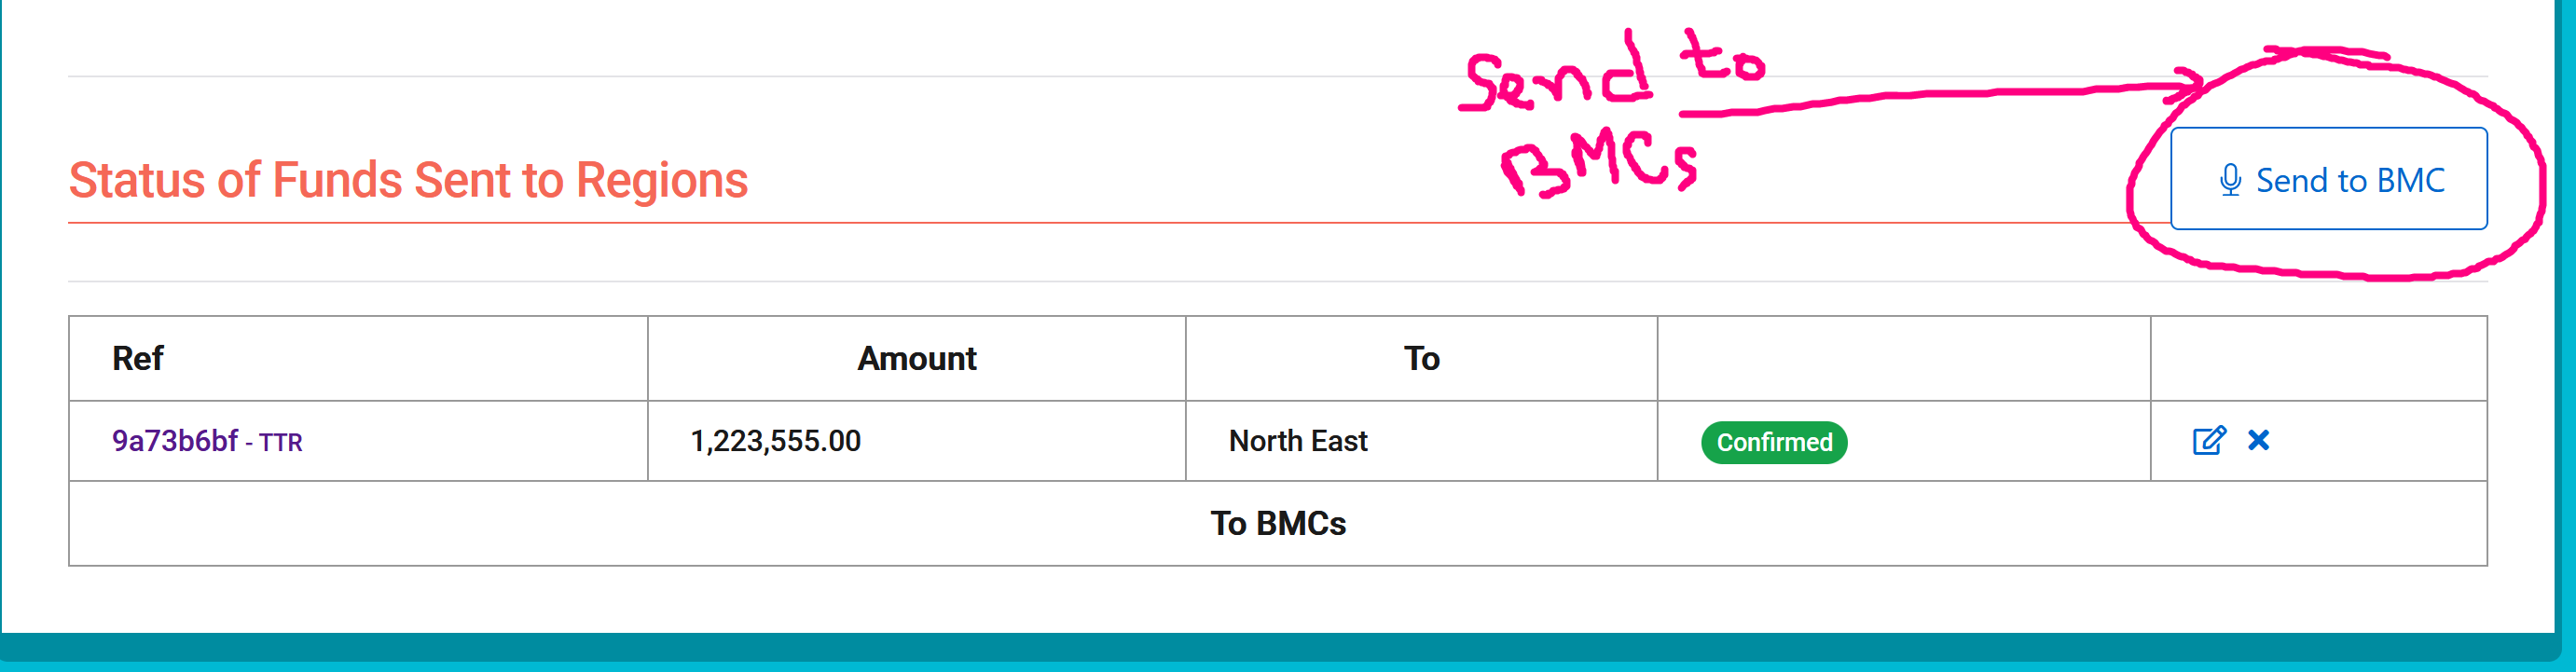
As seen bellow:
![]()
Here too the region needs to confirm the BMC whenthe actually money is sent to their bank account: ![]()
And once the BMC confirms it, it can now start sending back their SOEs as shown above.
It's important to note that in the case a transfer is marked as "Pre-financed", the recipient can start sending SOEs without needing to confirm it.
As soon as the regions start sending to their BMCs they will the transactions reflect as following: 
Programs and funding sources
Programs and funnding sources are linked and their management is available in the HQ role.
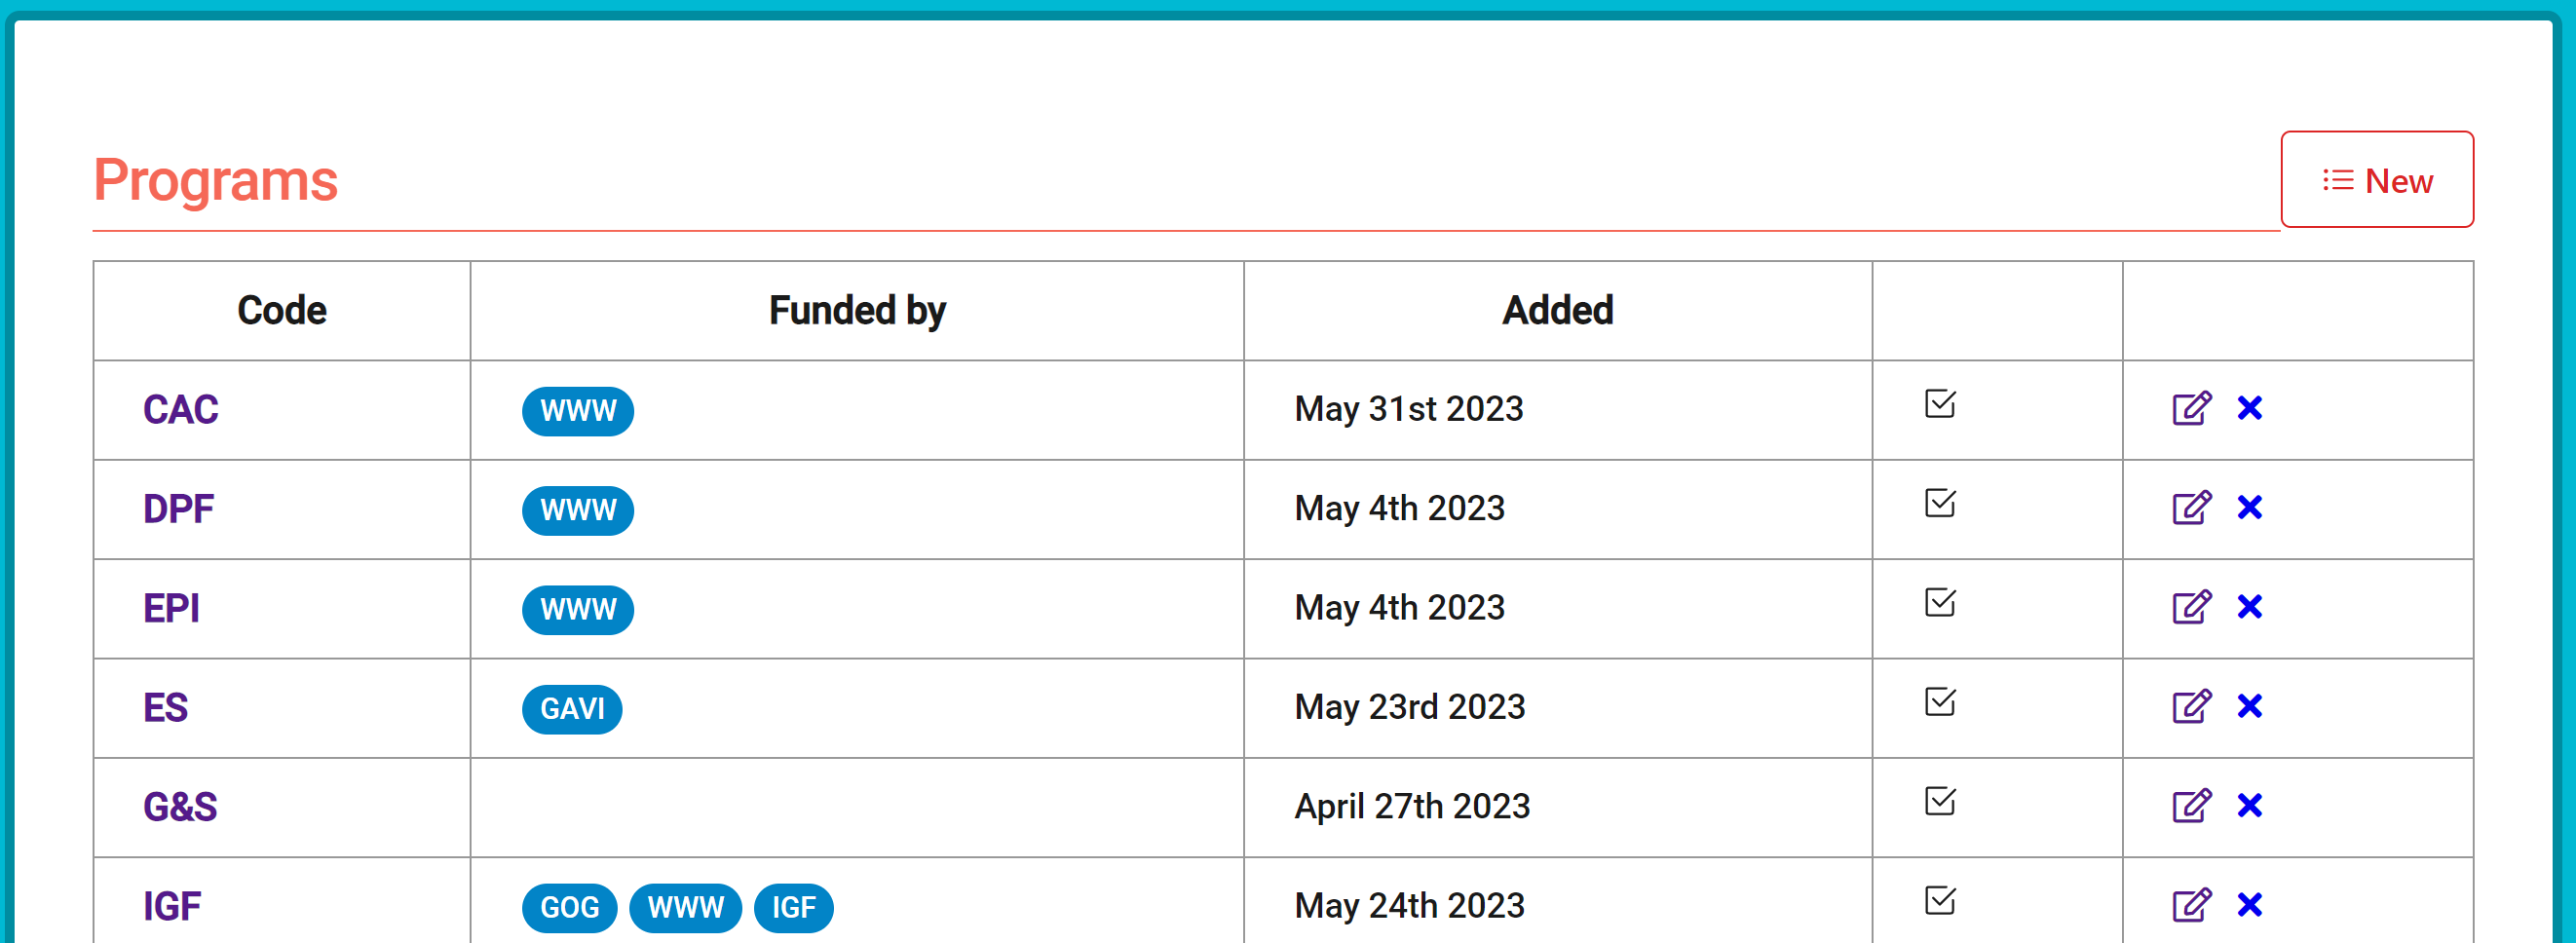
When you are adding a program, you have the fields that allows you to link the funding sources for it: 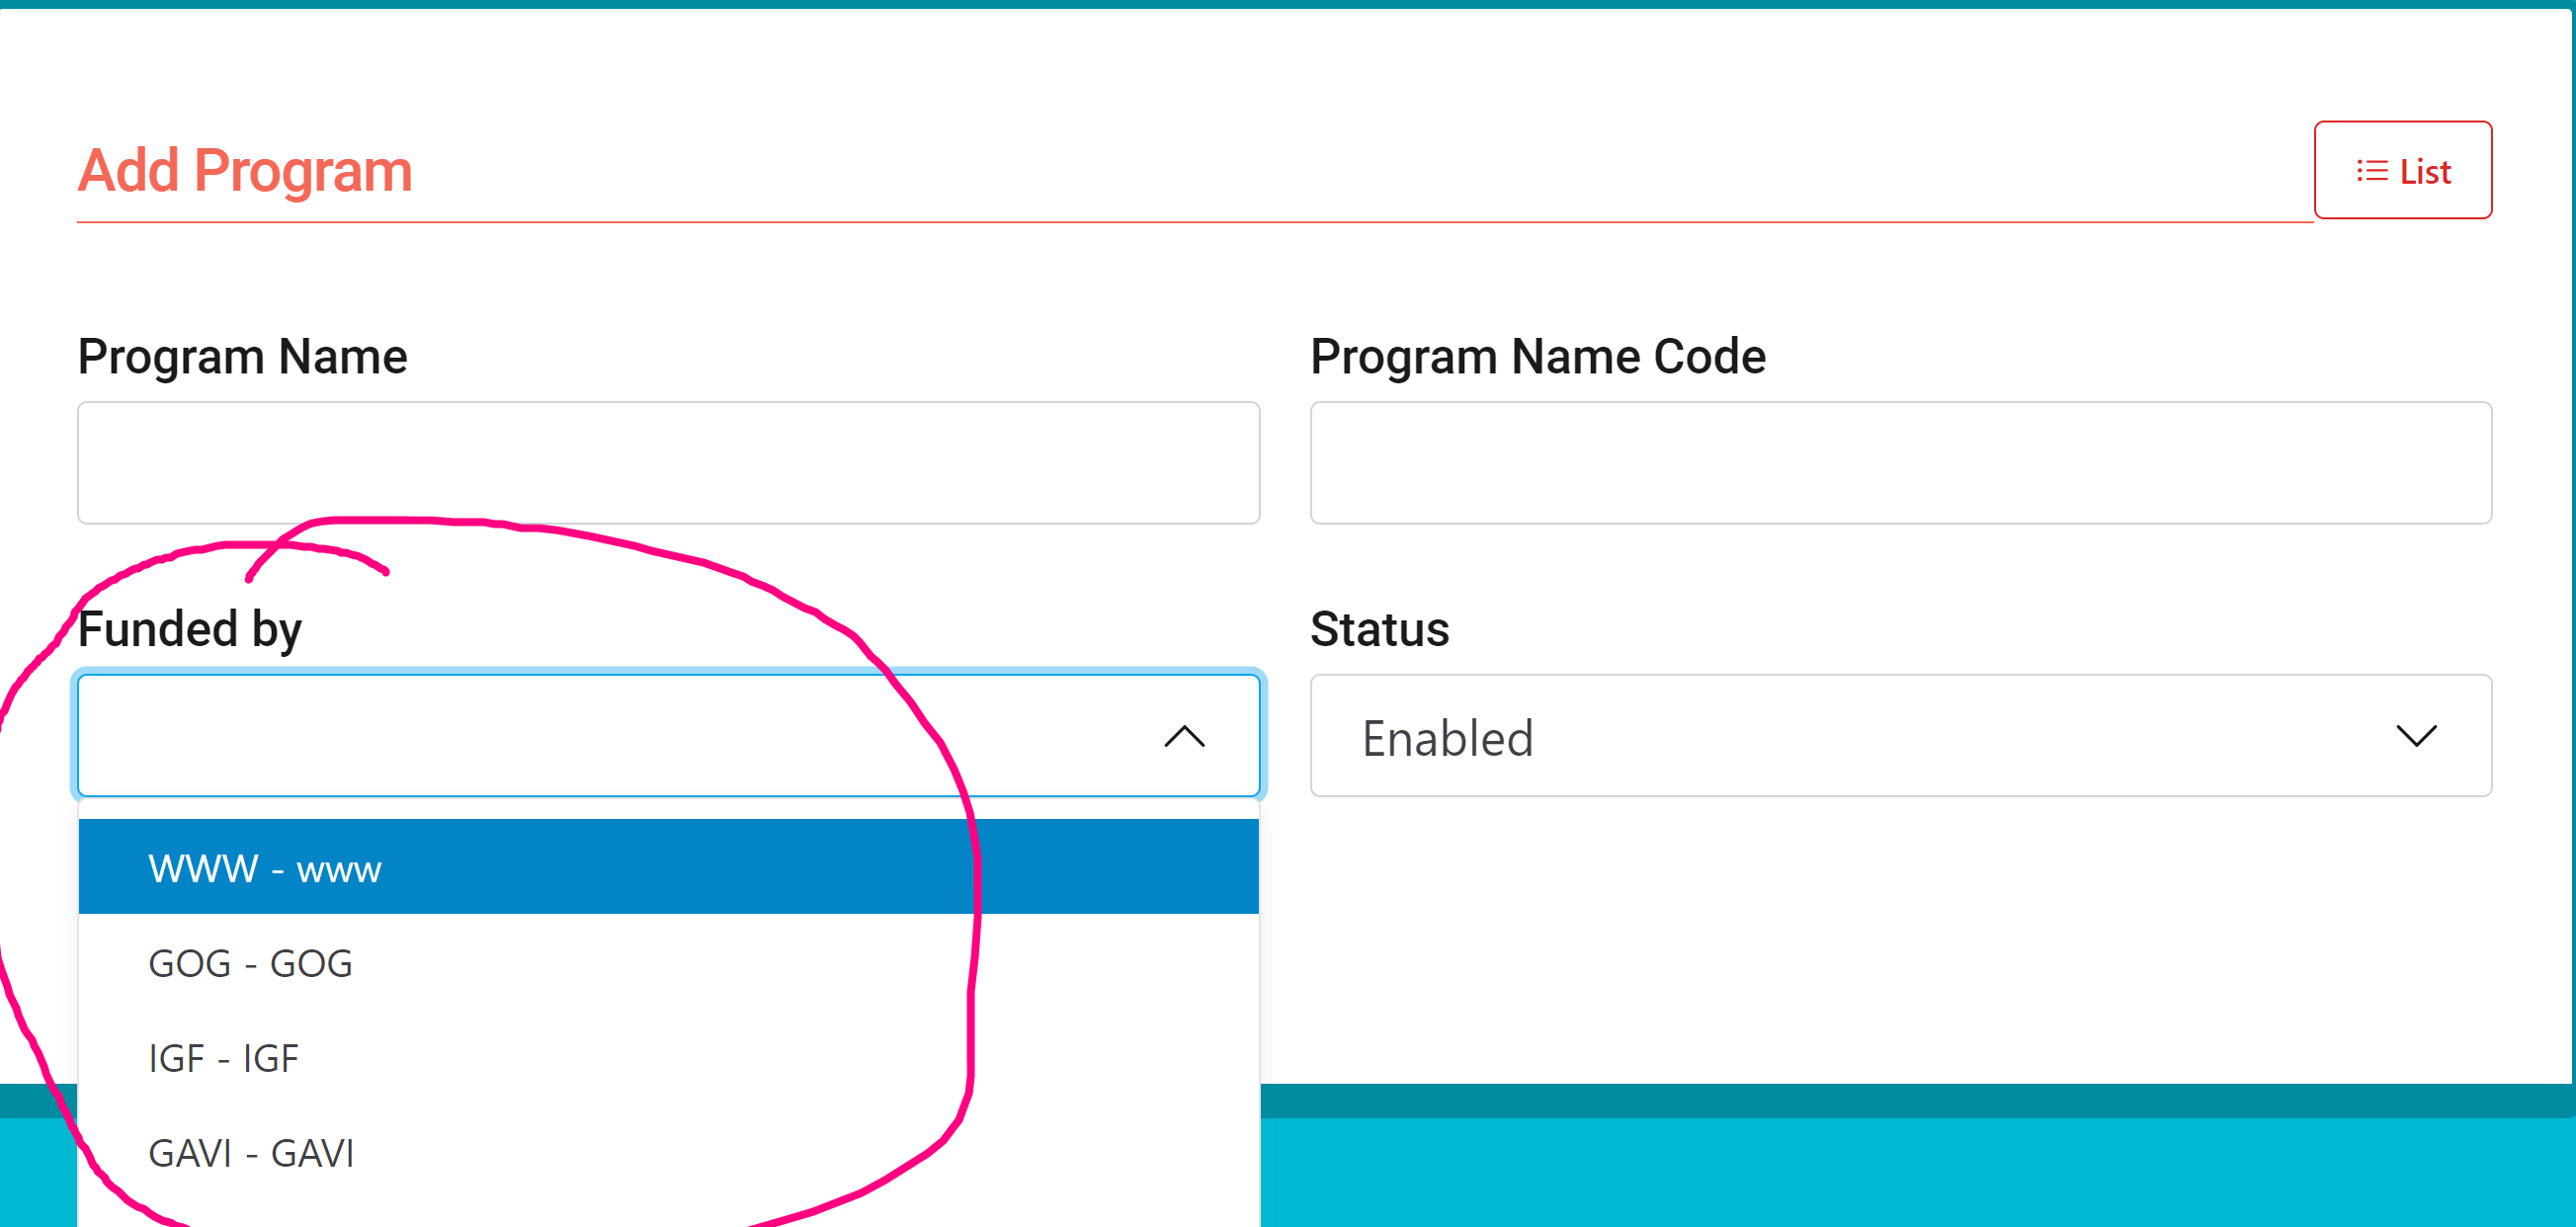 And just like most content, programs and funding sources can be edited if the permission is given.
Adding funds from donors
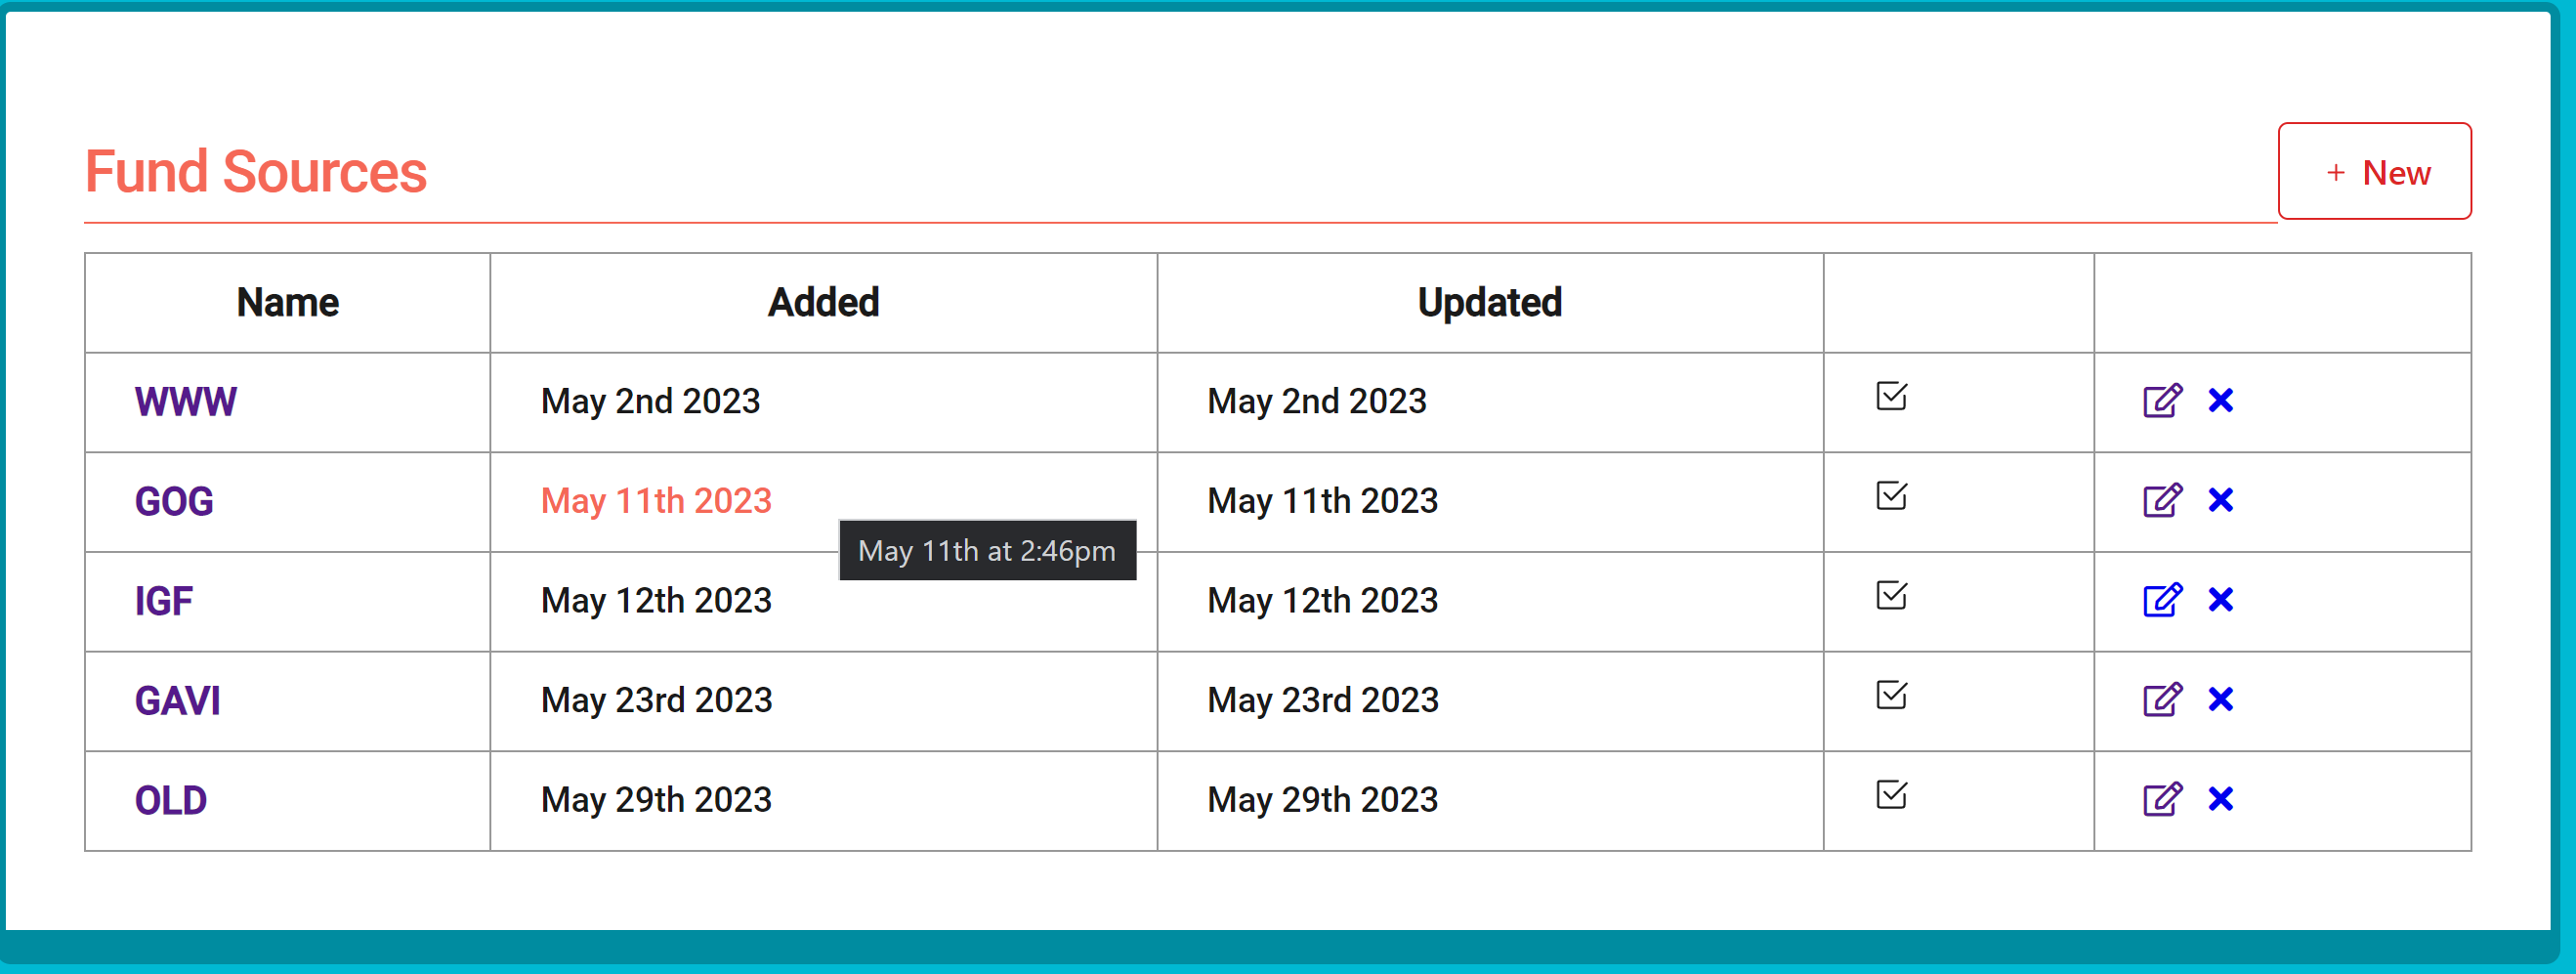
At the HQ, funds received from the donors can be recorded under each donor's page. To do so, go to the funding sources page, click the fund source/sponsor, then you will see the following form: 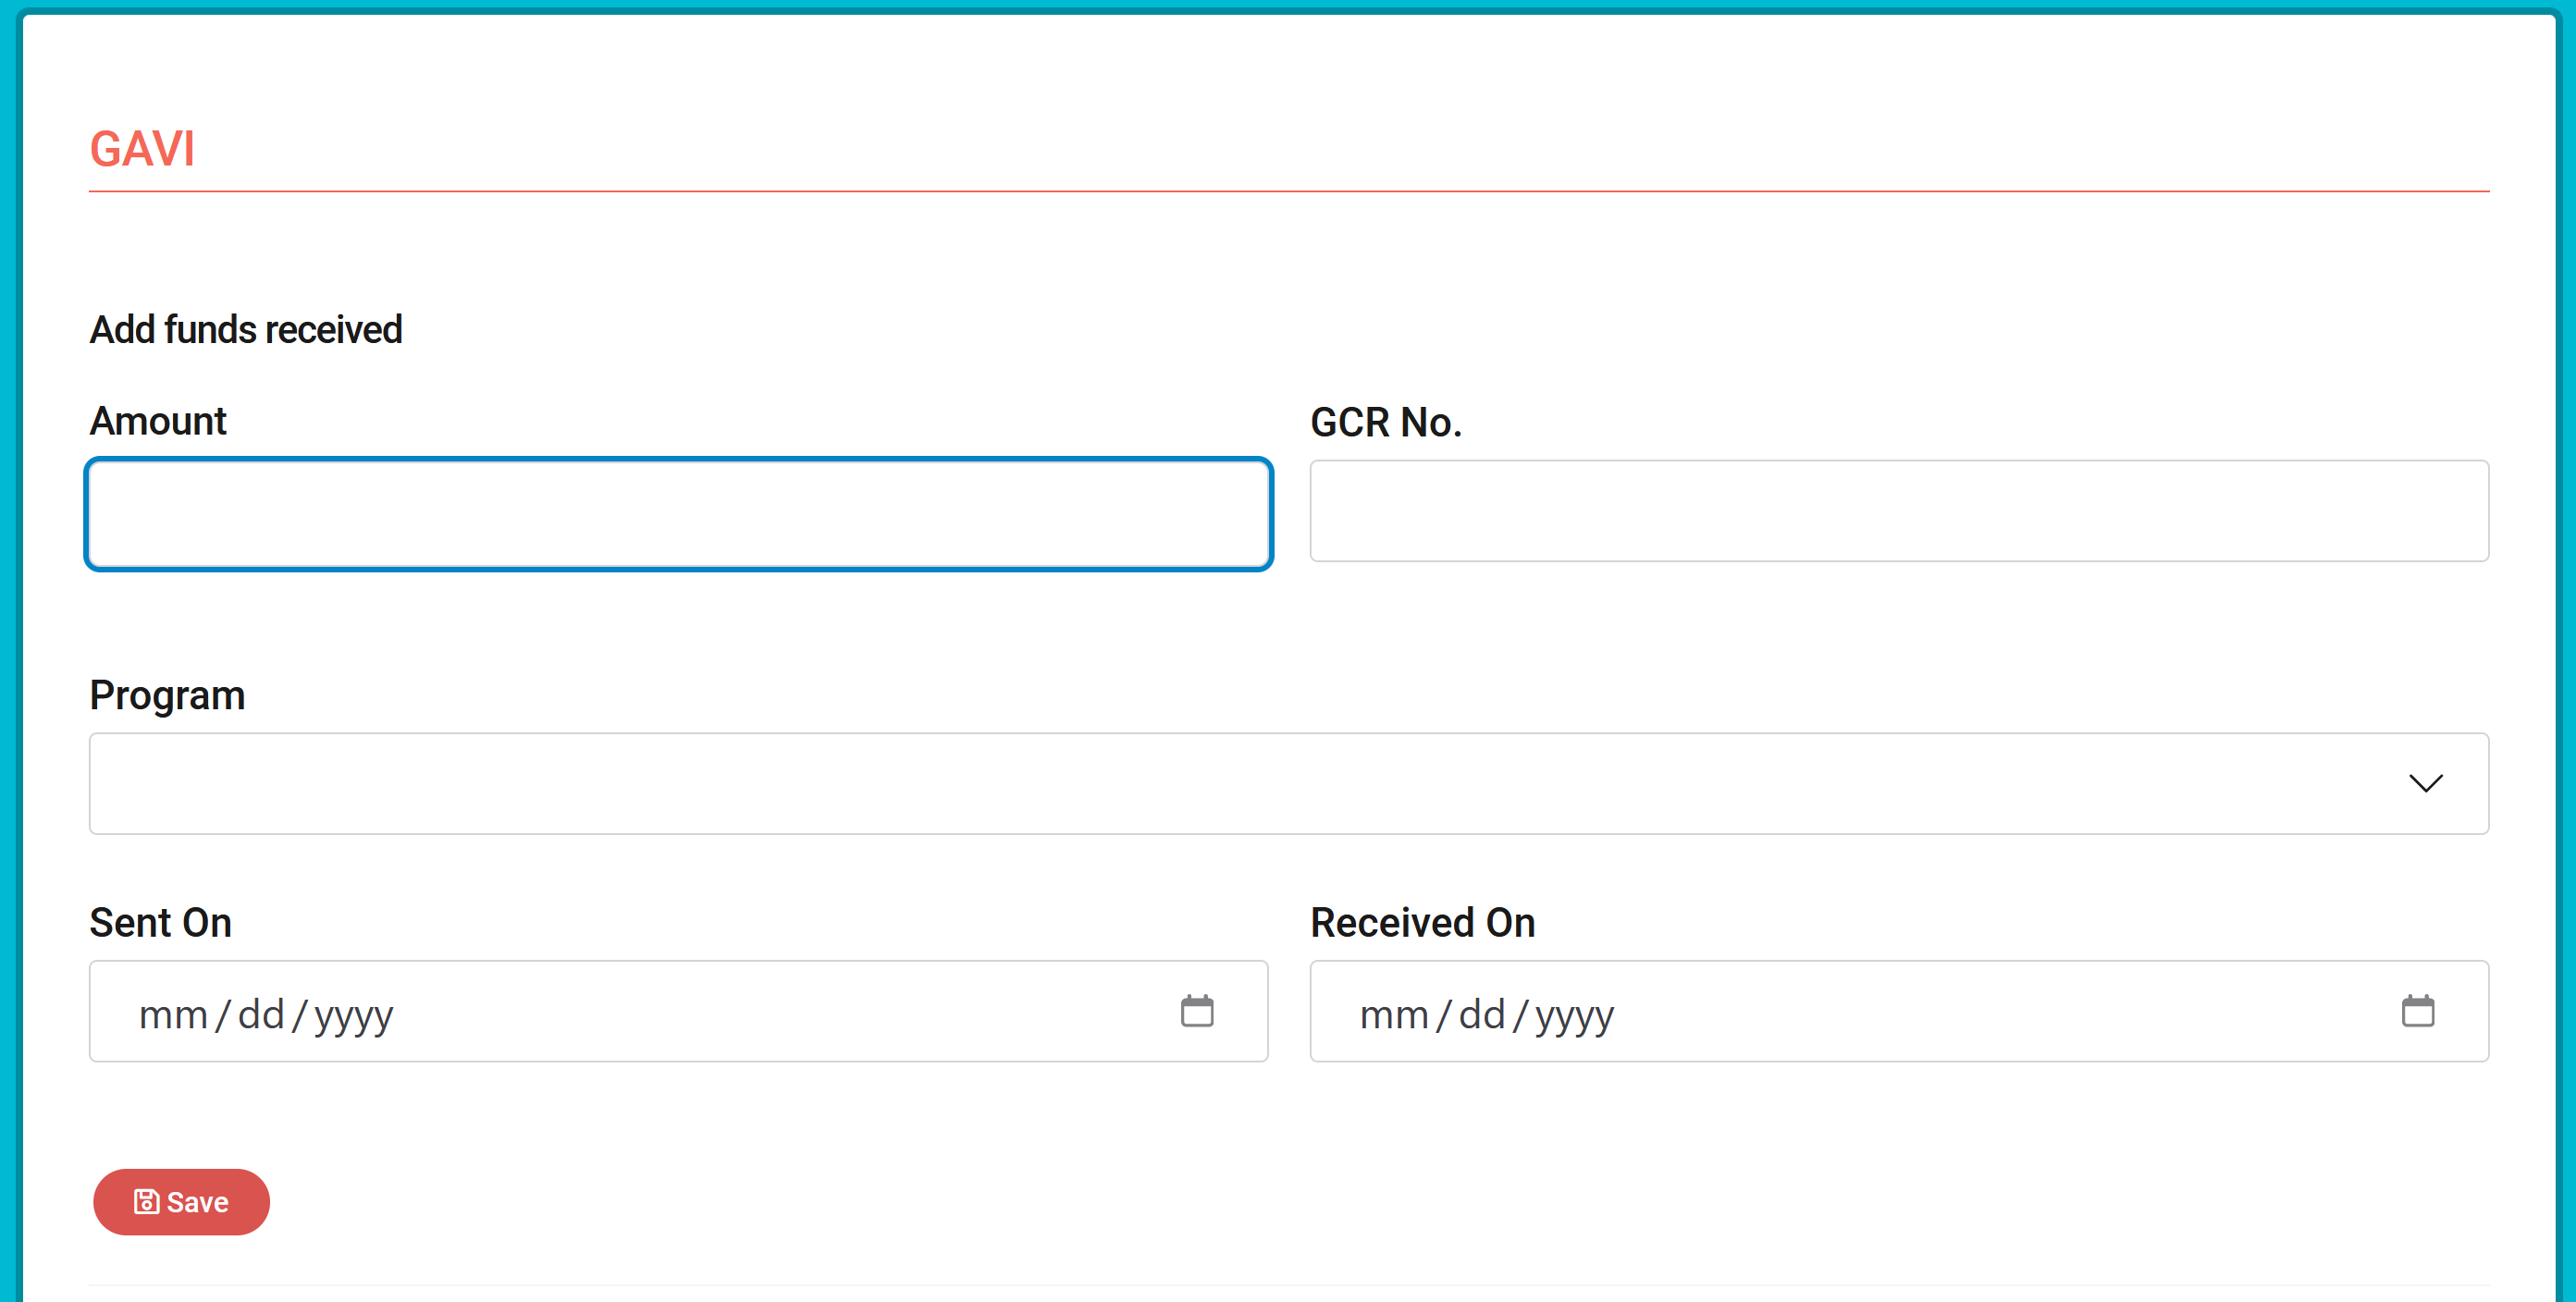
Once funds added you will see the entries as following: 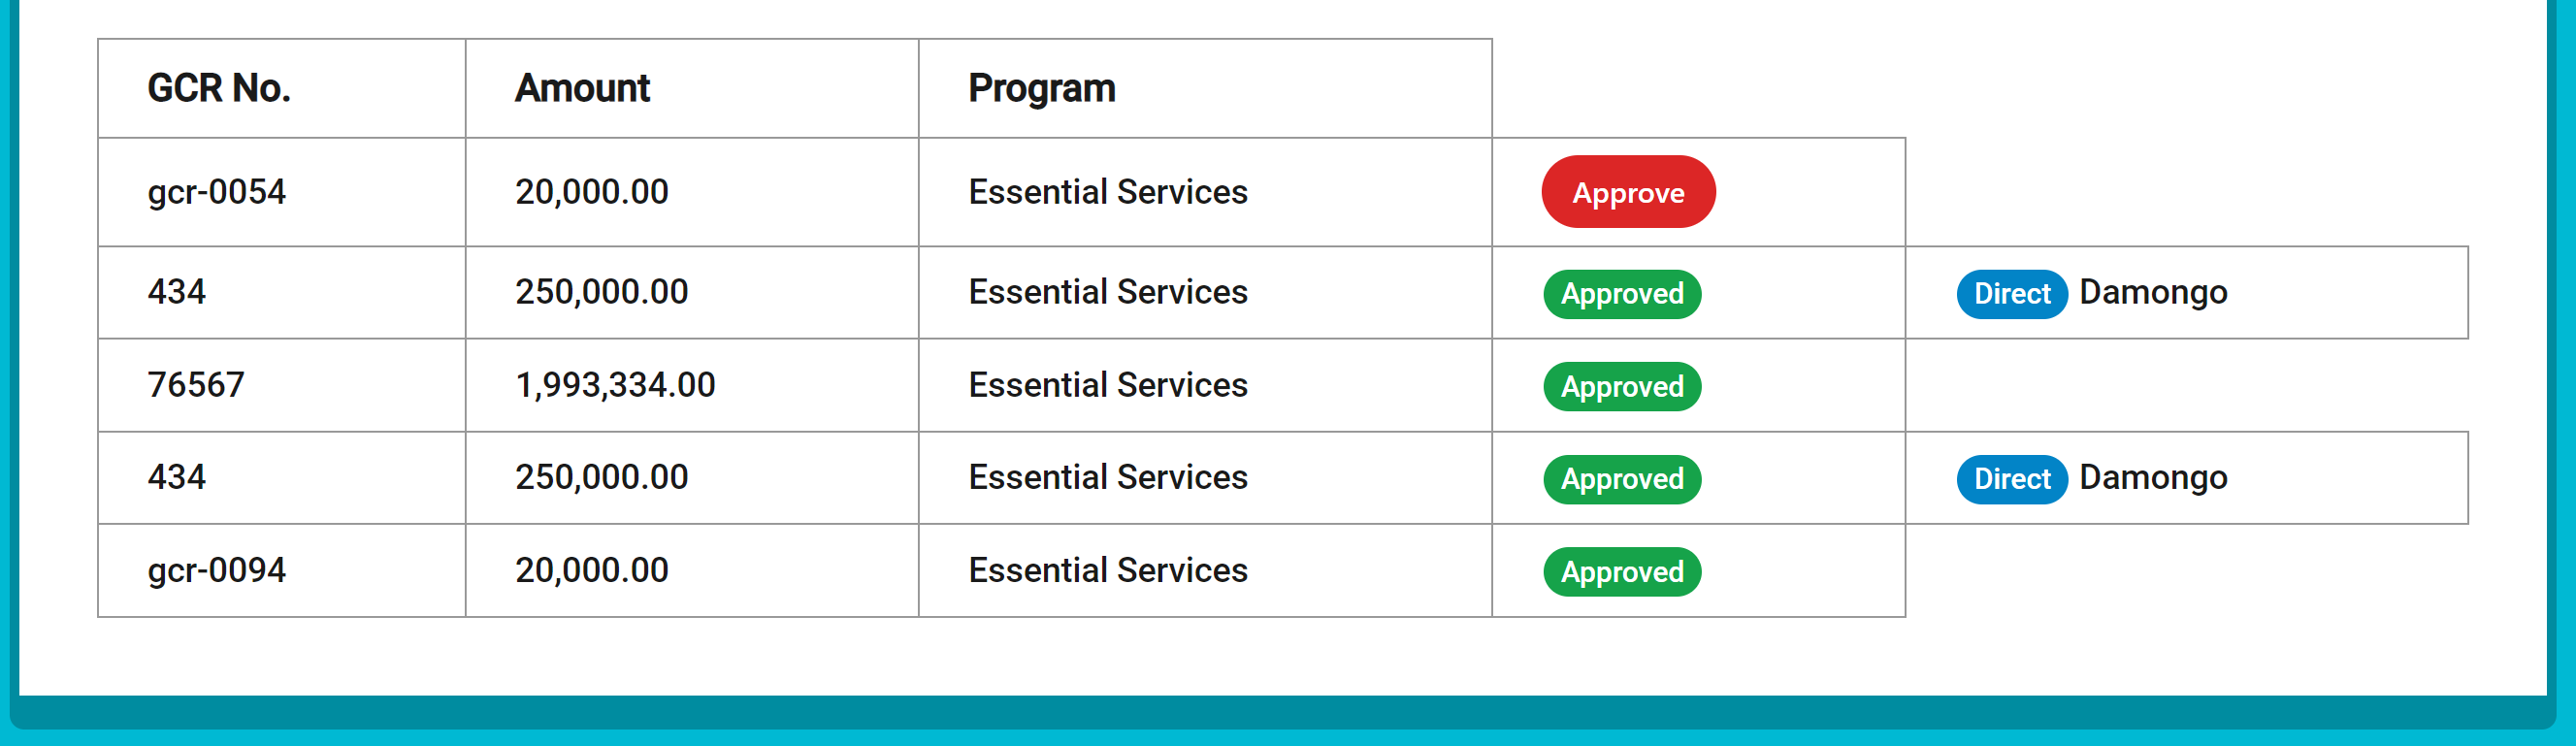
Program refunds
To return any fund from the programs, use the "Program refunds" menu to enter a new return. To add a new refund, click on "New" then fill in the following form:
When you click on the "Program refunds" in the navigation you will be presented with the list of existing refunds: 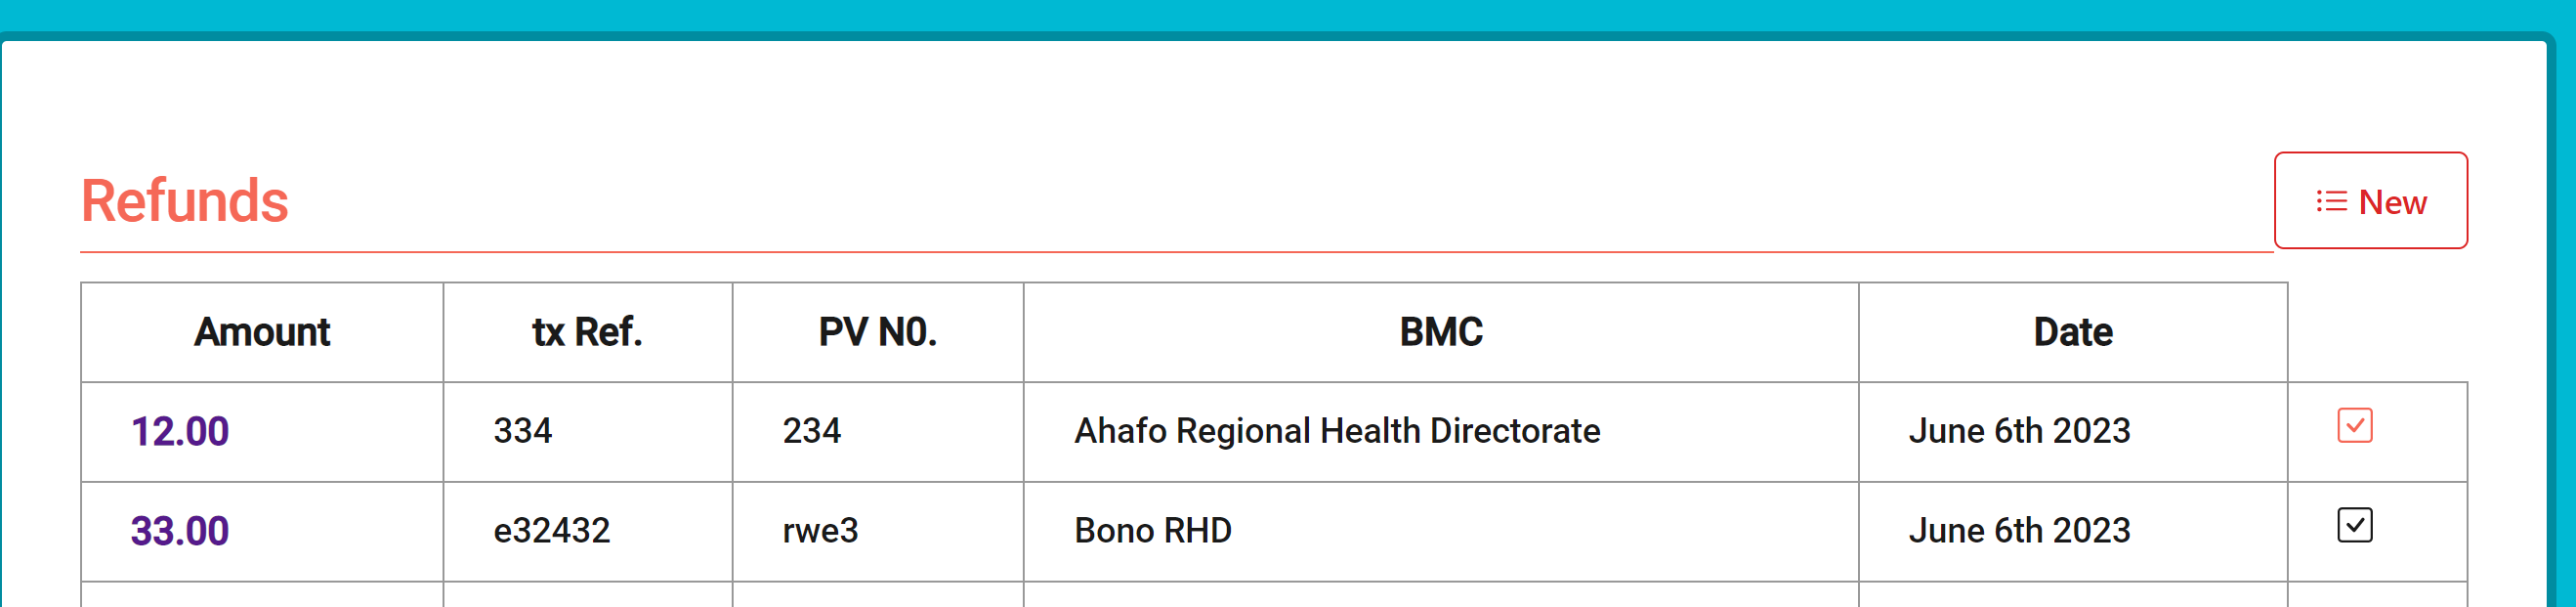
All refunds entered are subject of approval by the HQ. The admins a the HQ will see it like following: 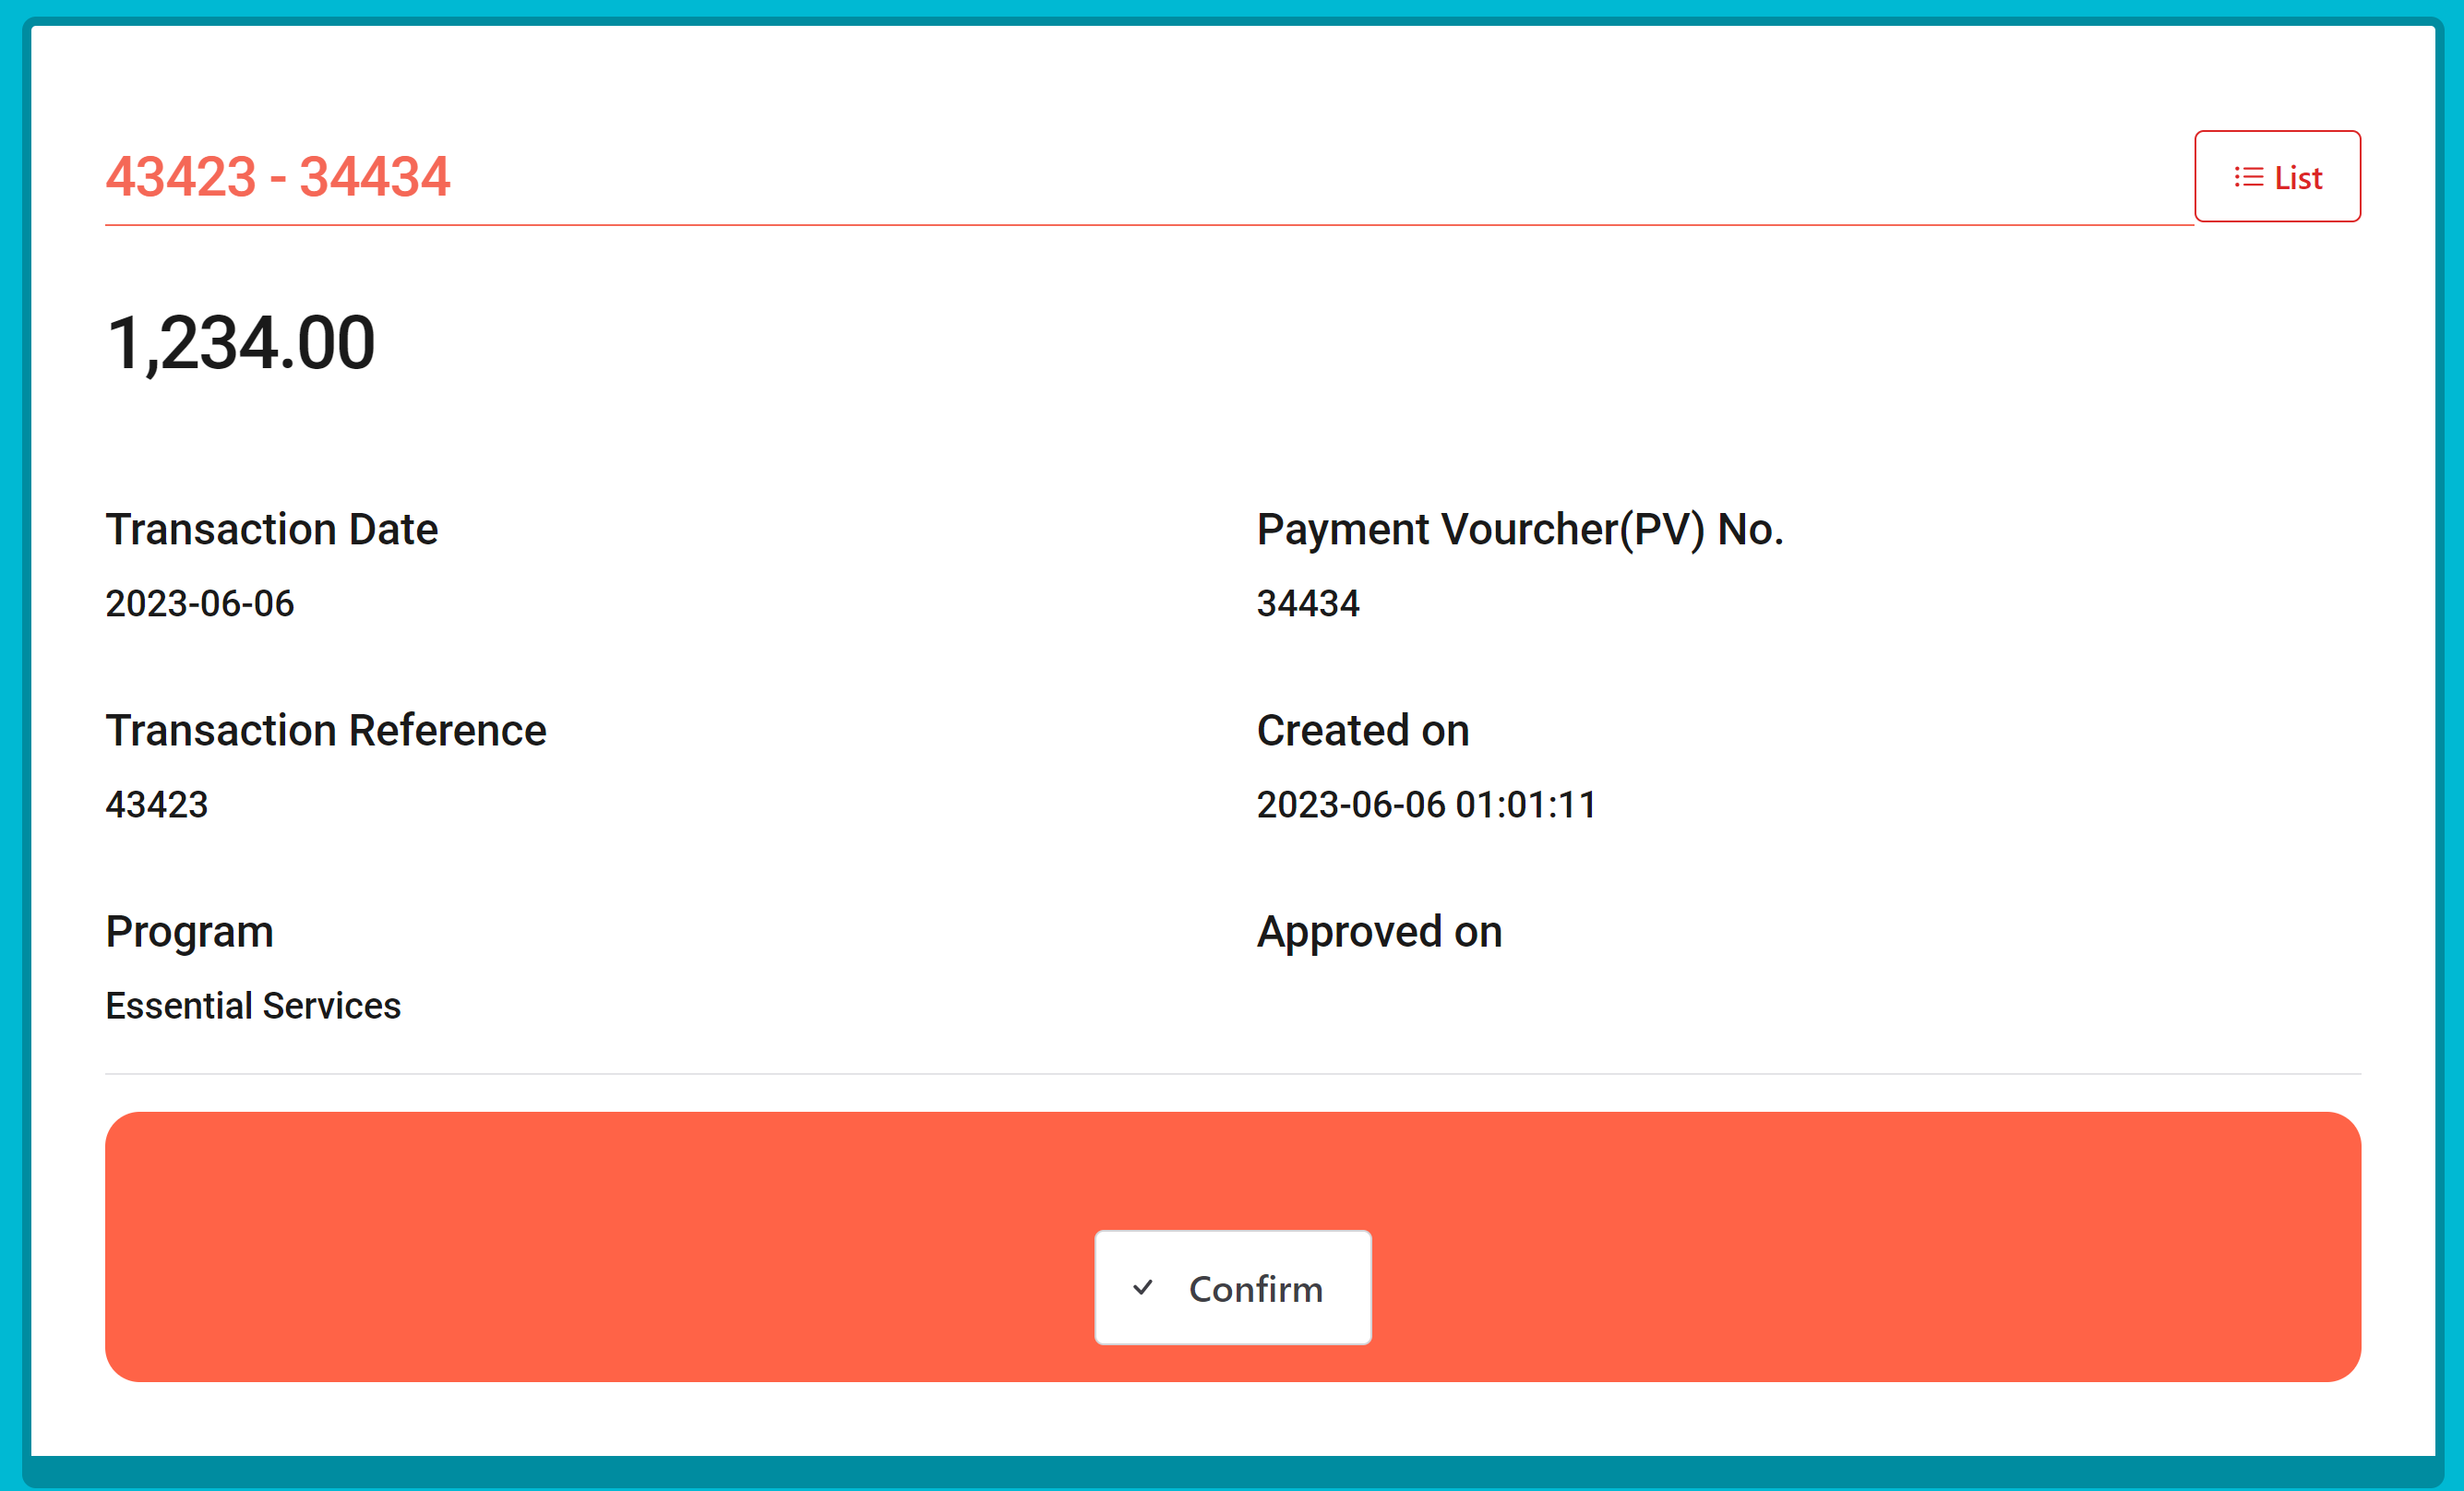
Outstanding Audits
Enter any outstanding audit from the BMCs. The BMCs have the option to mark an outstanding audit as "Resolved"
To add a new outstanding audit, click on "Outs. Audit Issues" in the navigation. Then click on "New". You will be presented with the following form: 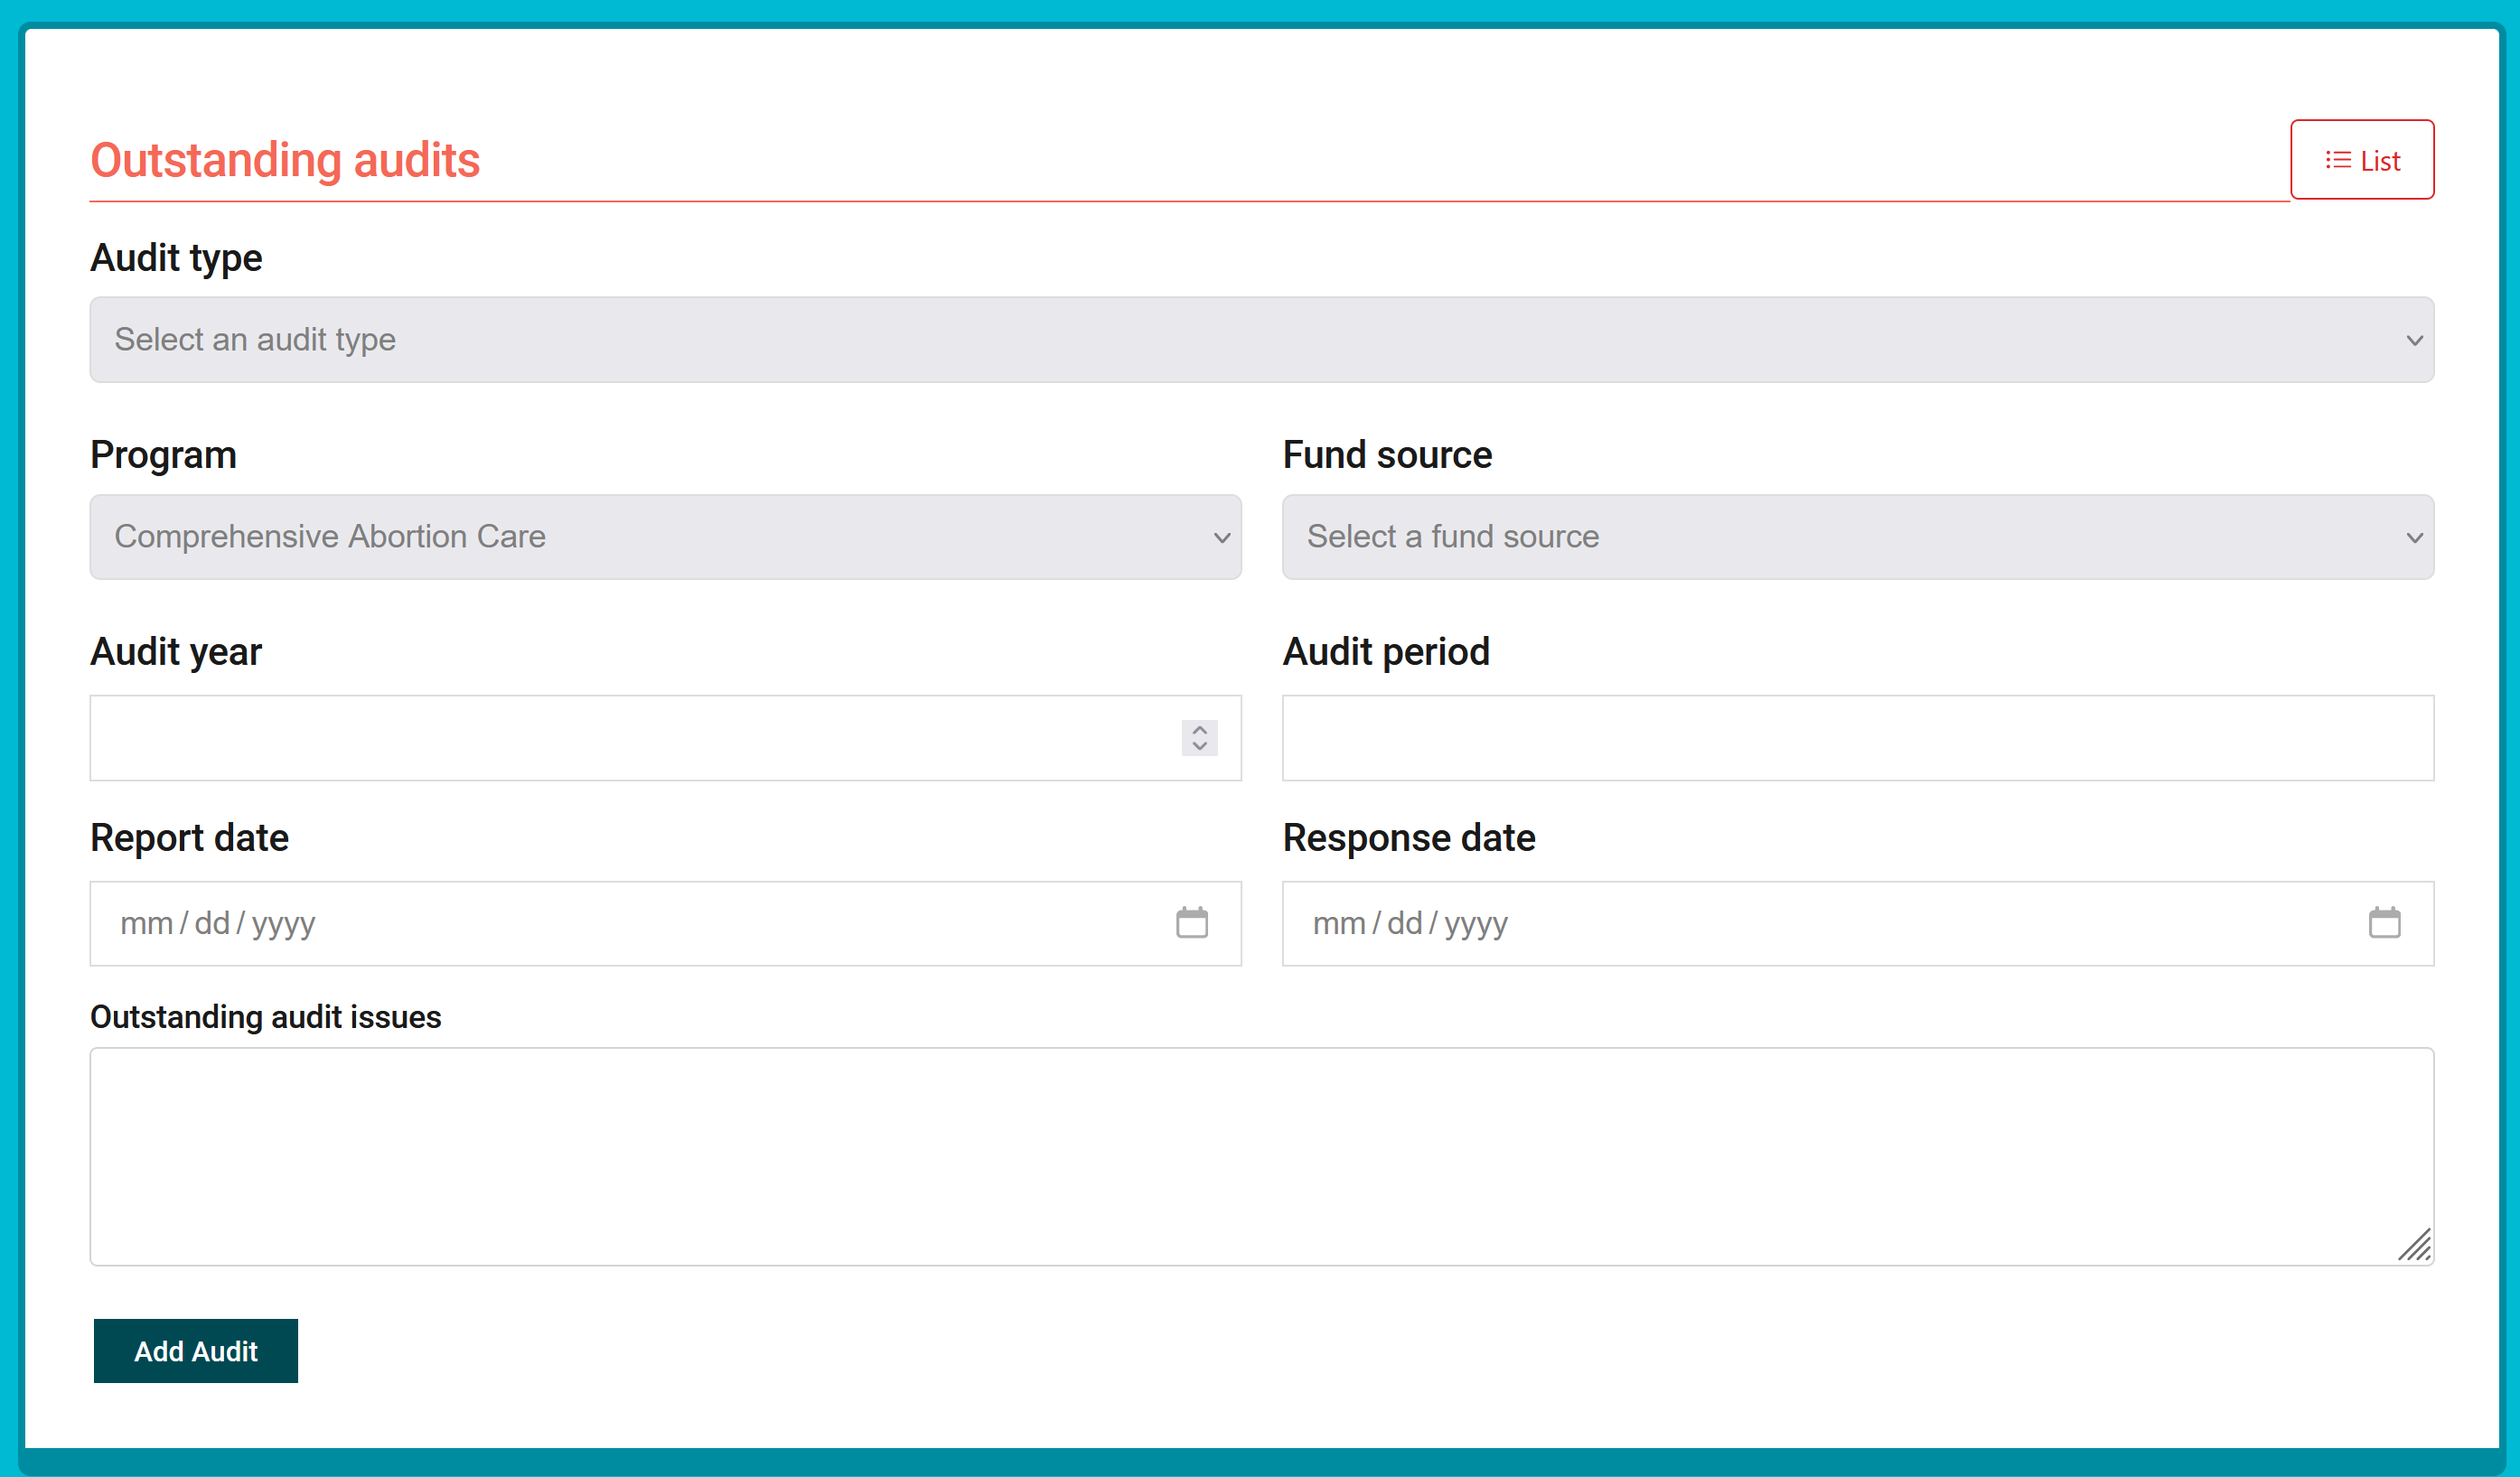
This form covers all possible audit types, programs, and the various funding sources that you can pick from.
When an outstanding audit issue is entered, it's made available for the HQ and the top RHD to see until it's marked as resolved. 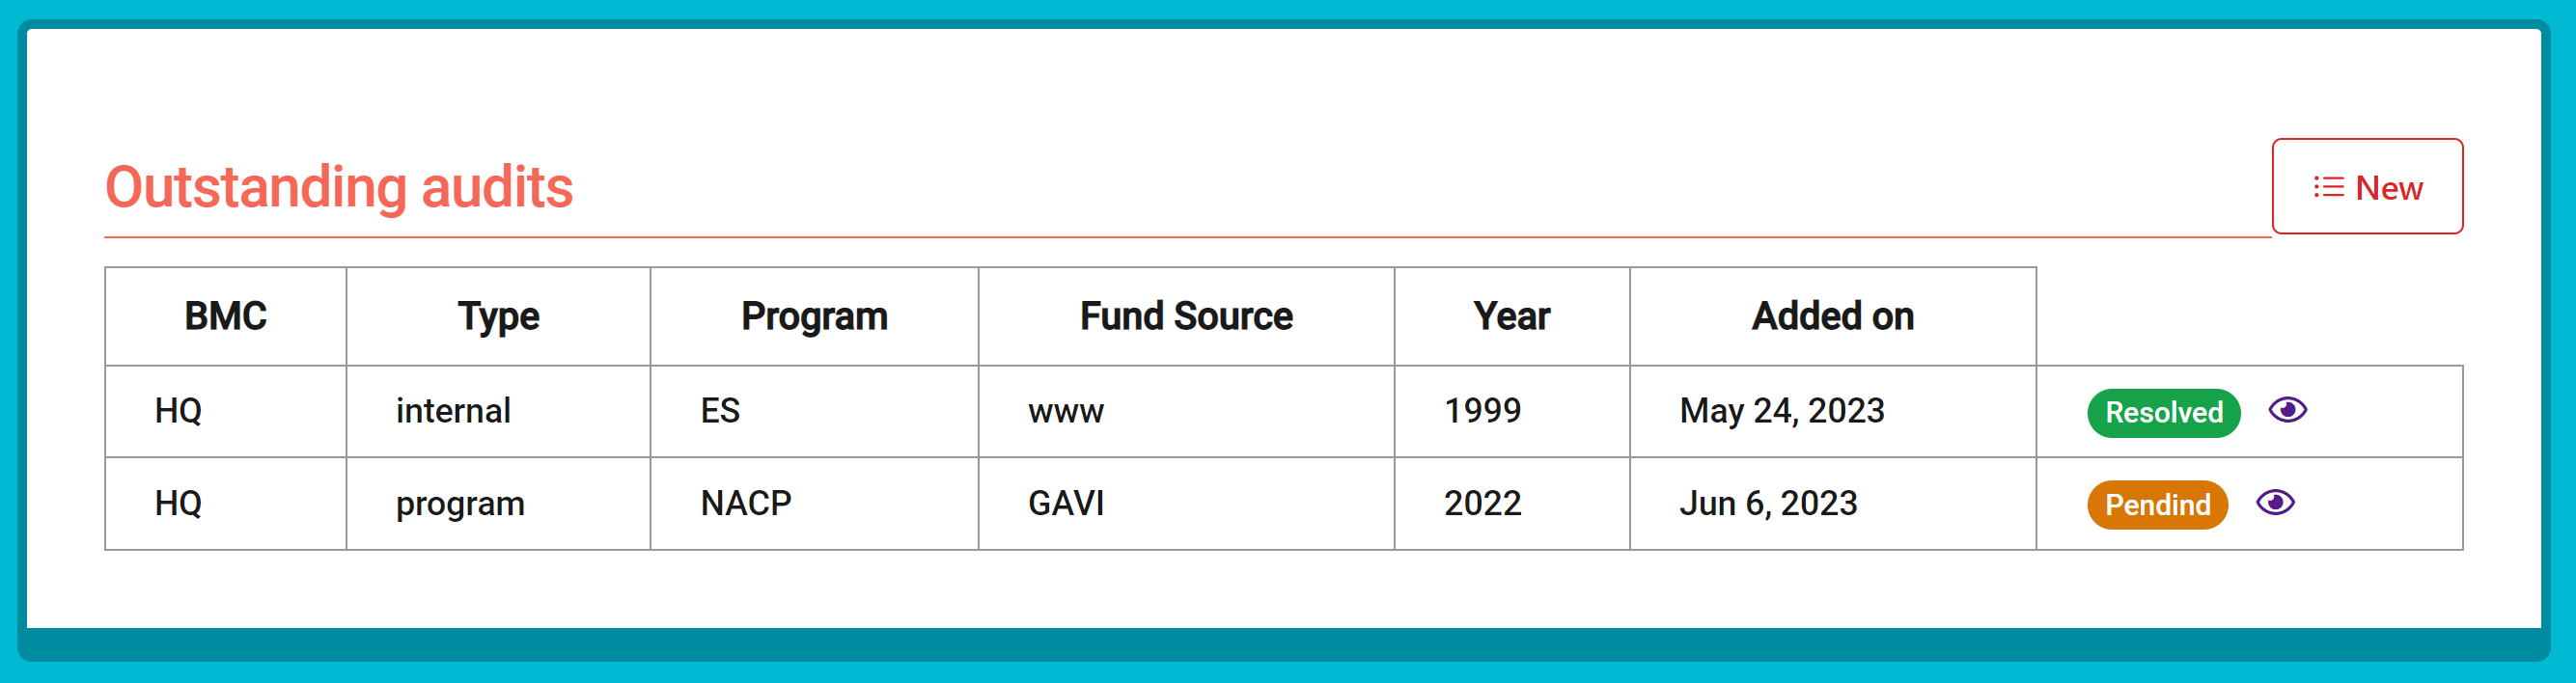
And you can see the details of the issue by clicking on the eye in front of it: 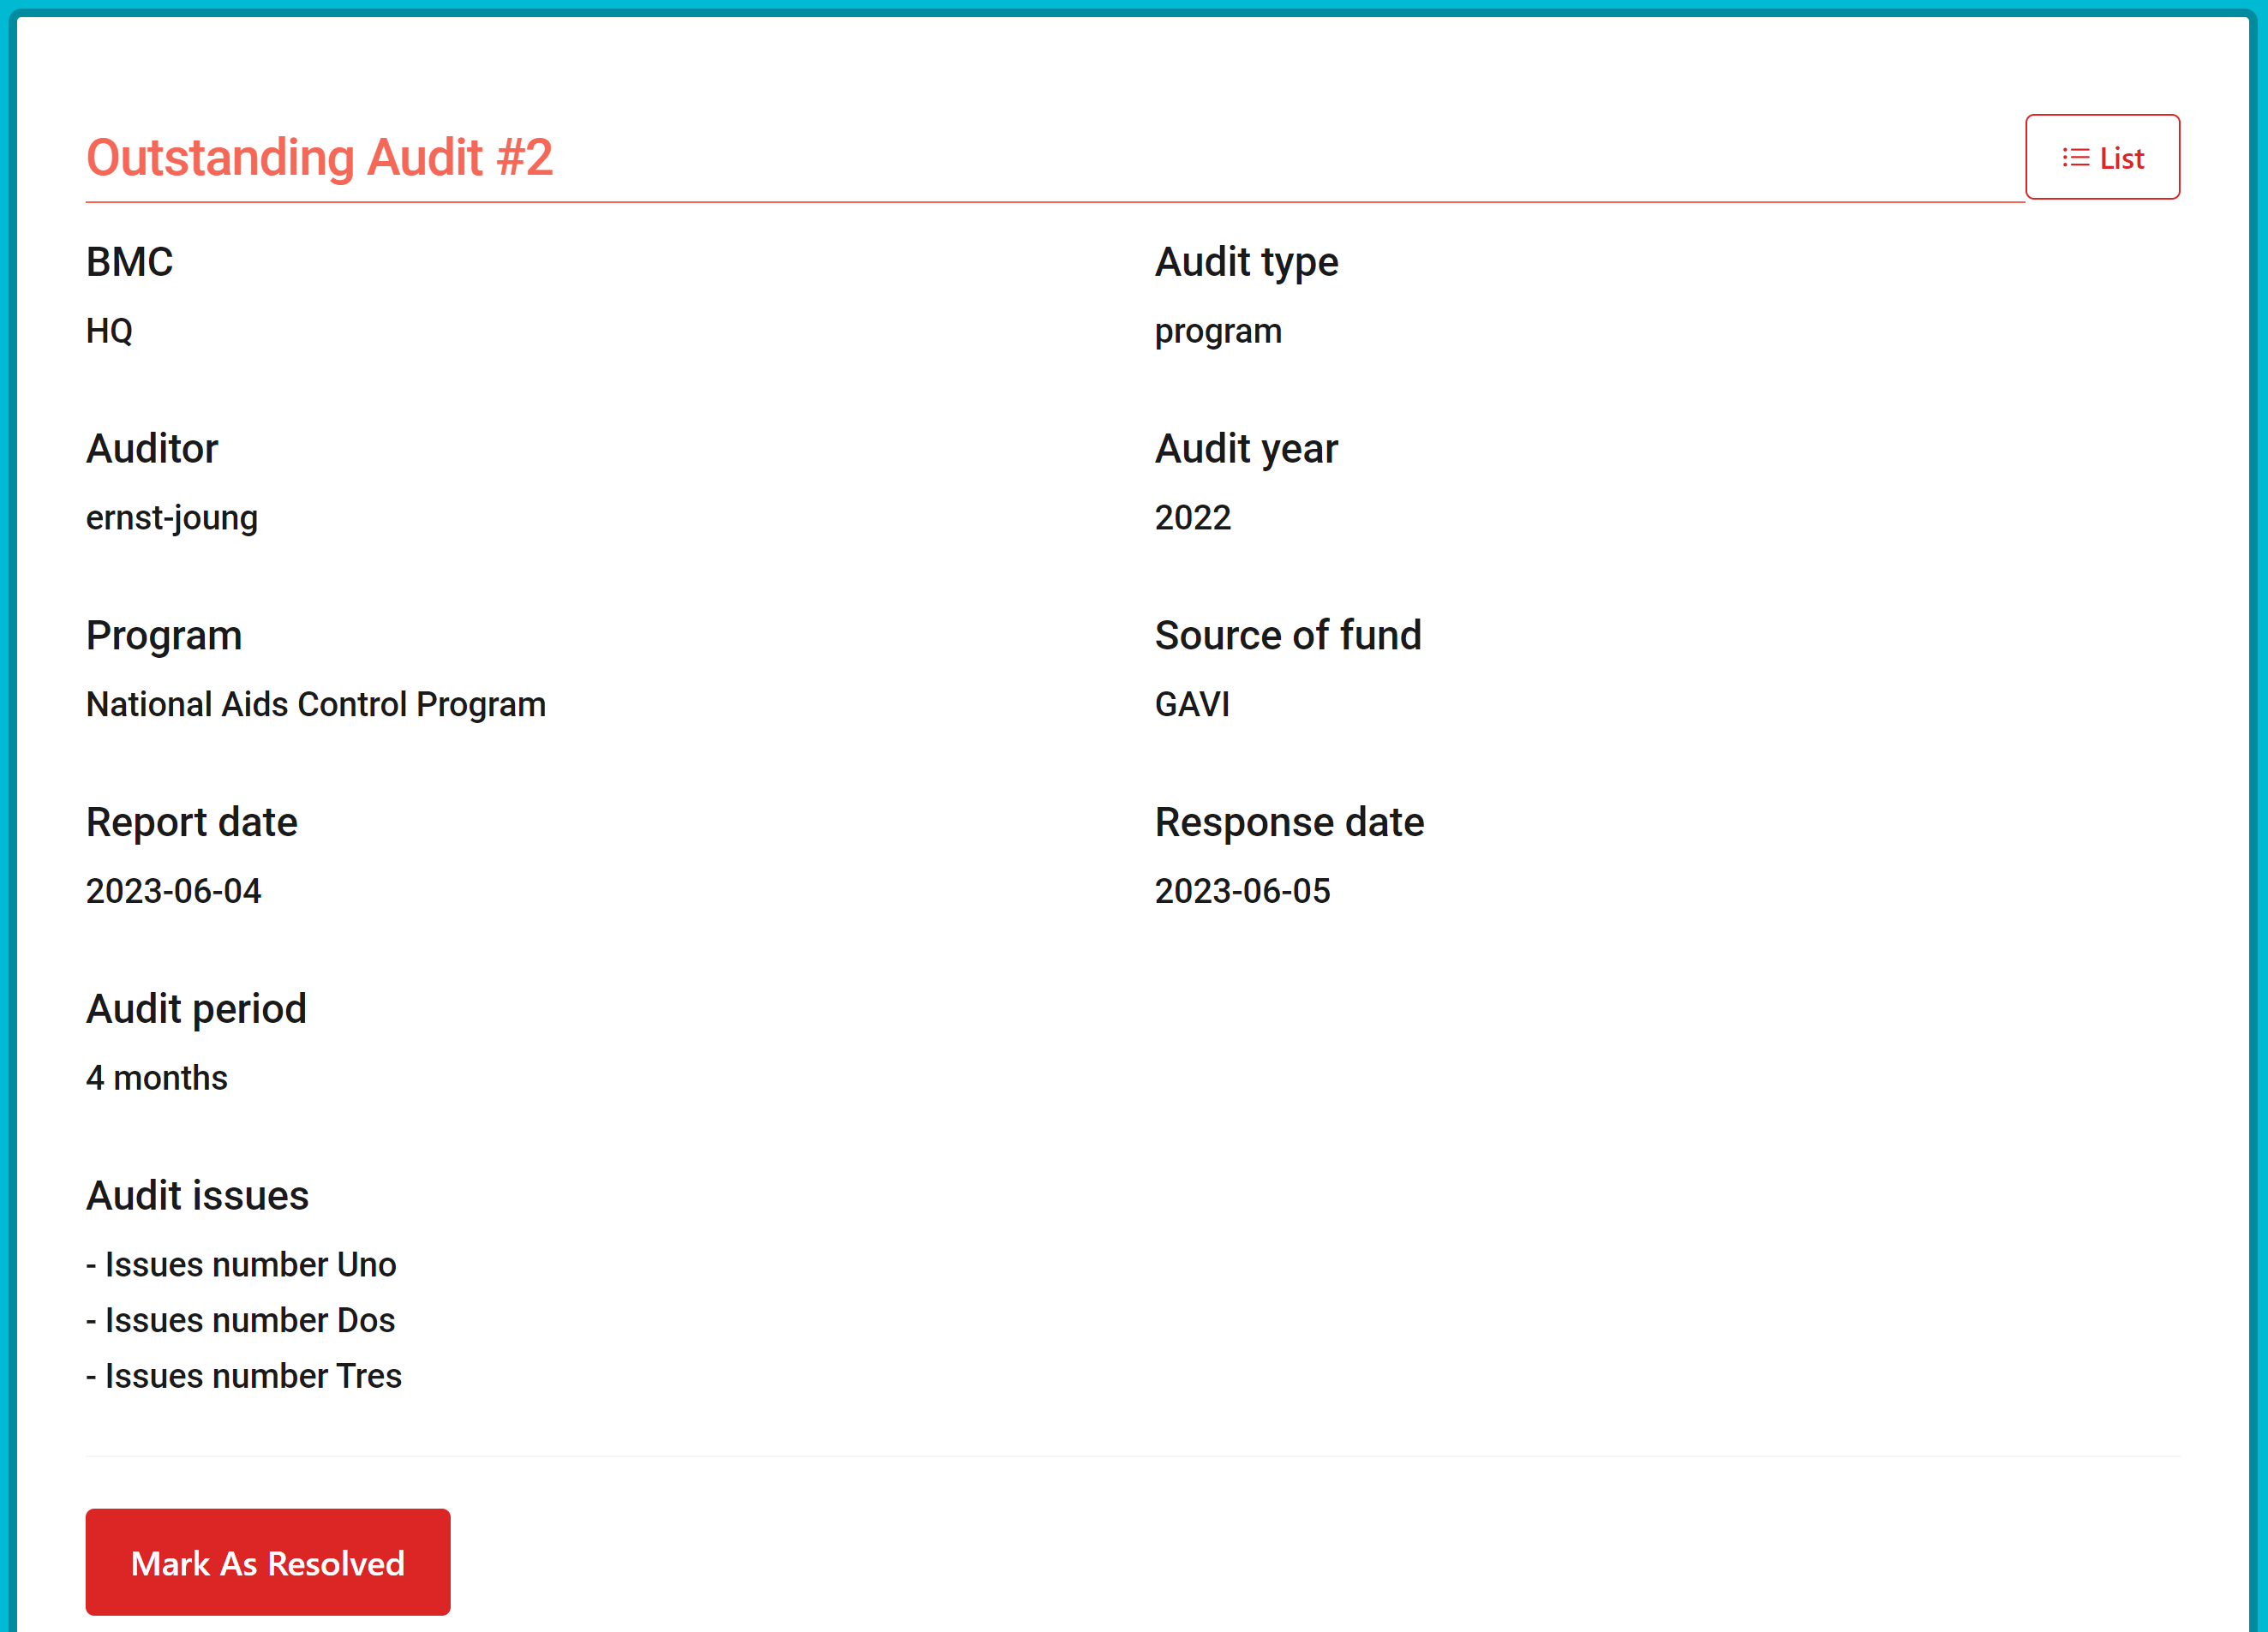
IGF - Internally Generated Funds
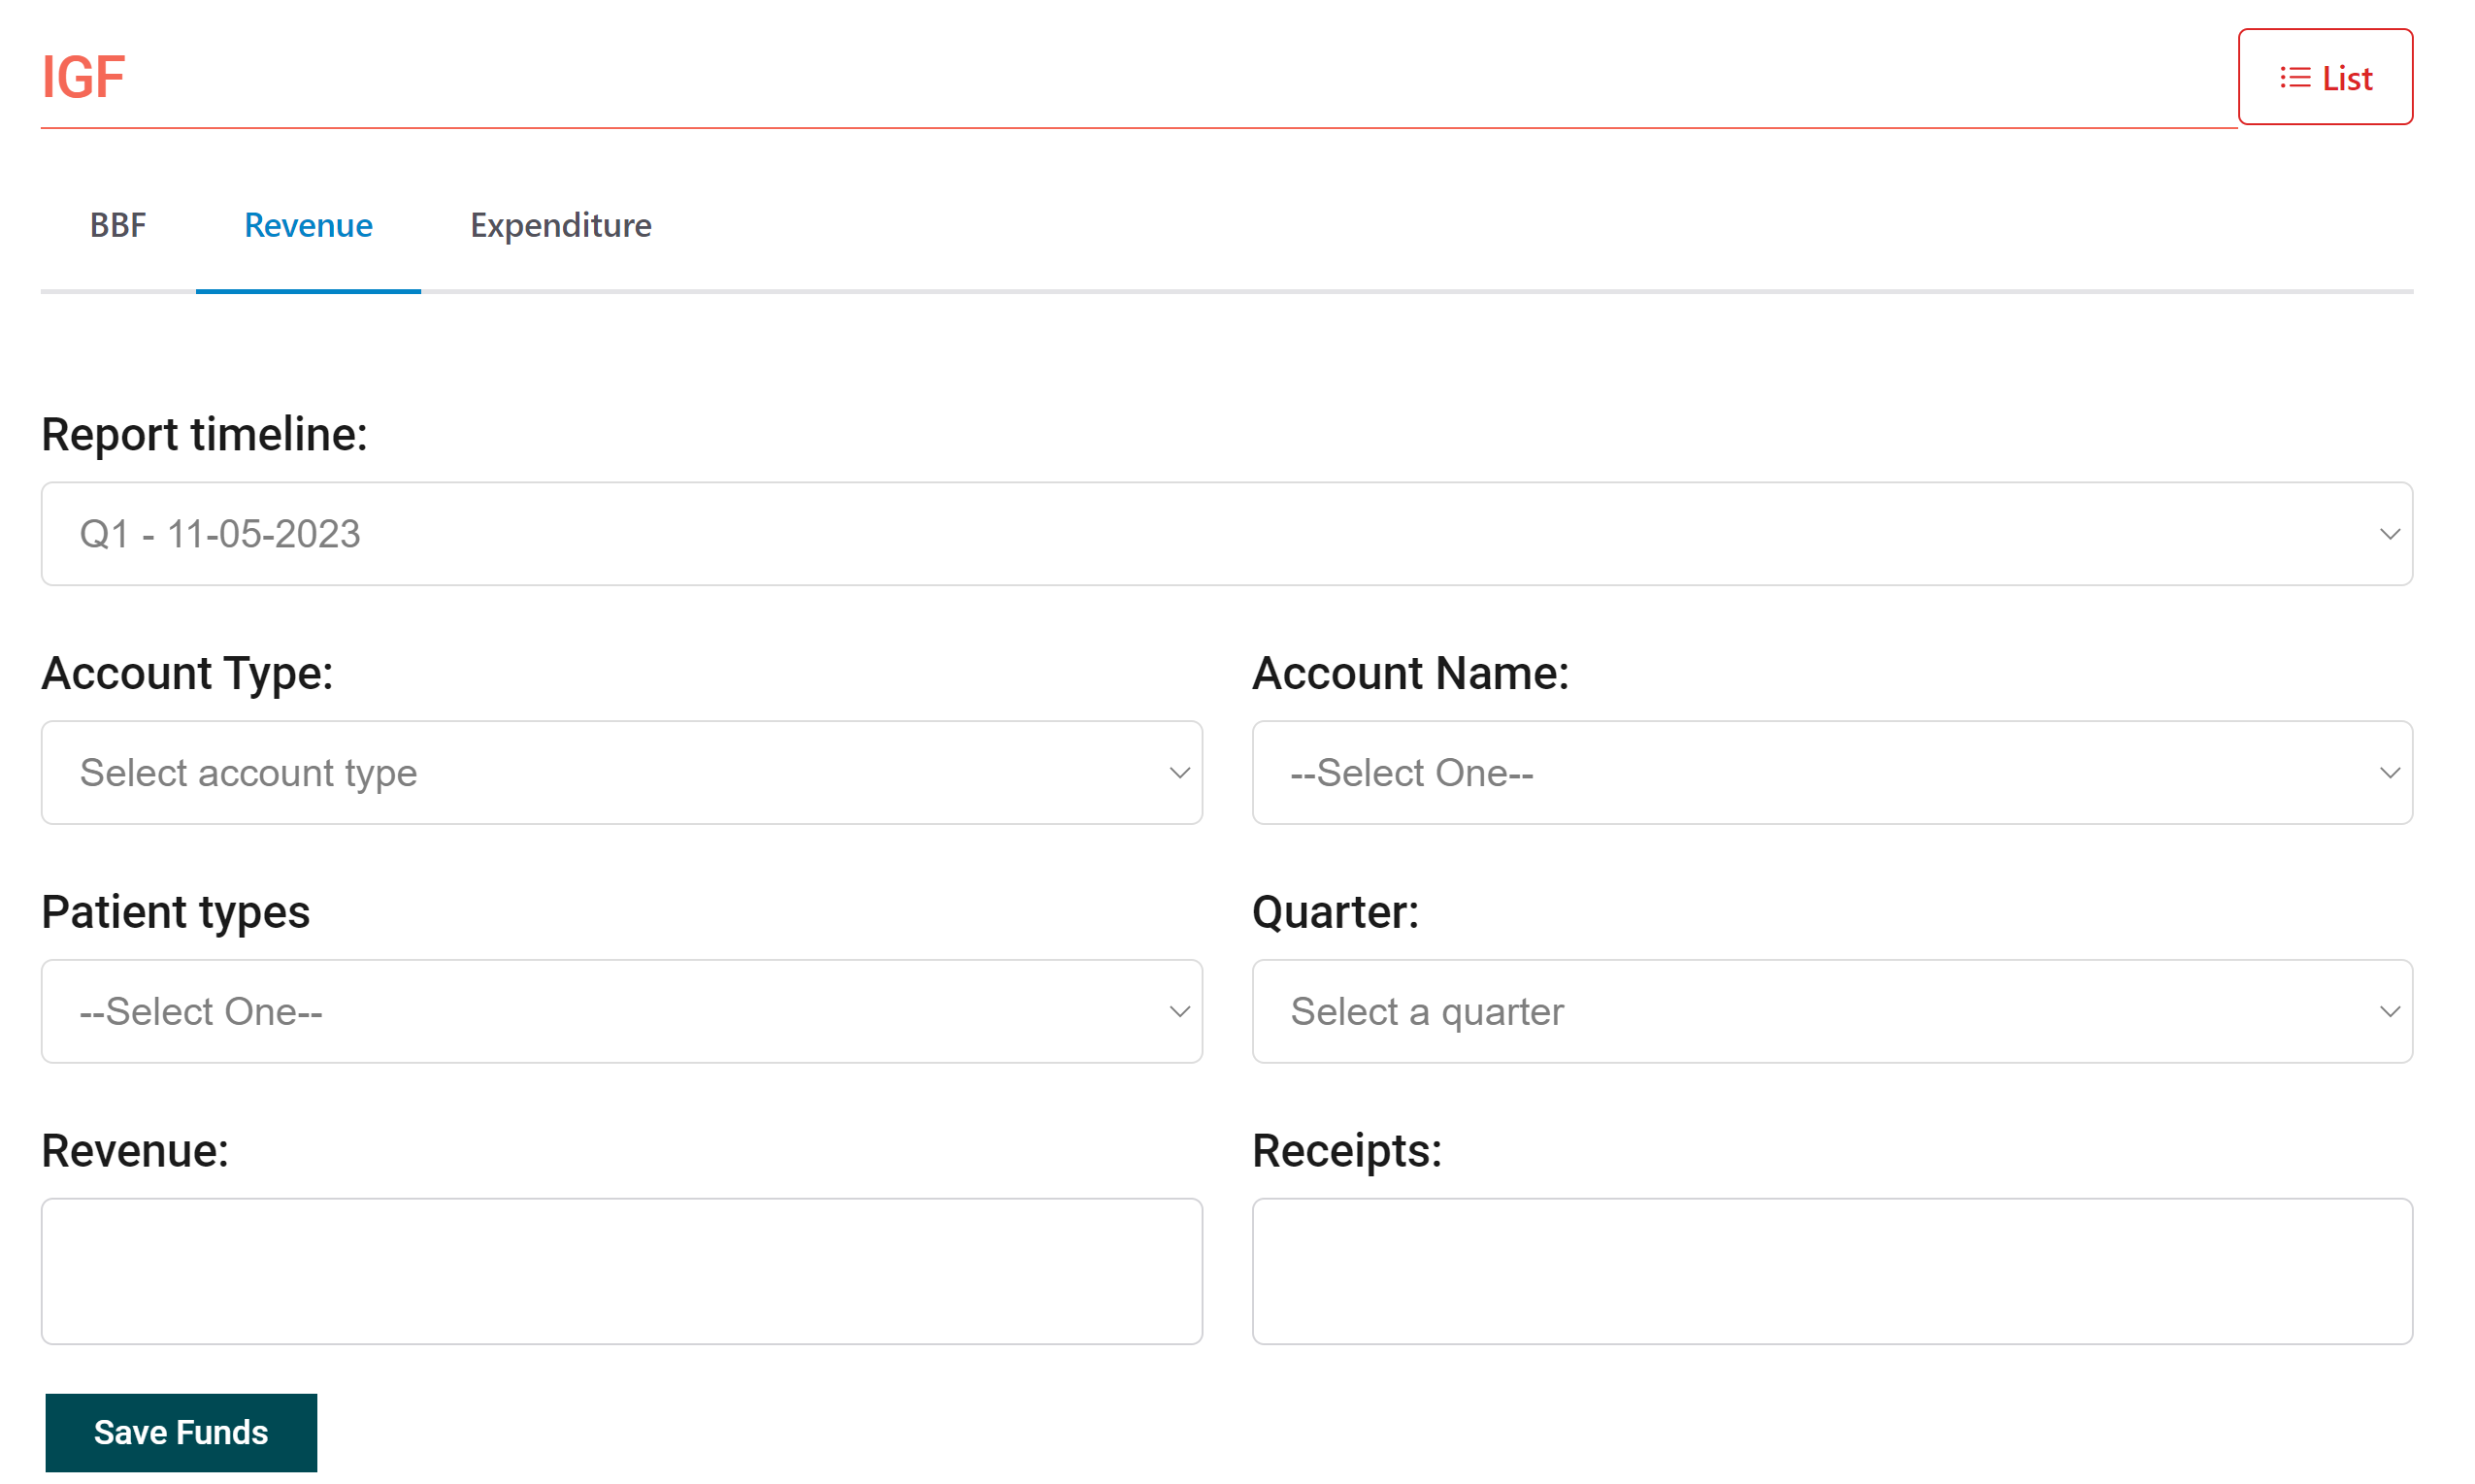
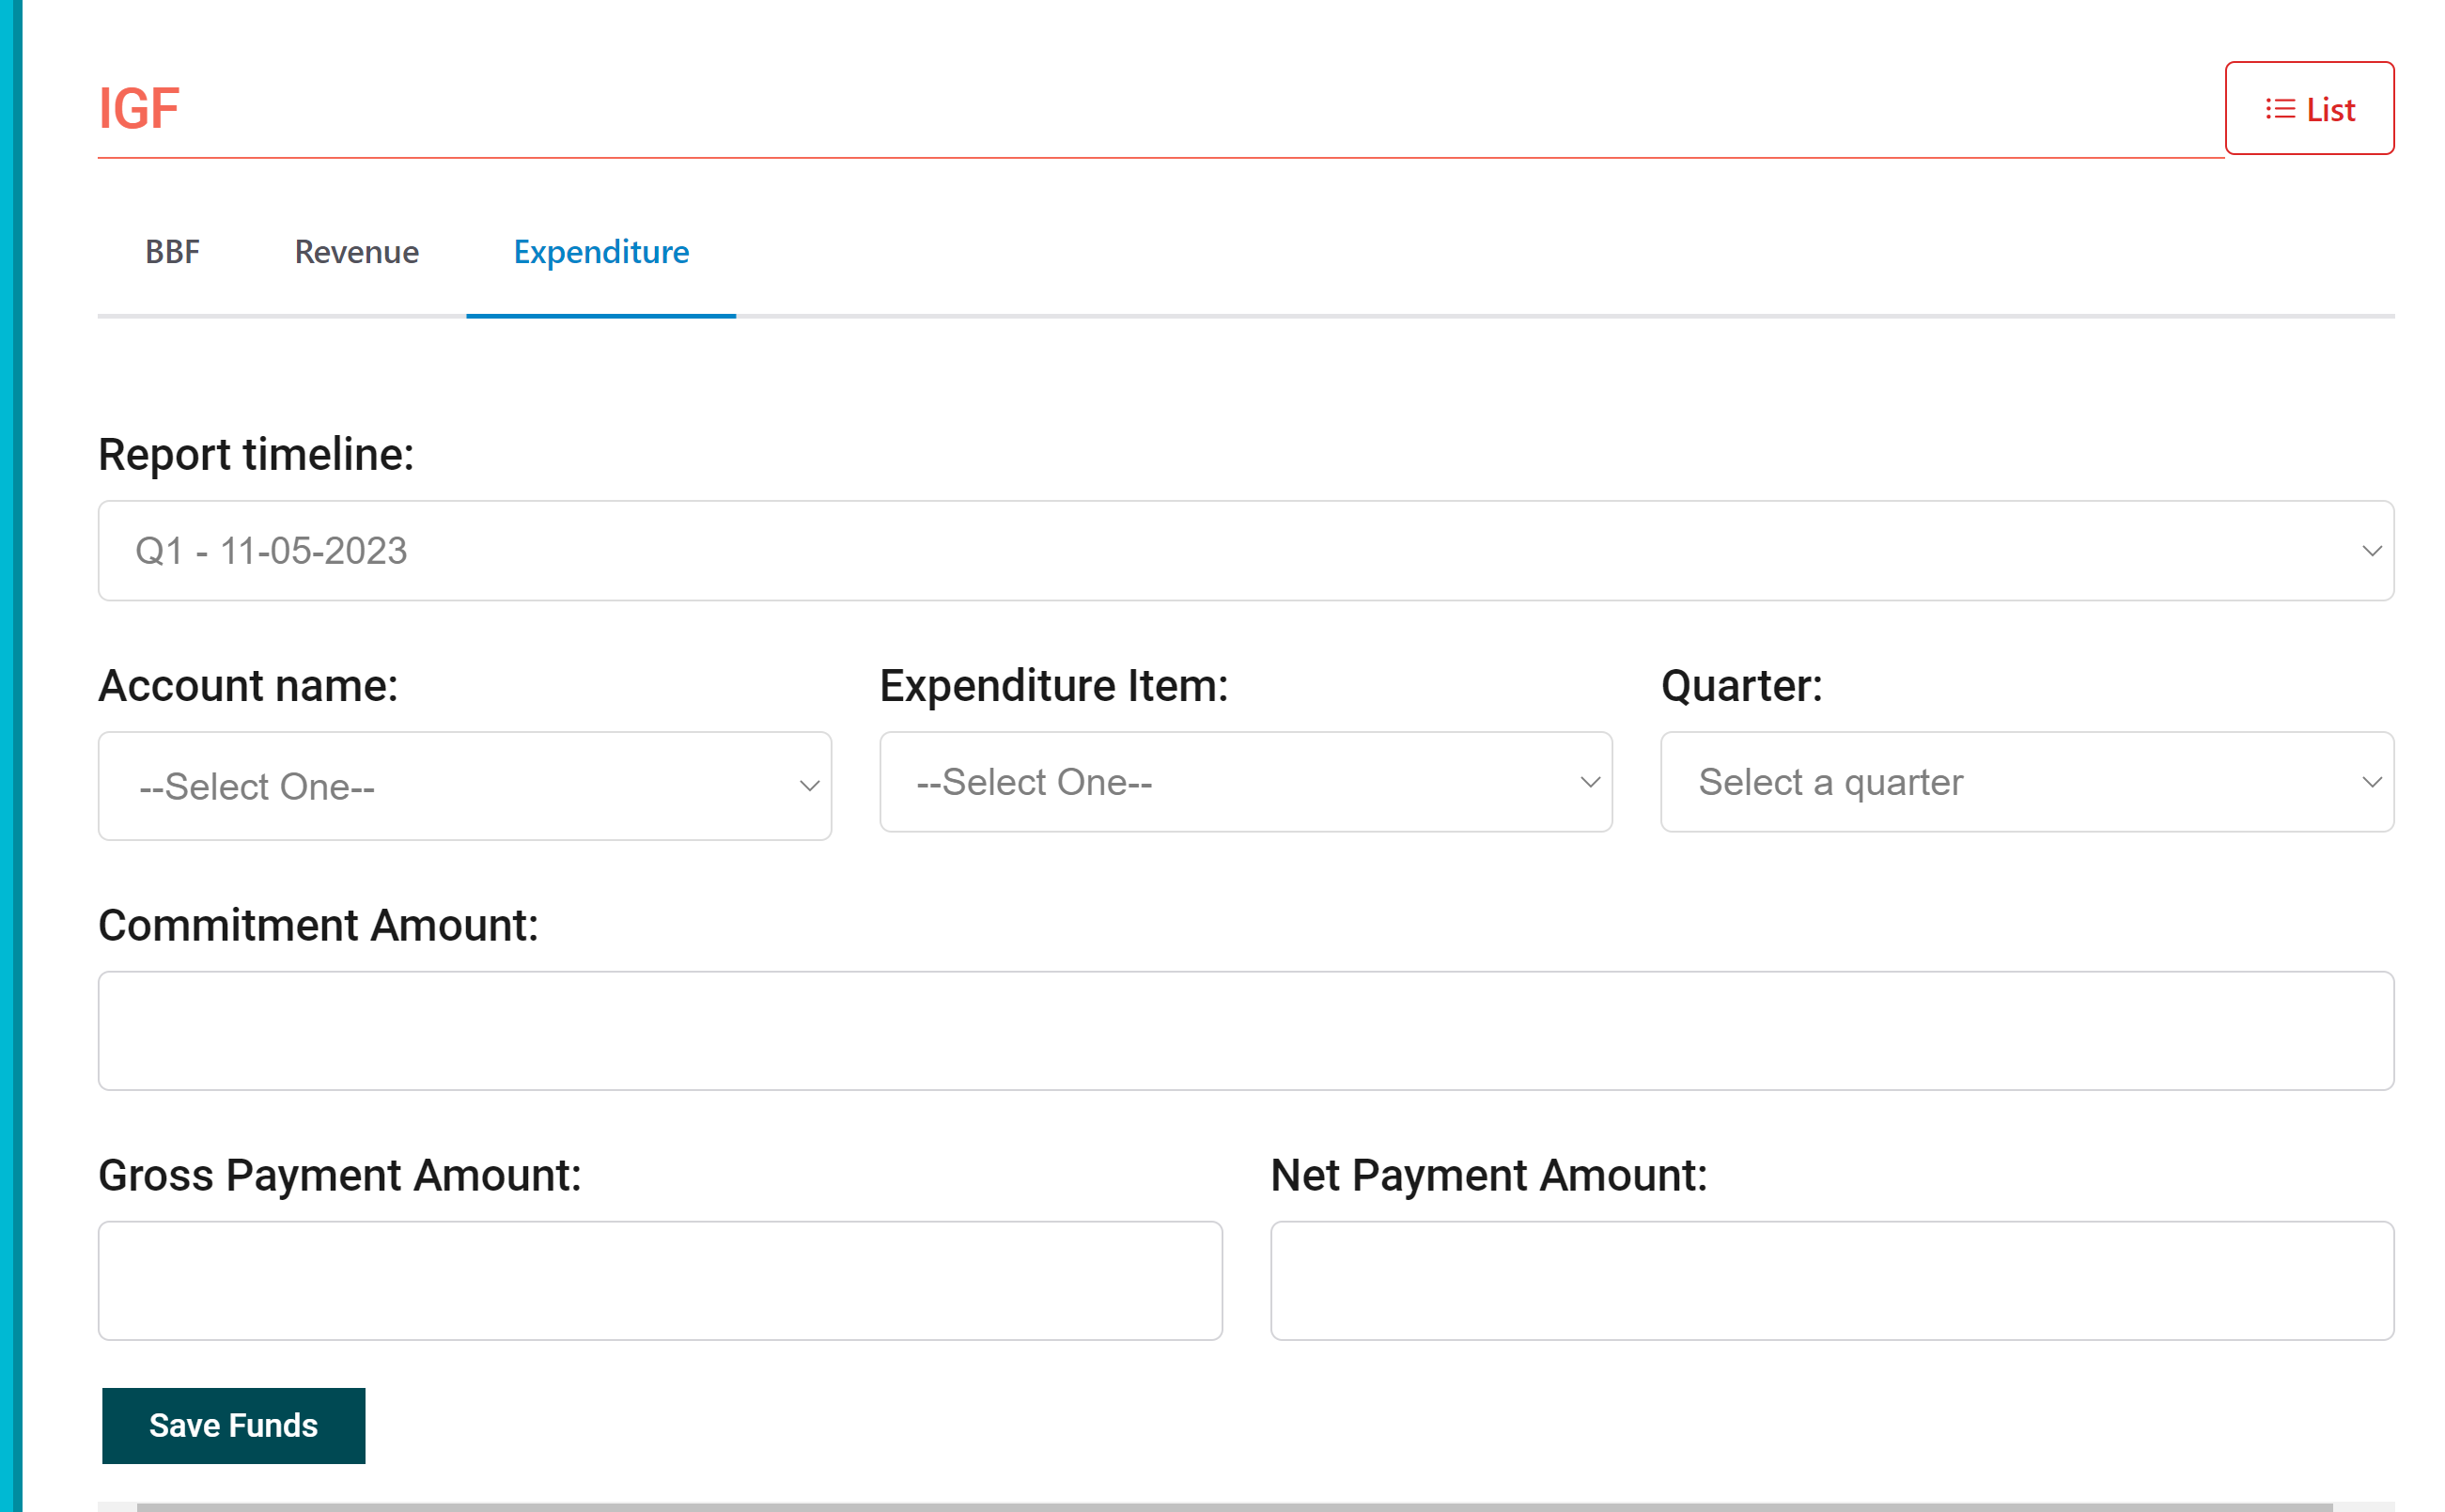
To acces the IGF data entry form, click on "IGF" on the navigation menu, then click on "New". Clicking on the "Igf" will show you a few entries of IGF. The following form is used to make the entries of IGF data:
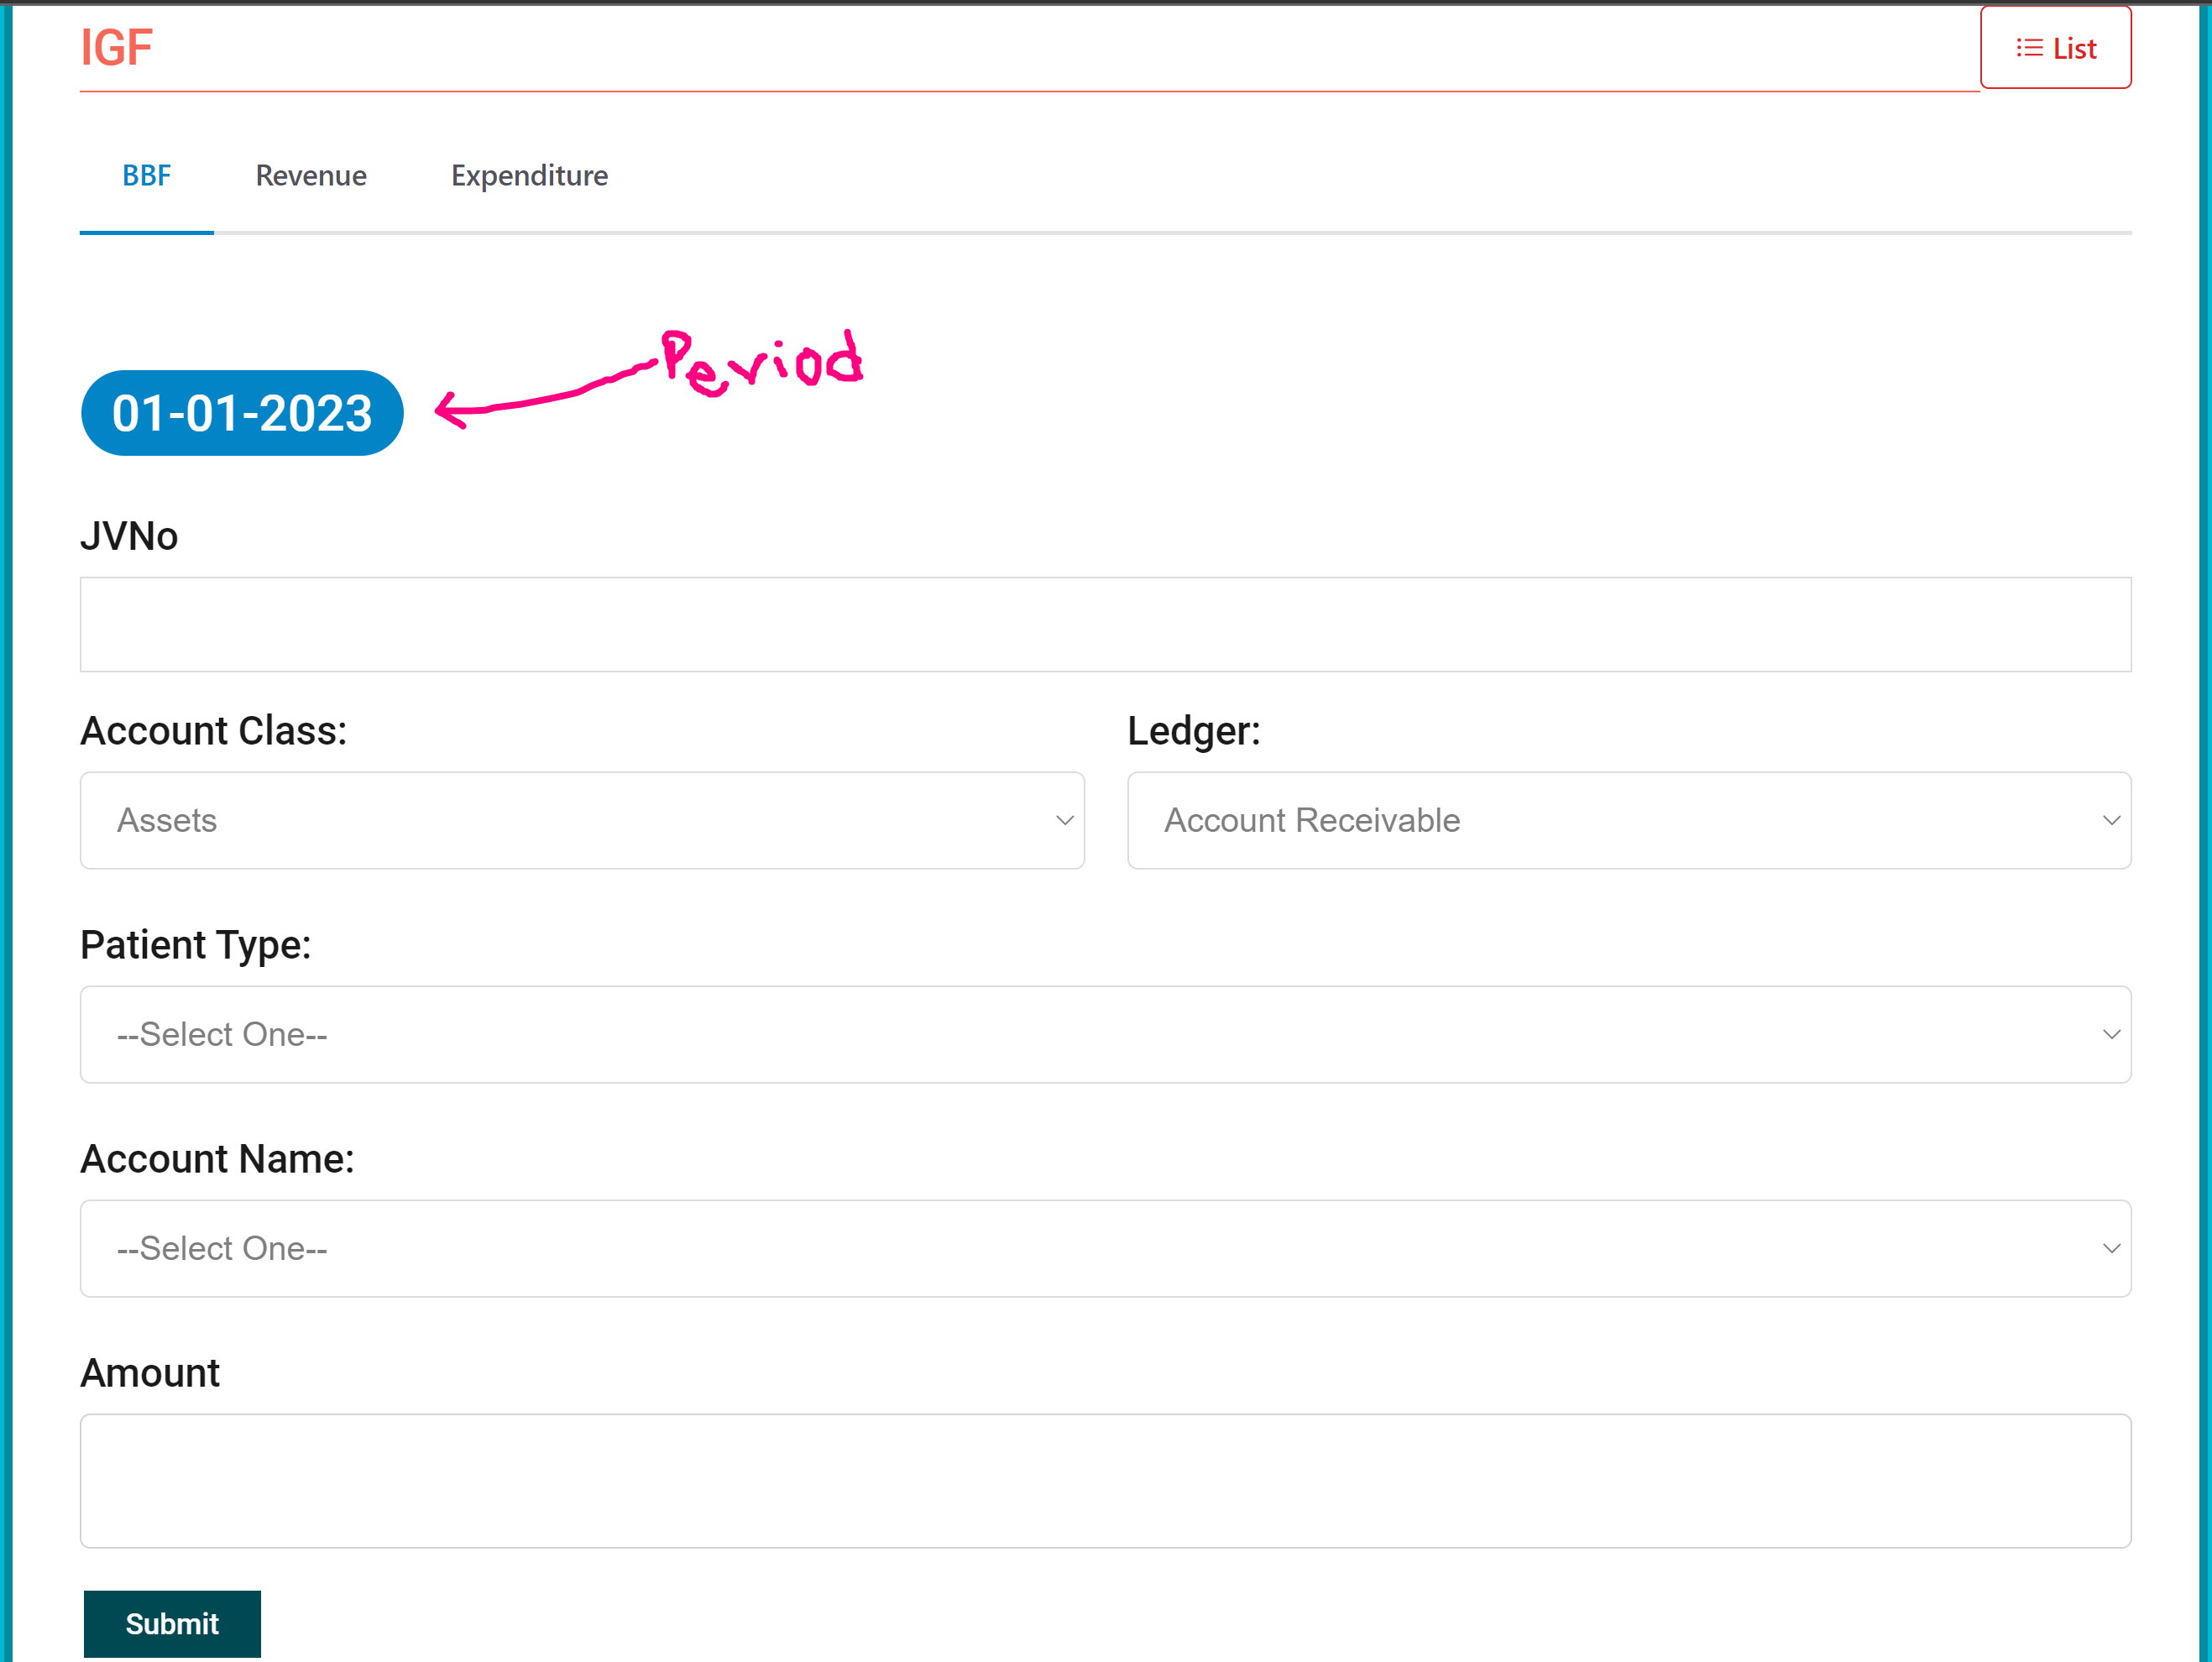
So you can enter more data for BBF such as Balance brought Forward, Revenue, and expenses:
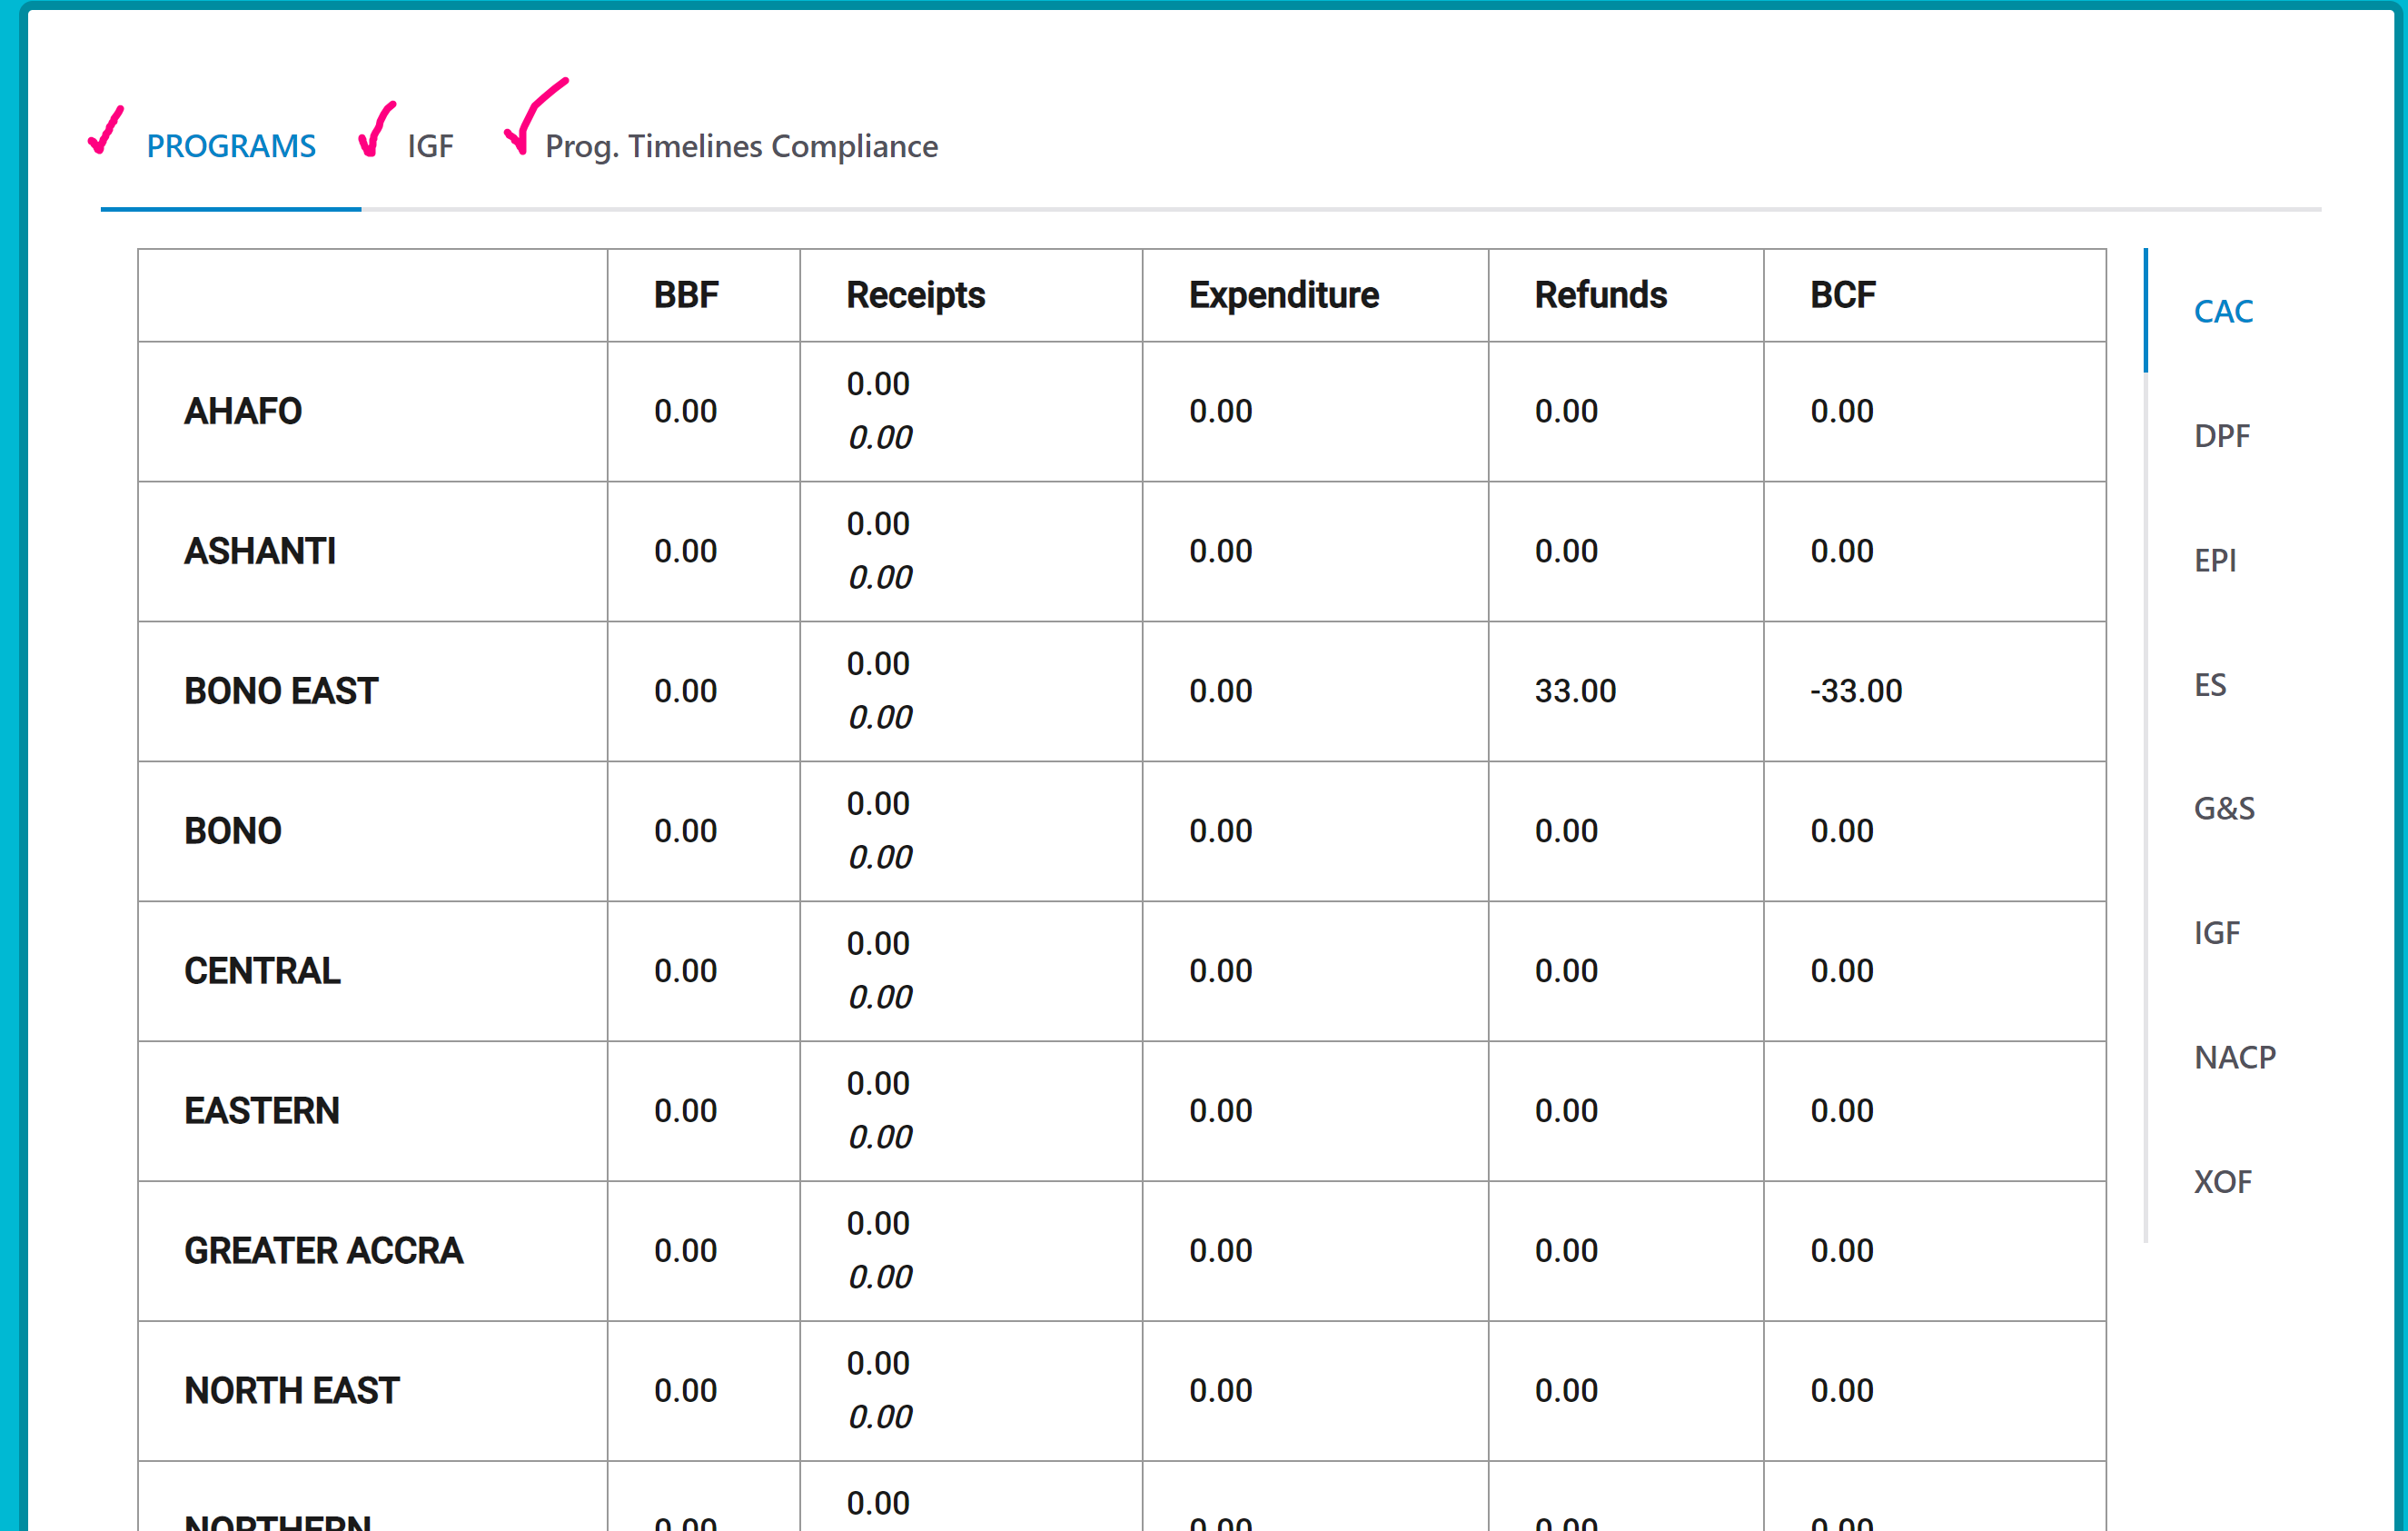
Reporting
Reporting gives you access to an overview of the system data. You can have access to the programs reporting, IGF reporting, and programs timelines compliances reporting
IGF Reporting: 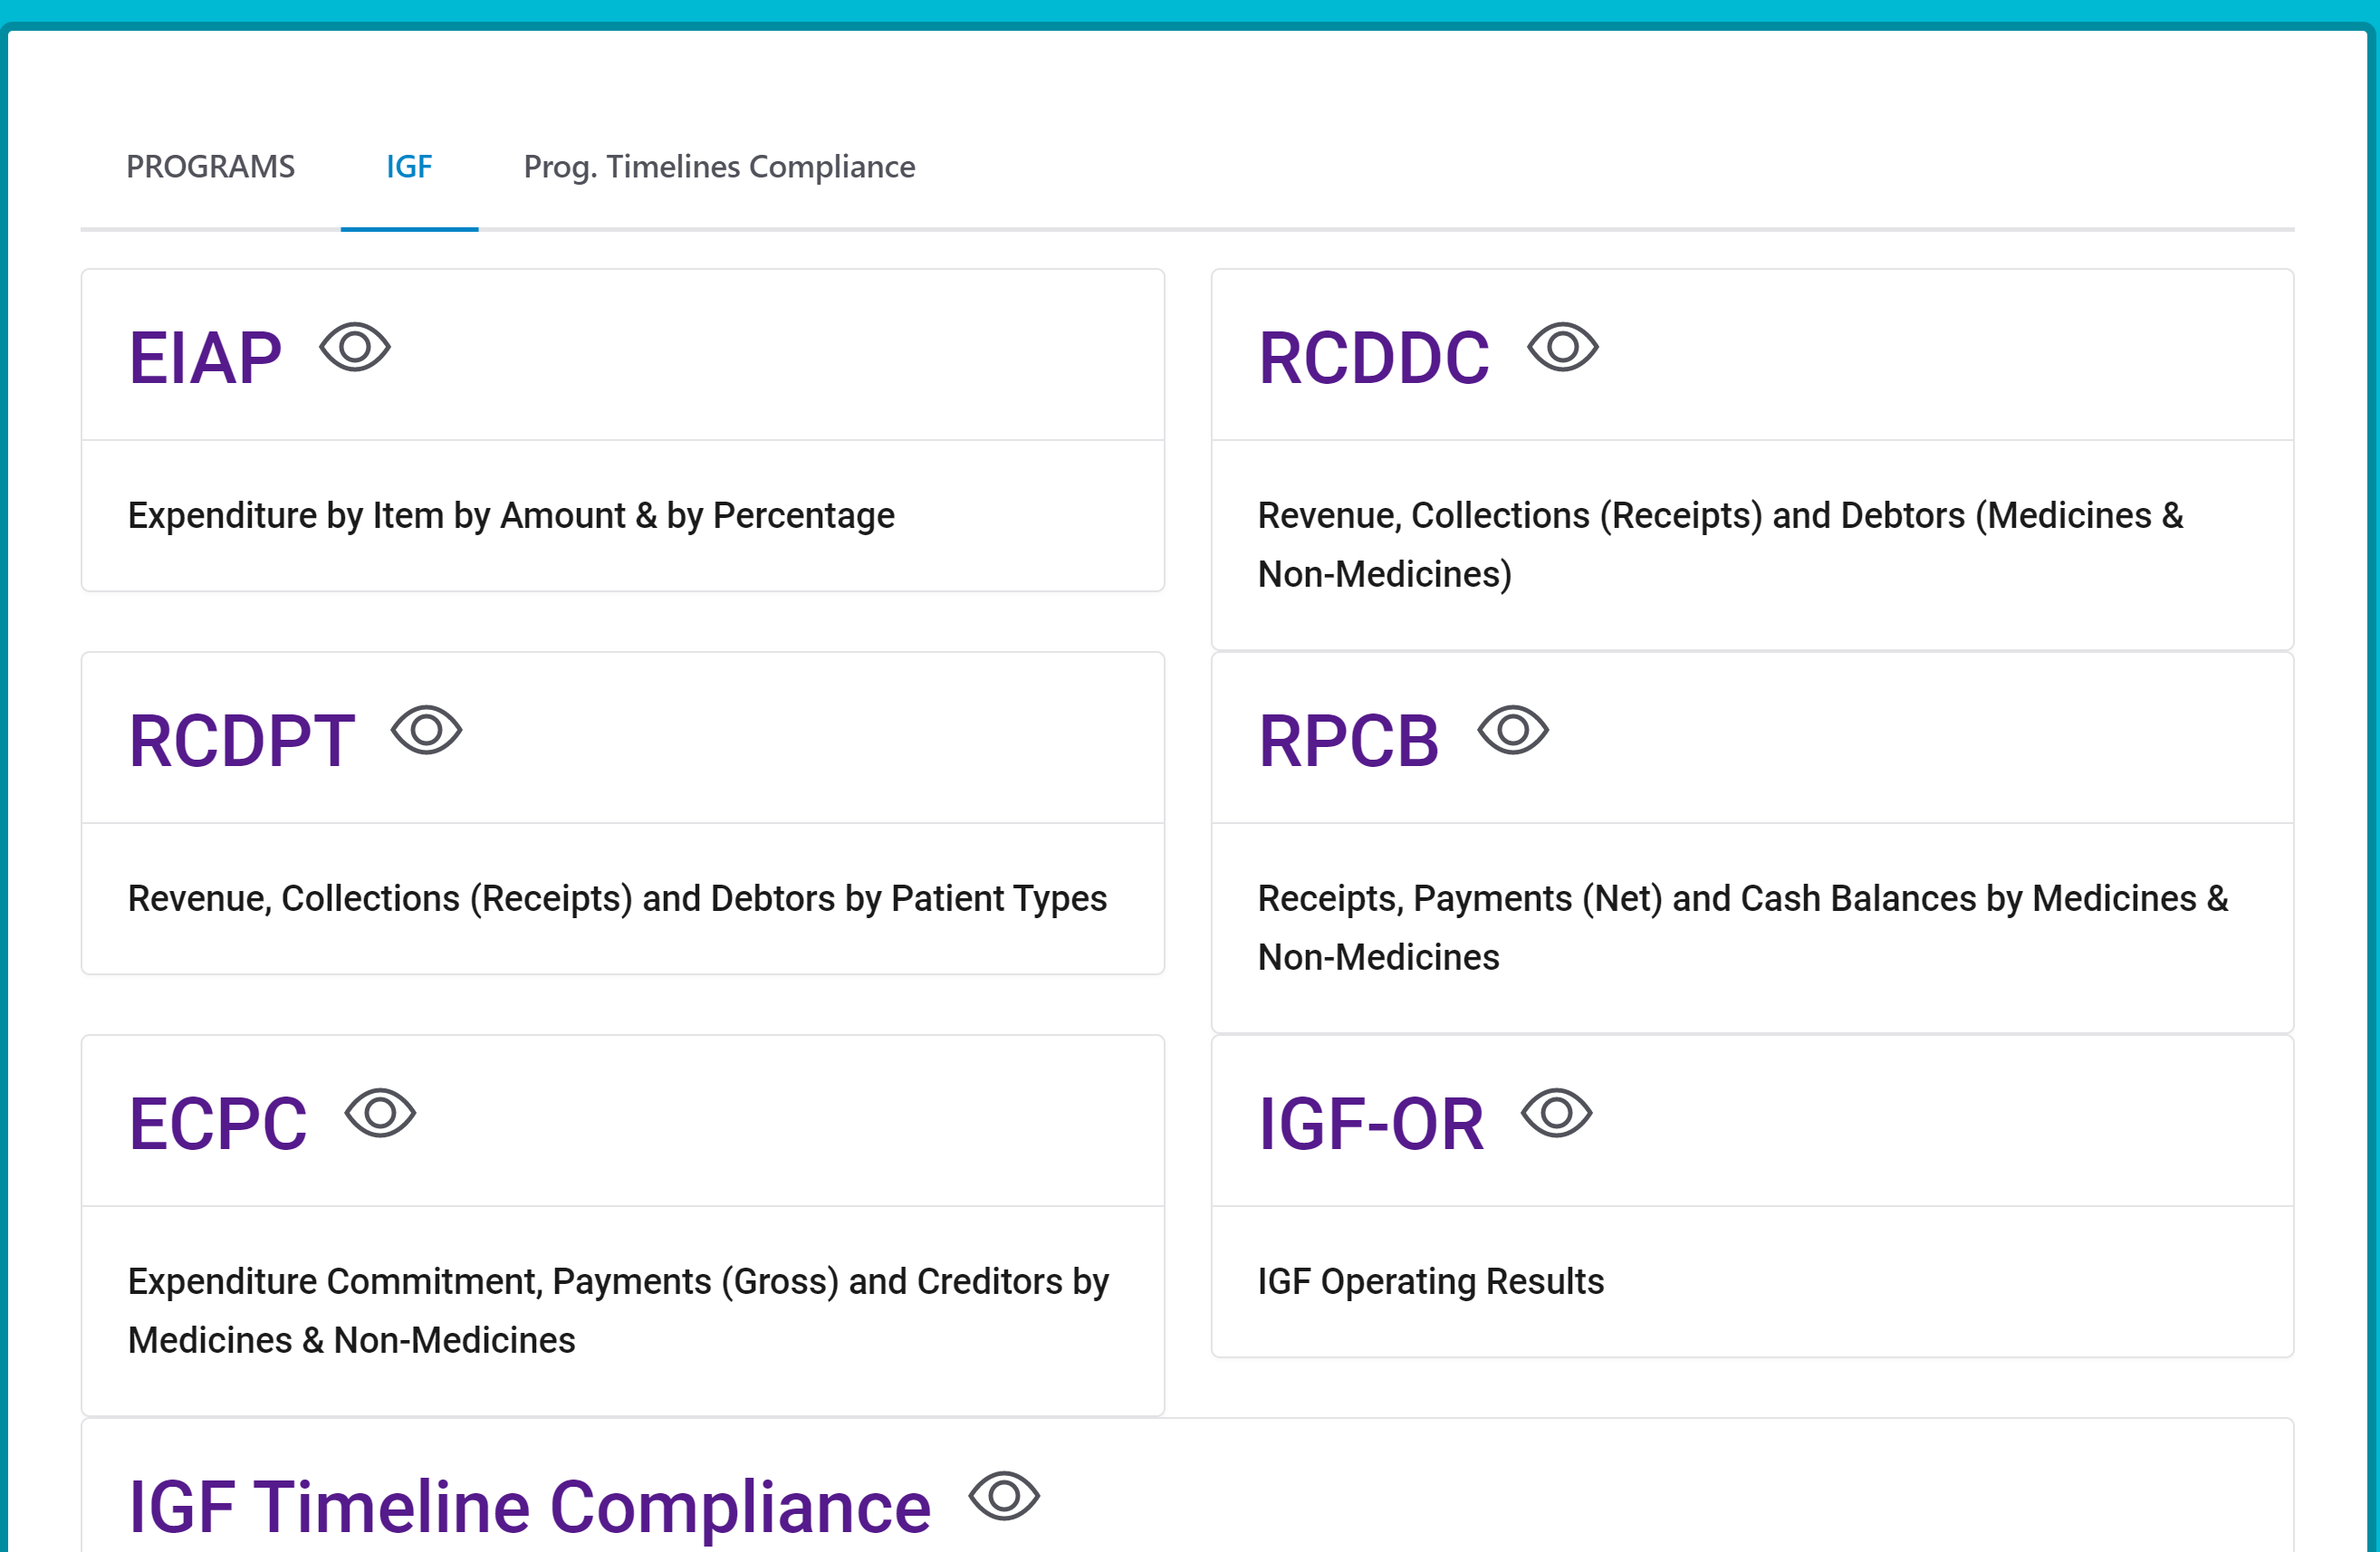
Programs timelines compliances: 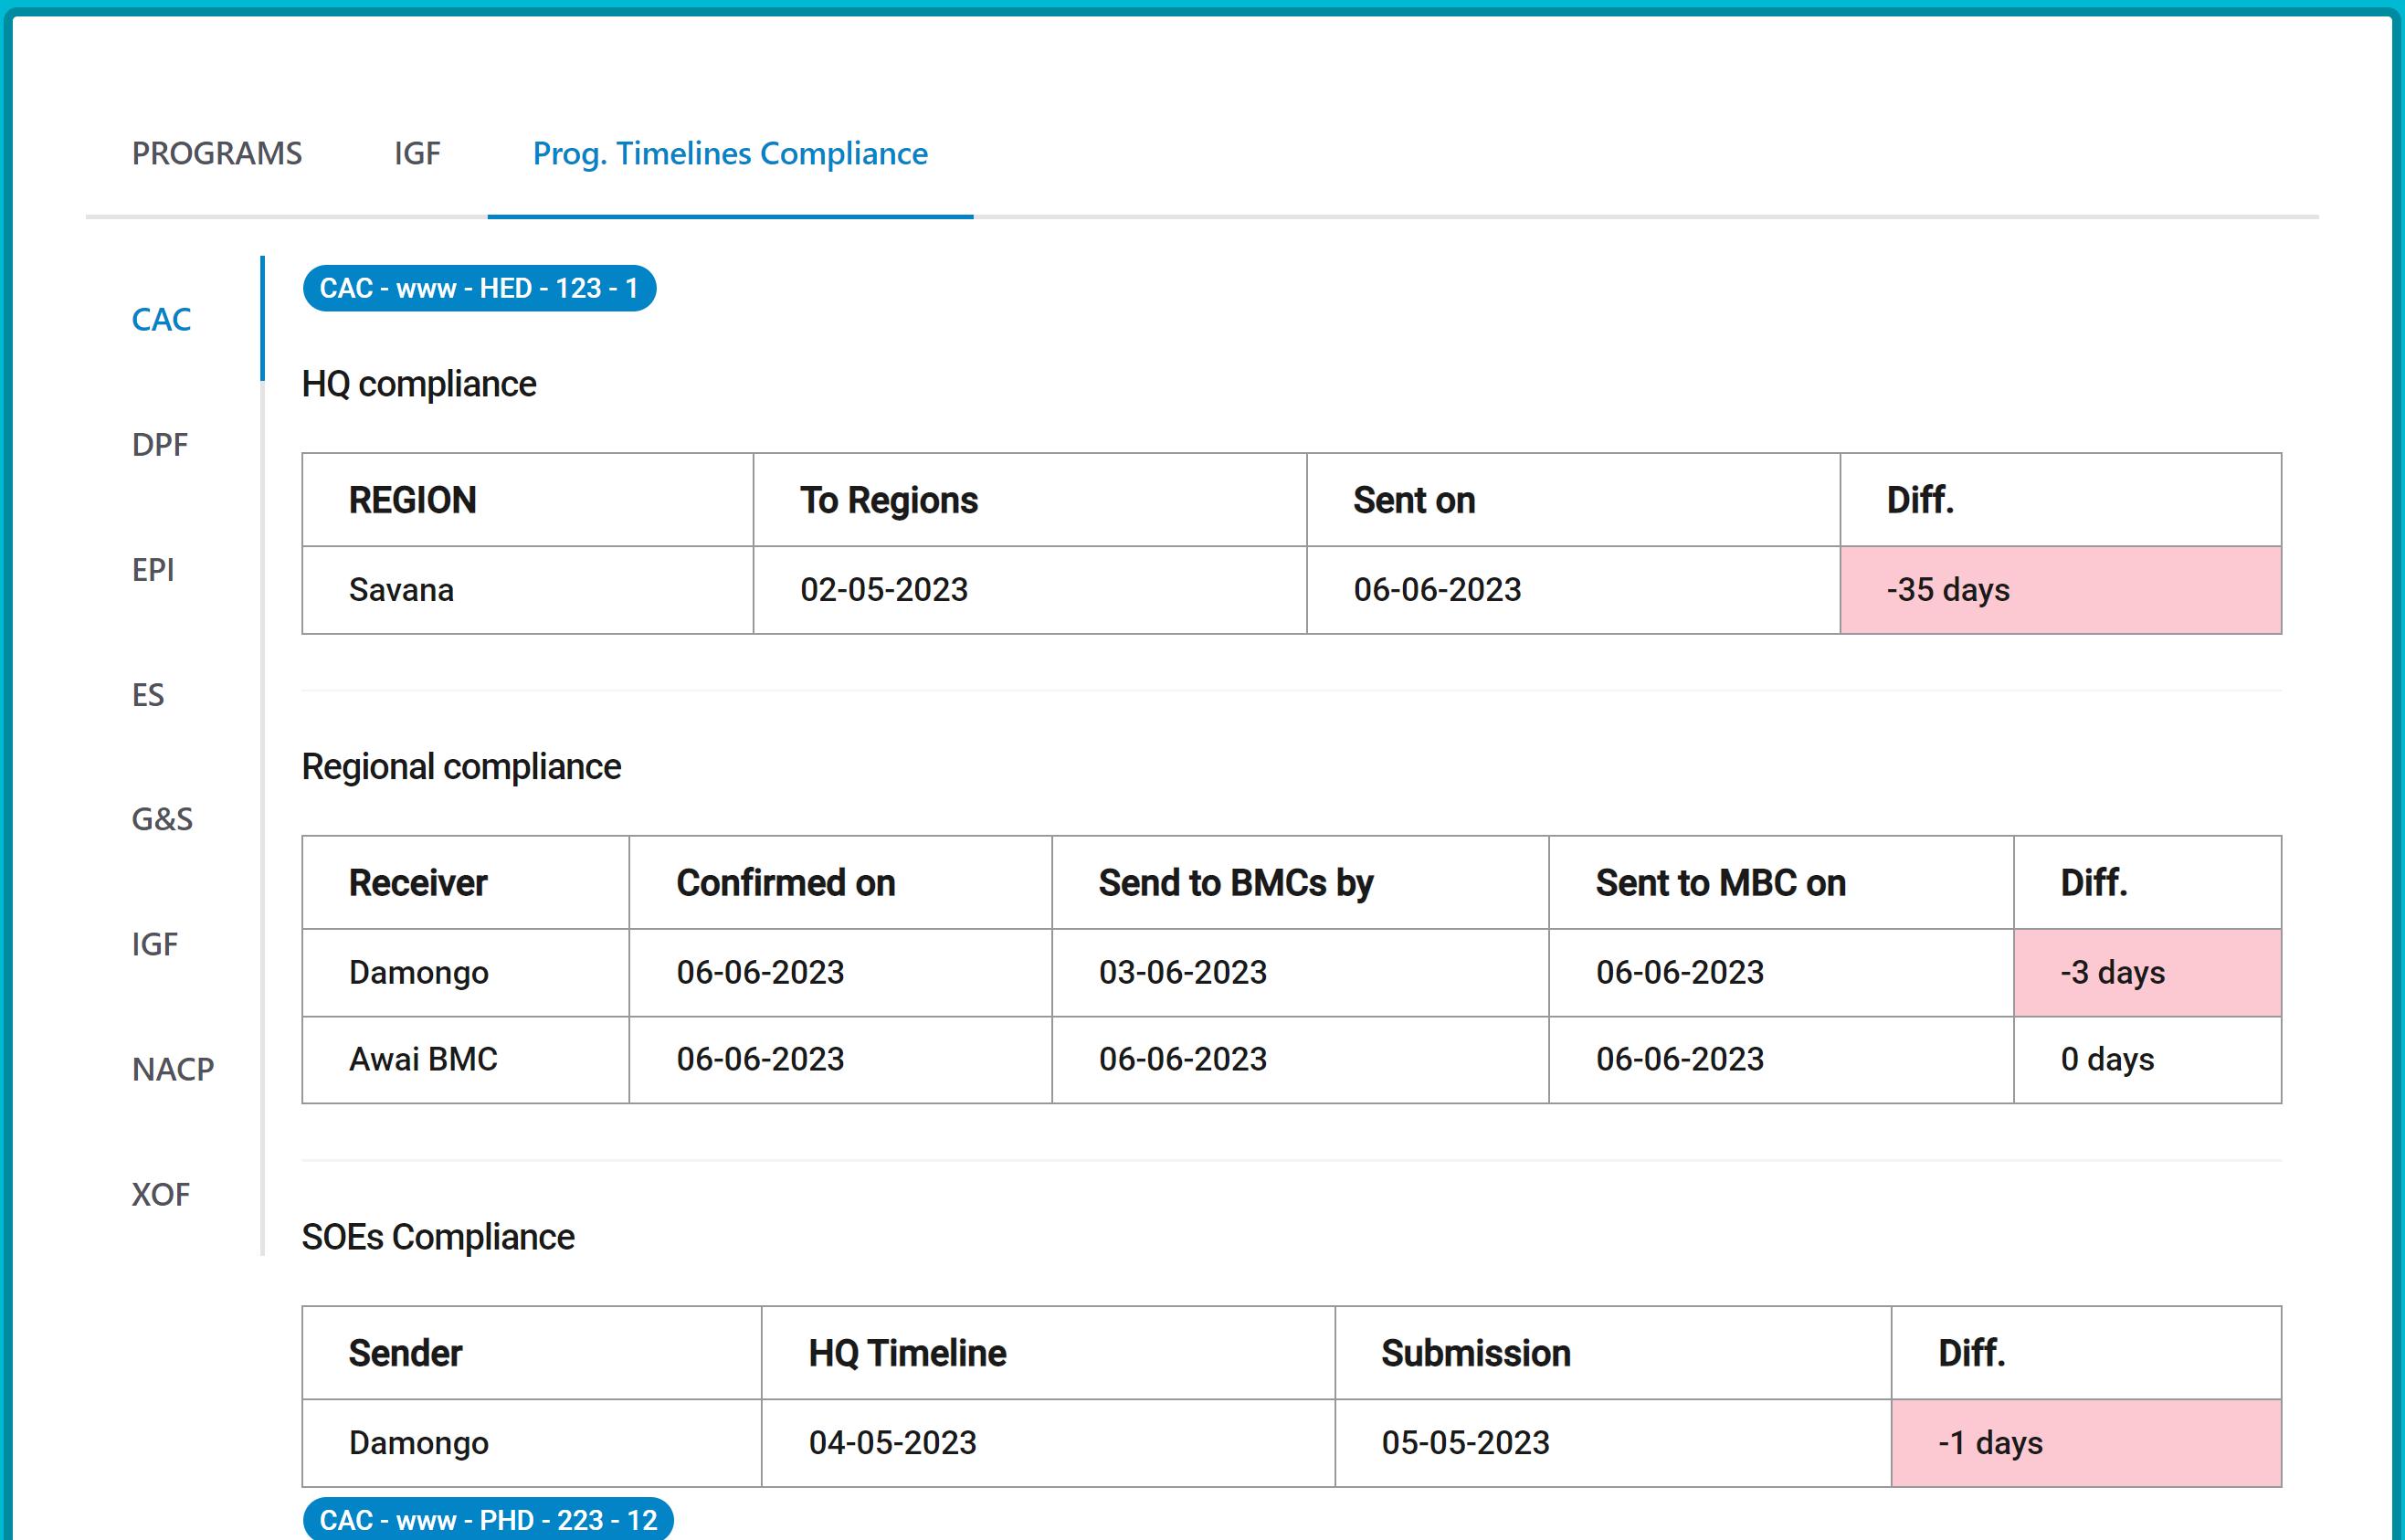
Troubleshooting
If you encounter any issues while using the Financial Dashboard, refer to the following resources:
- Contact the helpdesk at support@ghsfinancialdashboard.com
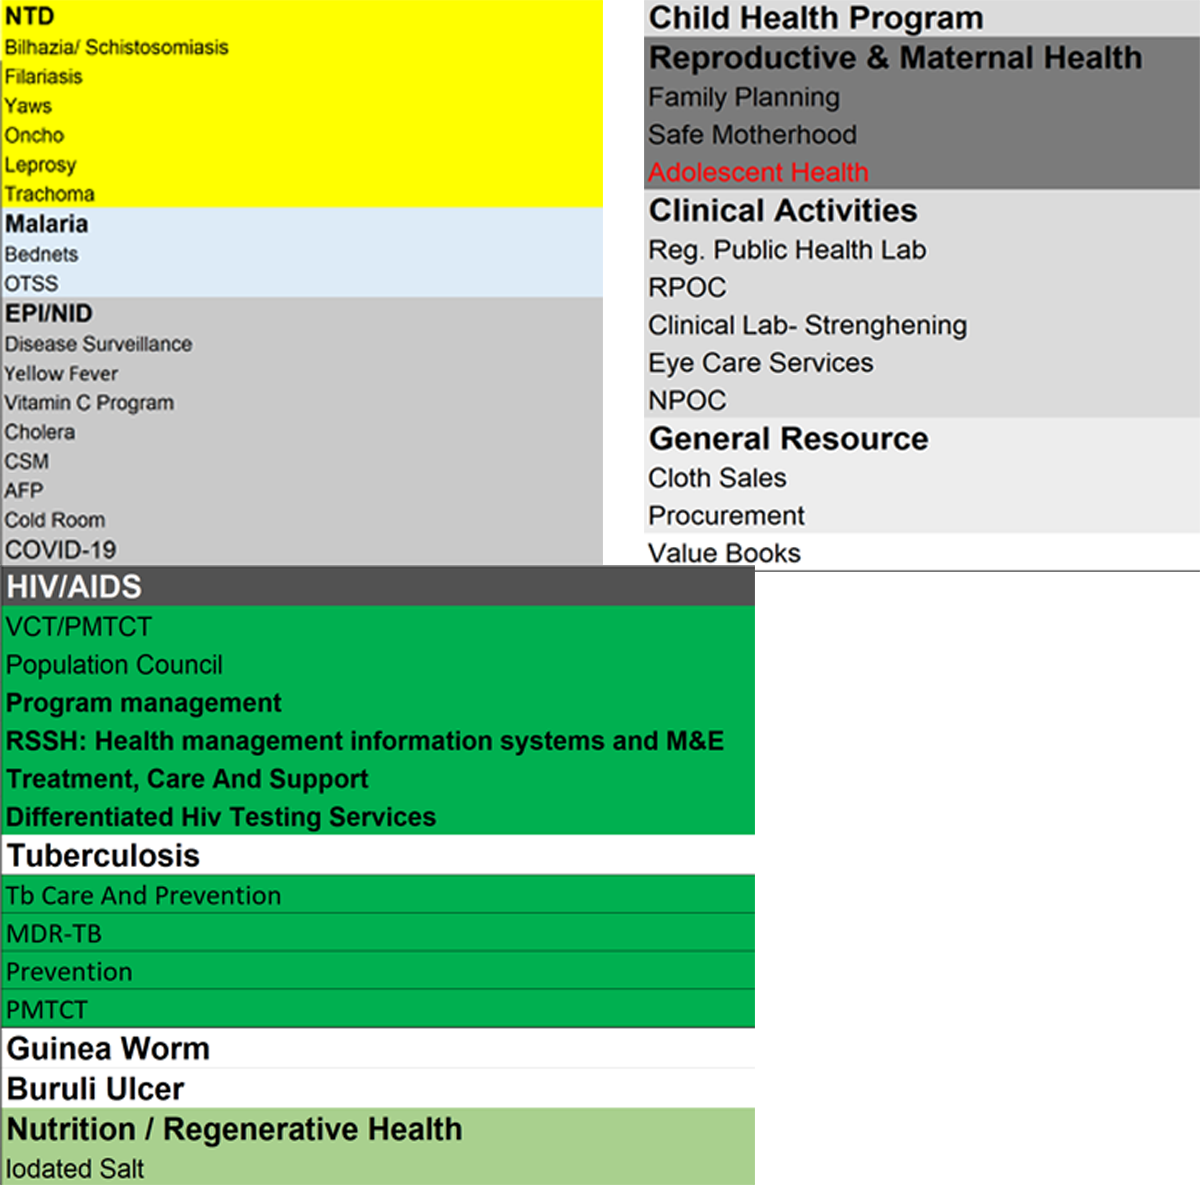
Programs and Sub-programs
Support and Contact Information
If you need additional help or have questions regarding the Financial Dashboard, please reach out to our support team:
- Contact the helpdesk at support@ghsfinancialdashboard.com
- Visit our website at www.ghsfinancialdashboard.com/support for technical resources and documentation.
- We welcome your feedback and feature requests to continually improve the Financial Dashboard.